Posted on Leave a comment

15-Minute BELLY FAT BURNING Wall Pilates Workout

15 MIN FAT BURNING WALL PILATES WORKOUT

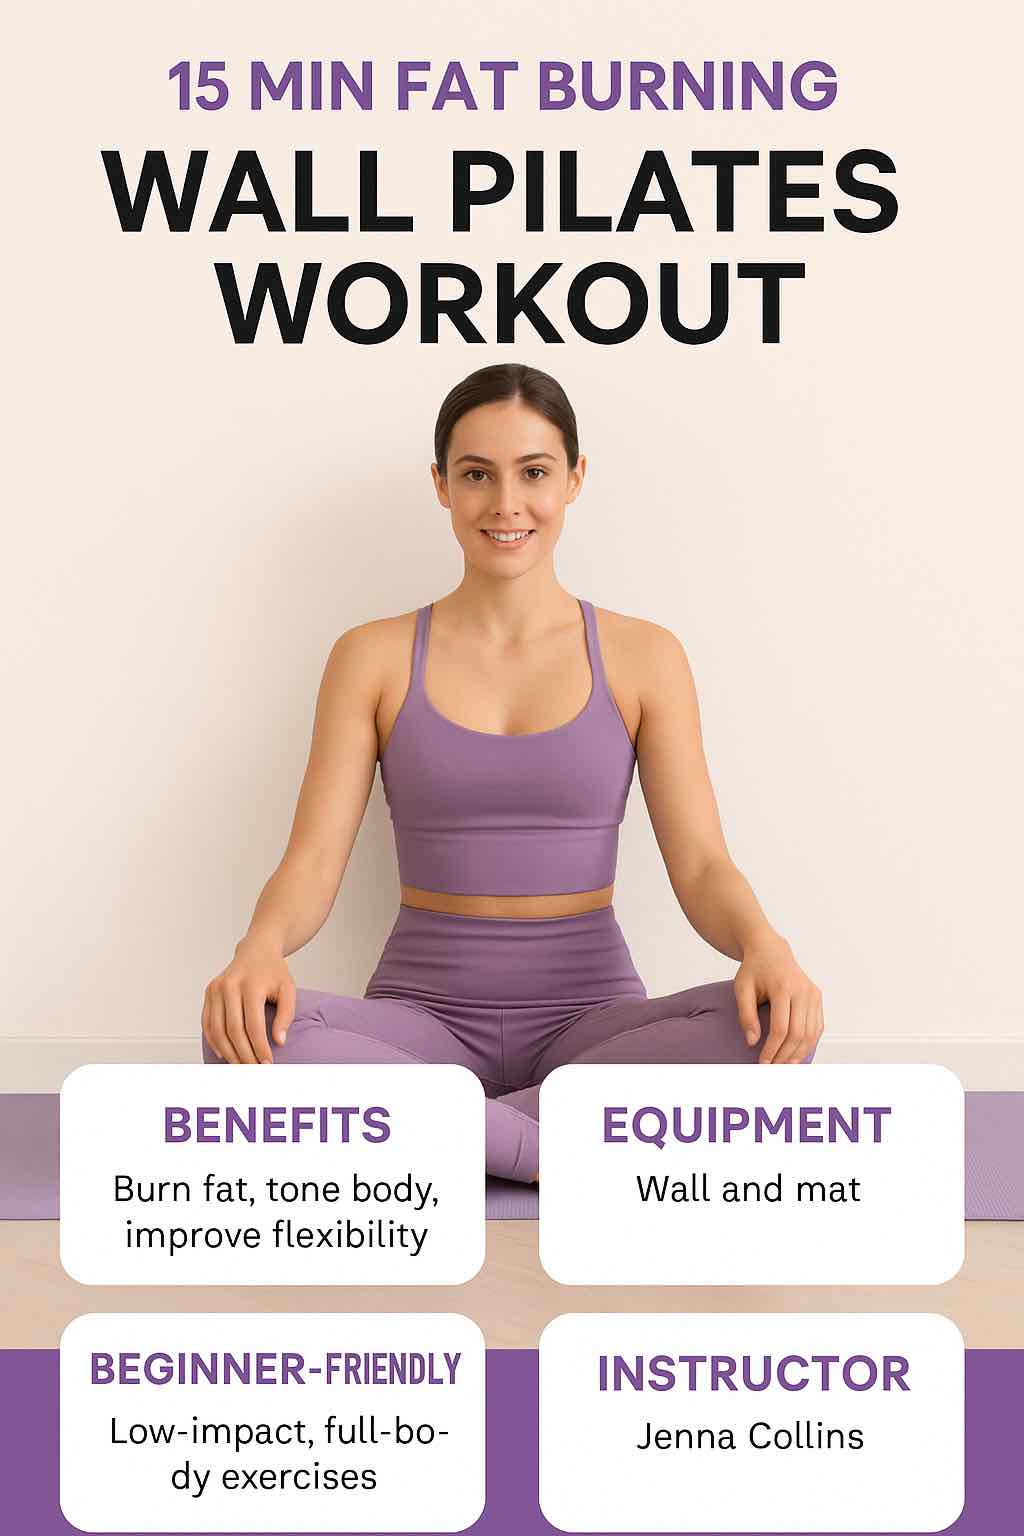
Pilates is a fantastic way to tone, strengthen, and improve flexibility. But did you know that you can utilize a simple wall to enhance your Pilates routine? Jenna Collins from Jenna Collins Fitness introduces a 15-minute beginner-friendly fat-burning wall Pilates workout that’s designed to engage your entire body.

Watch and learn from video here : 15 Min FAT BURNING Wall Pilates Workout (Beginner Friendly)

About the Workout:

This unique Pilates routine uses the wall as a prop to intensify the exercises. It’s a low-impact, full-body workout that aims to burn fat and tone the entire body using just the wall and your body weight. Whether you’re new to Pilates or looking for a fresh way to spice up your routine, this session is perfect for you.

Key Highlights:

  • Duration: A concise 15-minute session that’s packed with effective exercises.
  • Focus: The workout emphasizes full-body engagement, targeting everything from the legs and core to the arms and back.
  • Accessibility: Suitable for all fitness levels, especially beginners. All you need is a wall and a mat.
  • Benefits: Regular practice can help burn fat, improve muscle tone, and enhance overall flexibility.

A Glimpse into the Workout:

The session begins with foundational Pilates exercises adapted for the wall. Expect movements that challenge your balance, strength, and flexibility. Jenna guides you through each exercise, ensuring proper form and alignment.

Conclusion:

Pilates is known for its ability to transform the body, and this 15-minute wall Pilates session by Jenna Collins is no exception. It’s a refreshing take on traditional Pilates, offering a unique challenge that promises results. Commit to the routine, and you’ll be on your way to a toned and fit physique in no time.

Credit: This workout and video content are created by Jenna Collins from Jenna Collins Fitness.


Frequently Asked Questions: Wall Pilates with Jenna Collins

1. What is Wall Pilates, and how is it different from regular Pilates?
Wall Pilates is a variation of traditional Pilates that incorporates a wall for support and resistance. It helps improve alignment, balance, and strength—especially useful for beginners or those recovering from injury.

2. Can a 15-minute workout really burn fat?
Absolutely! While short, high-quality workouts like Jenna Collins’ Wall Pilates session can effectively kickstart fat burning by engaging multiple muscle groups and boosting your heart rate in a low-impact way.

3. Is this workout suitable for complete beginners?
Yes! This session is designed specifically for beginners. Jenna provides clear, easy-to-follow instructions that help you maintain proper form and avoid injury.

4. What equipment do I need for this workout?
All you need is a flat wall, a yoga mat or soft surface for floor work, and a little bit of space. No additional equipment is required!

5. Which muscles does this workout target?
This full-body session targets the core, glutes, thighs, arms, and back. The wall adds resistance and helps deepen muscle engagement in each move.

6. Is this workout safe for people with joint issues?
Yes, it’s a low-impact workout, making it gentler on the joints. However, if you have chronic joint problems or injuries, it’s best to consult a healthcare professional before starting.

7. How often should I do this workout to see results?
For best results, aim to do this workout 3–5 times a week. Consistency is key, and as you build strength, you can increase the duration or combine it with other routines.

8. Can Wall Pilates help with weight loss?
While Pilates alone won’t lead to drastic weight loss, it helps build lean muscle and improve metabolism. Combined with a balanced diet and other forms of cardio, it can contribute to overall fat loss.

9. Can I do this workout if I’m not flexible?
Yes, flexibility is not a prerequisite. In fact, regularly practicing Wall Pilates can improve your flexibility over time by gently stretching and lengthening muscles.

10. Where can I find more of Jenna Collins’ workouts?
You can follow Jenna Collins on her YouTube channel, Jenna Collins Fitness, for more Pilates tutorials, fitness tips, and beginner-friendly routines.

Posted on Leave a comment

Post-Pregnancy Belly: Effective Exercises and Expert Tips

In this comprehensive blog post, we delve into the world of post-pregnancy fitness, focusing on how to address and heal the stubborn “mommy tummy” often associated with diastasis recti. Our insights are derived from Joanna Soh’s YouTube video, “How to Lose Belly Fat After Pregnancy | 5 Effective Exercises | HER Network,” featuring holistic coach and yoga instructor, Nika Karan.

Understanding Mommy Tummy and Diastasis Recti
Post-pregnancy, many women struggle with a protruding belly often caused by diastasis recti, a condition where the abdominal muscles separate due to pregnancy. Nika Karan, a mother of two, shares her expertise in dealing with this common issue.

Key Points from the Video:

  • Diastasis Recti Explained: This condition occurs when the growing baby causes the abdominal muscles to separate, leading to a bulging belly post-pregnancy.
  • Ineffective Traditional Exercises: Crunches and planks can exacerbate diastasis recti and should be avoided initially.
  • Importance of a Proper Check: A simple self-test can determine the presence and extent of abdominal muscle separation.

Effective Exercises for Diastasis Recti:

  1. Inner Thigh Squeeze: Using a ball, squeeze the inner thighs while lying on your back. This engages the core and pelvic floor.
  2. Bridge Pose with Squeeze: Incorporate lifting hips off the ground while squeezing a ball between your knees.
  3. Alternating Heel Drops: Drop one heel at a time from a knees-up position, focusing on core engagement.
  4. Forearm Plank Knee Lifts: In a forearm plank, alternate lifting each knee, ensuring core engagement.
  5. Squats: Perform squats to strengthen the legs and core, aiding in overall core healing.

Additional Tips and Recommendations:

  • Daily Walking: Walking for 30 minutes to an hour daily can significantly aid in muscle strengthening and gap closing.
  • Long-Term Effectiveness: These exercises are beneficial even years after childbirth.
  • Progressive Program: Starting with these basic exercises, one can gradually progress to more advanced routines.

Conclusion:
Dealing with diastasis recti and the resulting “mommy tummy” requires a specialized approach, focusing on strengthening the core and pelvic floor muscles before progressing to more traditional abdominal exercises. Nika Karan’s expert advice and Joanna Soh’s platform provide valuable resources for mothers at any postpartum stage.

For detailed demonstrations of the exercises and further insights, watch Joanna Soh’s video here.

How to Lose Belly Fat After Pregnancy | 5 Effective Exercises

This blog post offers a detailed exploration of post-pregnancy belly healing, with practical exercises and expert advice from Nika Karan and Joanna Soh’s YouTube video. It’s a comprehensive guide for mothers seeking to regain their core strength and confidence post-childbirth.

10 FAQs for Post-Pregnancy Belly Healing:

  1. What is diastasis recti? Diastasis recti is the separation of abdominal muscles commonly experienced by women post-pregnancy.
  2. Can diastasis recti be healed without surgery? Yes, many cases can be improved with specific exercises focused on strengthening the core and pelvic floor.
  3. How do I check for diastasis recti? A simple self-test involves lying on your back, lifting your head, and checking for a gap above and below the belly button.
  4. What exercises are effective for healing diastasis recti? Exercises like inner thigh squeezes, bridge poses, alternating heel drops, forearm plank knee lifts, and squats are beneficial.
  5. How often should I do these exercises? Daily exercise, as part of a consistent routine, is recommended for the best results.
  6. Are these exercises suitable long after childbirth? Yes, these exercises can be effective even years after giving birth.
  7. Can walking aid in healing diastasis recti? Yes, daily walking is a simple and effective way to strengthen core muscles and aid recovery.
  8. What should I avoid during recovery? Avoid strenuous abdominal exercises like traditional crunches and planks initially, as they can worsen the condition.
  9. How long does it take to see improvements? Recovery time varies, but consistent exercise over several weeks to months can show significant improvements.
  10. Is it normal for the skin to remain stretched post-recovery? Yes, it’s common to have stretched skin post-pregnancy, which may not return to its pre-pregnancy state.

Blog Tags for the Post: Post-Pregnancy Fitness, Diastasis Recti Healing, Core Strengthening, Pelvic Floor Exercises, Maternal Wellness, Recovery After Childbirth, Holistic Health, Fitness for Mothers, Abdominal Recovery, Postpartum Exercise

Posted on Leave a comment

7-Day Diastasis Recti Exercise Challenge for Mommy Tummy

In this detailed blog post, we explore effective exercises for combating “mommy tummy” caused by diastasis recti, as presented by Linda Poirier in her Bodies After Babies YouTube video, “Get Rid Of Mommy Tummy with 3 Simple Diastasis Recti Exercises | 7 Day Challenge.”

Understanding Diastasis Recti and Mommy Tummy
Diastasis recti is a condition where the abdominal muscles separate during pregnancy. This separation can lead to a bulging belly postpartum, often referred to as “mommy tummy.” This condition is common but manageable through specific exercises.

Linda Poirier’s Approach
Linda introduces a straightforward, seven-day exercise challenge focused on strengthening the core and reducing diastasis recti. The key is consistency and gradual progress. The challenge includes three simple exercises:

  1. Leg Bolts:
  • Lie on your back with feet flat on the floor.
  • Slowly move your right leg down and back up, then your left leg.
  • Do this five times per side.
  • Focus on engaging your pelvic floor and lower abs.
  1. Toe Taps:
  • Remain on your back, raising legs to a 90-degree angle.
  • Alternate tapping each foot on the floor.
  • If your back arches, don’t tap the floor; instead, go as low as you can without arching.
  1. Bridges:
  • Still lying on your back, feet flat on the floor.
  • Slowly lift into a bridge position, focusing on controlled movements.
  • Lift your butt, lower back, then upper back, and reverse down.
  • Perform a set of ten.

Tips for Success:

  • If you find the exercises challenging, adjust the reps to a comfortable number.
  • Ensure you engage the right muscles and maintain control.
  • Consistency is vital; complete the exercises daily for seven days.

Encouragement and Community:
Linda encourages participants to share their experiences and challenges in the comments of her video. This communal aspect can provide support and motivation.

Conclusion:
The seven-day challenge offers a practical and achievable way for new moms to start addressing their diastasis recti. While the journey to recovery can vary for each individual, these exercises provide a foundation for strengthening and healing.

For detailed demonstrations of these exercises and more insights, watch Linda Poirier’s video here.

Get Rid Of Mommy Tummy with 3 Simple Diastasis Recti Exercises | 7 Day Challenge.

This post provides an in-depth look at simple yet effective exercises to address diastasis recti, inspired by Linda Poirier’s YouTube video. It is designed to help new mothers start their journey towards regaining core strength and reducing the mommy tummy.

10 FAQs and answers for the post:

  1. What is diastasis recti? Diastasis recti is a condition where the abdominal muscles separate, often occurring during pregnancy.
  2. Can diastasis recti be fixed without surgery? Yes, many cases of diastasis recti can be improved with specific exercises.
  3. What are the best exercises for diastasis recti? Leg bolts, toe taps, and bridges are effective exercises for strengthening the core and improving diastasis recti.
  4. How often should I do these exercises? Perform these exercises daily as part of a 7-day challenge for the best results.
  5. What if I find the exercises too challenging? Start with as many reps as comfortable and gradually increase as your strength improves.
  6. How do these exercises help with diastasis recti? They focus on strengthening the core and pelvic floor, which helps in bringing the separated abdominal muscles closer.
  7. Can I do these exercises postpartum? Yes, but it’s recommended to consult with your doctor before starting any postpartum exercise regimen.
  8. How long does it take to see results? Results vary, but many see improvements within the 7-day challenge period.
  9. Are these exercises safe for everyone? While generally safe, if you experience pain or discomfort, it’s best to consult a healthcare professional.
  10. Can I continue these exercises after the 7-day challenge? Absolutely, continuing these exercises can lead to further improvements.

Blog Tags for the Post: Diastasis Recti, Postpartum Recovery, Core Strengthening, Mommy Tummy, Fitness Challenge, Abdominal Exercises, Postnatal Fitness, Pelvic Floor Strengthening, Home Workouts, Women’s Health

Posted on Leave a comment

Healing Power of Hanging – A Guide to Full-Body Mobility

In this insightful blog post, we delve into the therapeutic benefits of hanging, as discussed in the Strength Side’s YouTube video “How Hanging Heals the Body.” The video, hosted by Josh and Trevor, explores how this simple activity can significantly impact our body’s mobility, spine health, shoulder mechanics, and overall posture.

Understanding the Benefits of Hanging
Hanging, a fundamental movement, plays a crucial role in reshaping posture, healing shoulders, and even potentially increasing height. Dr. John M. Kirsch highlights that 90% of his patients recommended for shoulder surgery avoided it through regular hanging exercises. The benefits include:

  • Decompressing the spine, creating space in compressed areas.
  • Opening up muscles around the shoulder, improving mobility.
  • Increasing grip strength, which is linked to longevity.
  • Strengthening shoulders and core, enhancing overall strength and athleticism.

Key Points for Effective Hanging

  • Keep shoulders relaxed and up towards the ears.
  • Maintain slight tension in the core with ribs pulled down.
  • Ensure steady breathing and steady grip.
  • Progress slowly to avoid injury and ensure effectiveness.

Building Up to One-Arm Hanging
The video emphasizes the evolution of our shoulders for brachiating (swinging from branch to branch), making hanging and climbing natural movements for us. Progressing from two-arm to one-arm hanging is crucial for replicating these ancestral movements. The one-arm hang not only challenges the body more but also replicates the dynamic movement of brachiating.

Personal Journey and Program Suggestions
Trevor shares his personal journey of overcoming shoulder dislocations through hanging and non-traditional rehab methods. For those looking to start their hanging journey, the video suggests a basic one-arm hanging program, which can be adjusted according to individual levels.

Conclusion:
Hanging is a simple yet powerful tool for improving physical health, particularly for those with a modern lifestyle that involves a lot of sitting or physical strain. It’s not just a workout routine; it’s a return to our natural movement patterns that can lead to significant health benefits.

To watch the full video and get more detailed insights and exercises, check out Strength Side’s video here.

How Hanging Heals the Body

This post provides a comprehensive overview of the benefits of hanging, drawing from the Strength Side’s video, and offers practical advice on incorporating this exercise into your routine.

FAQs

  1. What are the benefits of hanging exercises? Hanging can decompress the spine, open up shoulder muscles, increase grip strength, and improve overall strength and athleticism.
  2. How does hanging reshape posture? By using gravity, hanging pulls the hips away from the shoulders, creating space and alleviating compression caused by modern lifestyles.
  3. Can hanging heal shoulder issues? Yes, many individuals have found relief from shoulder pain and avoided surgery through consistent hanging exercises.
  4. Is hanging beneficial for spine health? Absolutely. Hanging helps in decompressing the spine, which is beneficial for overall spine health.
  5. How long should I hang for maximum benefit? Start with what’s comfortable, gradually building up to 60 seconds or more.
  6. Can beginners do hanging exercises? Yes, beginners can start with assisted hangs, gradually progressing as strength increases.
  7. What’s the difference between passive and active hanging? Passive hanging involves relaxed shoulders, letting gravity do the work, while active hanging involves pulling the shoulders down actively.
  8. Should I only hang from two arms? Starting with two arms is recommended, but progressing to one-arm hangs can offer greater benefits and mimic natural movements.
  9. How often should I practice hanging exercises? Daily hanging for a few minutes can be beneficial, but ensure not to overdo it and maintain a light, comfortable routine.
  10. What if I experience pain during hanging? Discontinue if you feel pain and consult a medical professional. Hanging should feel like a stretch, not painful.

Blog Tags for the Post: Hanging Exercises, Posture Improvement, Shoulder Health, Spine Decompression, Grip Strength, Fitness Techniques, Mobility Enhancement, Rehabilitation, Natural Movement, Core Strengthening

Posted on Leave a comment

Top 4 Exercises to Heal Diastasis Recti Naturally

In this blog post, we’re diving into a crucial topic for many postpartum women and others struggling with abdominal separation – diastasis recti. Drawing insights from Ariana Brielle’s YouTube video, “Top Exercises to Heal Diastasis Recti NATURALLY,” we explore effective and beginner-friendly exercises to tackle this issue naturally.

Understanding Diastasis Recti Diastasis recti involves the separation of the rectus abdominis muscles, often due to pregnancy or significant abdominal weight. This condition can lead to a protruding belly and weakened core muscles.

Ariana’s Journey Ariana shares her personal journey of healing diastasis recti and an umbilical hernia naturally, without surgery. She emphasizes the importance of deep core healing exercises combined with weight lifting and cardio to strengthen abdominal muscles and lose weight.

Top 5 Basic Exercises for Diastasis Recti:

  1. Toe Taps: Perform for 30 seconds, ensuring your legs remain at a 90-degree angle.
  2. Flat Foot Taps: Similar to toe taps, but using the entire foot.
  3. Heel Slides: Extend your leg while sliding your heel on the floor.
  4. Leg Extensions: Extend one leg out and then bring it back.
  5. Leg Drops: Drop one extended leg slowly and bring it back up.

These exercises should be done in 3 rounds, for about 30 minutes daily, over 30-60 days. Ariana stresses the importance of keeping the core engaged throughout these workouts.

Key Points to Remember:

  • Consistency and patience are vital.
  • The exercises might seem simple but can be quite intense.
  • Focus on deep breathing and maintaining a tight core.
  • Avoid exercises that exert excessive pressure on the abdomen.

Ariana’s Tips for Success:

  • Start with a fitness level that suits you, advancing as you gain strength.
  • Take before and after pictures to track your progress.
  • It’s normal to take breaks and feel out of breath, especially when starting.

Conclusion: Healing diastasis recti naturally is a journey of patience and consistency. Ariana Brielle’s video provides a practical and achievable exercise routine that anyone, especially postpartum moms, can follow. With dedication, these exercises can significantly improve the strength and appearance of your core.

For a more in-depth look and demonstration of these exercises, check out Ariana Brielle’s video here.

Top Exercises to Heal Diastasis Recti NATURALLY

The blog post, inspired by Ariana Brielle’s video, offers a detailed and comprehensive guide on natural ways to heal diastasis recti, suitable for individuals at various fitness levels.

FAQs

  1. What is diastasis recti? Diastasis recti is the separation of the rectus abdominis muscles, commonly seen in postpartum women or individuals with significant abdominal weight.
  2. Can diastasis recti be healed naturally? Yes, with consistent and targeted exercises, many people have successfully healed diastasis recti naturally.
  3. What are the top exercises for healing diastasis recti? Toe taps, flat foot taps, heel slides, leg extensions, and leg drops are highly effective.
  4. How often should these exercises be performed? Aim for 3 rounds of these exercises daily, for about 30 minutes, over a period of 30-60 days.
  5. Can I perform these exercises if I had a C-section? Yes, these exercises are suitable for C-section mothers as well, but always consult with your doctor before starting any exercise program.
  6. Will these exercises also help in losing weight? While primarily aimed at strengthening the core, when combined with cardio and a healthy diet, they can aid in weight loss.
  7. Is it normal to feel intense burning during these exercises? Yes, a burning sensation is normal and indicates that the muscles are being worked and strengthened.
  8. How long does it take to see results? Results vary, but consistent practice over 30-60 days can show significant improvements.
  9. Are there any exercises to avoid with diastasis recti? Avoid exercises that put excessive strain on the abdomen, like traditional sit-ups and crunches, especially in the early stages of recovery.
  10. Should I wear a belly band or support garment? It depends on individual preference and comfort. Some find it helpful for support, but it’s not essential for healing diastasis recti.

Blog Tags for the Post: Diastasis Recti Recovery, Postpartum Fitness, Core Strengthening, Natural Healing, Abdominal Exercises, Postpartum Weight Loss, Beginner Workouts, Safe Postpartum Exercises, Core Healing, Women’s Fitness