Crispy air fryer chicken wings don’t need a vat of oil or a dusting of baking powder. This method relies on a simple dry brine, generous airflow, and a two-stage cook that renders fat first and crisps the skin second. The result: shatteringly crisp wings with juicy meat—and a base technique that welcomes multiple finishes without sacrificing crunch. For serving, a tangy blue cheese dip for wings is the classic counterpoint that cools the heat and amplifies the texture (blue cheese dip for wings).
Before we dive in, a quick safety note: wings are ready when the thickest part reaches 165°F / 73.9°C. Use an instant-read thermometer and let them rest briefly before saucing (source: USDA safe minimum internal temperatures).
Ingredients For Air Fryer Chicken Wings (Base)
2 lb (900 g) chicken wings, whole or separated into flats and drumettes
1¼ tsp fine kosher salt (or ¾ tsp table salt)
1 tsp garlic powder
1 tsp paprika (sweet or smoked)
½ tsp black pepper
1 tsp onion powder (optional)
1–1½ tbsp neutral oil (avocado, canola, or light olive)
Keep the base seasoning restrained; the fireworks happen after crisping when you finish with a sauce or dry rub so the skin stays glassy.
Method: Two-Stage Air Fryer Chicken Wings (Crisp Without Baking Powder)
Dry Brine (Optional But Powerful). Pat wings very dry, toss with only the salt, and refrigerate uncovered for 8–24 hours. This lightly dehydrates the skin and seasons the meat end-to-end.
Season And Oil. Blot any surface moisture, then add oil, garlic, paprika, pepper, and onion powder if you like.
Preheat. Warm the air fryer to 190°C / 375°F for 3–5 minutes.
Stage 1 — Render. Cook 190°C / 375°F for 16–18 minutes, flipping halfway; keep a single layer with air gaps so steam never softens the skin.
Stage 2 — Finish. Increase to 205–210°C / 400–410°F and cook 6–10 minutes more, flipping once, until deep golden and blistered.
Safety Check And Rest. Confirm 165°F / 73.9°C, then rest 2 minutes before saucing (see USDA poultry temperature).
Why This “No Baking Powder” Approach Still Crisps
Some recipes raise skin pH with baking powder; if readers want the science, this explainer clarifies how alkalinity affects browning (why baking powder crisps poultry skin). Here, a truly dry surface plus high, moving heat renders subcutaneous fat and blisters the skin—clean flavor, stellar texture, zero metallic notes.
Doneness & Texture Guide
Golden but not fully crisp: add 3–5 mins at 205°C/400°F.
Uneven browning: rotate basket or swap tray positions in tray-style models.
Skin blistering but meat drying: reduce finishing temp to 200°C/392°F and extend 2–4 mins.
Time & Temperature Chart (Reference)
Wings Type
Starting State
Stage 1
Stage 2
Total Time
Flats & Drumettes (standard, 2–2.5 lb)
Raw, patted dry
190°C/375°F × 16–18 min (flip at 8–9)
205–210°C/400–410°F × 6–10 min (flip once)
22–28 min
Whole wings (tips on)
Raw, patted dry
190°C/375°F × 18–20 min
205–210°C/400–410°F × 8–12 min
26–32 min
Wingettes (small)
Raw, patted dry
190°C/375°F × 14–16 min
205–210°C/400–410°F × 5–8 min
19–24 min
Frozen method: Times differ and require an initial thaw-render stage.
Flavor Finishes: Five Ways To Sauce Or Season Air Fryer Chicken Wings
Start with the base method above; then finish after crisping so the coating clings without softening the crust.
Buffalo (Hot)
Toss wings with ¼ cup hot sauce + 2 tbsp melted butter + ½ tsp garlic powder. Serve immediately with crisp celery and a cooling dip. If you want a parallel take to reference, this tested guide to air-fryer Buffalo wings offers a useful comparison while you keep the core technique intact (air-fryer Buffalo wings). For pairing, put a creamy blue cheese dip for wings front and center (blue cheese dip for wings).
Lemon Pepper
Stir 1 tbsp melted butter with 1–1½ tsp lemon pepper seasoning, then add a squeeze of fresh lemon; a little zest adds bright lift without extra salt. Toss, plate, and sprinkle with chopped parsley.
Garlic Parmesan
Bloom 2 minced garlic cloves in 1 tbsp butter + 1 tbsp olive oil for 30–45 seconds over low heat. Toss the wings in that garlicky fat, then finish with 2–3 tbsp finely grated Parmesan and parsley. Finely grated cheese clings better than coarse shreds, preserving the crackly shell.
Honey BBQ
Warm ⅓ cup BBQ sauce with 1–1½ tbsp honey. If the sauce is thick, whisk in 1–2 teaspoons of water so it coats evenly; for a tackier set, return the sauced wings to the basket for 1 minute.
All-Purpose Dry Rub
Mix 1 tsp paprika, ½ tsp garlic powder, ½ tsp onion powder, ½ tsp brown sugar, ¼ tsp cayenne, ½ tsp kosher salt, ¼ tsp black pepper. Dust immediately after cooking so the residual surface fat grabs the spices.
Pro Tips That Keep Air Fryer Chicken Wings Ultra-Crispy
Don’t Crowd. Airflow is everything; cook in batches if necessary. For quick fixes to pale skin, smoke, or uneven browning, read this practical guide to common air fryer mistakes (common air fryer mistakes).
Flip And Rotate. Basket models often brown harder on the bottom; tray-style machines benefit from a mid-cook tray swap.
Mind Your Model. Capacity, wattage, and basket shape influence timing.
Sauce Late. Toss after the high-heat finish to protect the glassy crust. If someone prefers an oven method, here’s a respected oven-fried wings approach for context (oven-fried wings).
What “Air Fryer” Really Means (And Why Airflow Matters For Wings)
An air fryer is essentially a compact convection oven: a heating element and a powerful fan drive hot air across food in a tight chamber. That setup excels at blasting moisture from skin while rendering fat—a perfect match for air fryer chicken wings. For readers new to the appliance, this primer explains basket versus oven-style designs in plain English (what is an air fryer).
Because airflow is central, basket shape and chamber width affect results. Wide, shallow baskets often brown more evenly and handle wings without stacking, which means fewer batches and better texture. Narrow, tall baskets can work well too, but they demand stricter spacing and more flipping for even color.
Gear Notes: Choosing The Best Air Fryer For Wings (Capacity, Basket Shape, Airflow)
When readers are shopping, steer them toward capacity and shape before bells and whistles. A broad, shallow basket encourages airflow; sufficient wattage helps the unit recover heat after you add cold wings. For current, test-driven picks, here’s an expert shortlist of the best air fryers. And for airflow-focused designs that cook faster and more evenly, this in-depth review showcases why a wide, shallow basket can be a game-changer (Typhur Dome 2 review).
Multi-rack countertop ovens can get close to basket-style results—just rotate trays halfway and keep wings in a single layer on each rack to maintain airflow.
Serve And Pair
Classic Buffalo begs for contrast—so put that blue cheese dip for wings front and center and add crunchy celery and carrot sticks for texture (blue cheese dip for wings). If you’re making Lemon Pepper or Garlic Parmesan, a squeeze of lemon at the table adds a bright top note without dampening the crust. Keep sauces warm—not scorching—so they don’t tighten the skin when they hit it. For a simple appetizer board, pair the wings with pickled peppers, crisp radishes, and a crunchy salad.
Troubleshooting In Real Kitchens
If a batch smokes, fat likely pooled under the basket or residue baked on from a previous cook; add a small splash of water to the drawer and clean between rounds. Then if the wings look pale, extend the finishing phase or rotate the basket/tray to expose different sides to the hottest zones. And if some pieces crisp while others lag, you may have mixed sizes—separate wingettes and drumettes so smaller pieces don’t overcook while larger ones catch up. For a quick refresher on pitfalls and fixes, this guide to common air fryer mistakes is a solid reference (common air fryer mistakes).
From Base Technique To Brand-Specific Tweaks
Different machines run hot or gentle, and presets can mislead. We encourage readers to watch color and texture—not only the timer—on the first run. Owners of compact units like the Philips HD9252/90 will benefit from stricter spacing; larger baskets such as the Inalsa 5.5L or Sous Chef 6.5L can spread wings wider and finish faster at the same settings.
Scaling Air Fryer Chicken Wings For A Crowd
Cooking for a party? Rather than cramming more into one batch, repeat the process in batches. Hold finished wings on a rack over a sheet pan in a low oven (95–115°C / 200–240°F) to keep them crisp while you cook the next round; then toss everything with warm sauce right before serving. Larger machines with wide baskets naturally reduce the number of rounds, which makes entertaining easier and keeps the wings crisp.
Also, spice blends with sugar can darken early during the finishing phase. If you’re running sweet rubs, drop the finishing temperature by about 5–10°C (10–15°F) and extend the time slightly to avoid scorching. Conversely, salt-forward rubs thrive at the higher finish: the surface dries faster, fat renders more completely, and the bite stays delicate.
Storing And Reheating Leftover Air Fryer Chicken Wings
Wings reheat beautifully if you protect the surface. Refrigerate in a shallow layer, leave uncovered for 30 minutes to off-gas steam, then cover. Reheat at 180°C / 356°F for 5–7 minutes, shaking once; if the skin needs a boost, go 1–2 minutes at 200°C / 392°F to refresh the crust. Avoid microwaving unless you immediately re-crisp in the air fryer.
Quick Recap for Air Fryer Chicken Wings Recipe
Dry brine if you can; otherwise, pat very dry.
Cook in two stages: render at 190°C / 375°F, then finish at 205–210°C / 400–410°F.
Keep airflow sacred: space pieces, flip, and rotate as needed. For fast fixes, see common air fryer mistakes (common air fryer mistakes).
FAQs
1) How long do air fryer chicken wings take to cook?
Generally, 22–28 minutes total. Start at 190°C/375°F for 16–18 minutes (flip once), then finish at 205–210°C/400–410°F for 6–10 minutes until the skin is deeply golden and crackly.
2) What internal temperature should air fryer chicken wings reach?
Aim for 165°F/73.9°C in the thickest part of the meat (not touching bone). Let the wings rest a couple of minutes before saucing so the crust stays crisp.
3) Can I make air fryer chicken wings from frozen?
Yes. Cook longer and in stages: begin at a lower temp to thaw/render, separate any stuck pieces, then increase the heat to crisp. Expect roughly 28–35 minutes depending on size and model.
4) Do I need baking powder for crispy air fryer chicken wings?
No. A dry brine, thorough surface drying, proper spacing, and a hot finish deliver shatteringly crisp skin without baking powder or a metallic aftertaste.
5) How much oil should I use on air fryer chicken wings?
Use about 1–1½ tablespoons per 2 lb (900 g)—enough to help browning without greasiness. Too much oil can inhibit crisping and cause smoke.
6) Should I preheat the air fryer for wings?
Yes. A 3–5 minute preheat helps jump-start browning and keeps timing consistent across batches.
7) Do I flip air fryer chicken wings while cooking?
Absolutely. Flip halfway through Stage 1, and once during the hot finish. Also rotate trays in oven-style units to even out hot spots.
8) Can I stack wings to save time?
Avoid stacking during the main cook. Overlap traps steam and softens skin. If you must, separate pieces after a few minutes and finish in a single layer.
9) What’s the best seasoning base for air fryer chicken wings?
Keep it simple: salt, garlic powder, paprika, pepper. Then, after crisping, finish with Buffalo, Lemon Pepper, Garlic Parmesan, Honey BBQ, or a Dry Rub so the crust stays crunchy.
10) How do I stop smoke when cooking wings?
Clean the drawer/basket between batches and avoid excess oil. If needed, add a small splash of water beneath the basket to catch drips and minimize smoking.
11) Why aren’t my air fryer chicken wings crispy?
Common culprits: crowded basket, damp skin, no preheat, or skipping the high-heat finish. Spread wings out, pat dry thoroughly, and finish hotter for blistered skin.
12) Whole wings or flats & drumettes—which is better?
Either works. Separated pieces (flats/drumettes) generally cook more evenly and crisp faster; whole wings may need a few extra minutes.
13) Can I marinate wings before air frying?
Yes, though pat very dry before cooking. For sticky marinades, cook first, then toss in sauce to prevent soft skin and burnt sugars.
14) Is parchment or foil okay under air fryer chicken wings?
Only if your manufacturer allows it and never during preheat. Perforated liners are better for airflow; solid liners can block circulation and reduce crispness.
15) What’s the best way to reheat leftover wings?
Air fry at 180°C/356°F for 5–7 minutes until hot, then 200°C/392°F for 1–2 minutes to re-crisp. Avoid microwaving unless you finish in the air fryer.
16) How many wings can I cook at once?
As many as fit in a single layer with gaps. For parties, cook in batches and hold finished wings on a rack in a low oven so they stay crisp.
17) Do different air fryers change timing?
Yes. Basket size, wattage, and chamber shape matter. Start with the suggested ranges, then watch color and texture and adjust a minute or two as needed.
18) Can I use flour or cornstarch on air fryer chicken wings?
You can, sparingly. However, the dry-brine + hot finish method already crisps beautifully; extra starch may dull the clean, glassy texture.
19) When should I sauce air fryer chicken wings?
After they’re fully crisp. Toss quickly and serve right away so the skin stays snappy.
20) What side dishes pair best with air fryer chicken wings?
Celery sticks, carrot sticks, and a creamy dip are classics. Additionally, light salads, pickled vegetables, or coleslaw cut through richness without softening the crust.
Strawberry season arrives and, just like that, the mood lightens. Baskets of berries perfume the kitchen, mint waits in a glass of water, and the first squeeze of lime wakes everything up. Today, we’re building the strawberry mojito mocktail (Zero-Proof & Virgin) you’ll reach for all summer long—actually, ten of them—so you can pour something bright and refreshing no matter who shows up or what you have on hand. Along the way, we’ll keep things friendly, practical, and a little playful.
First, a few gentle techniques. Go easy when you muddle; you want perfume, not pulp. In fact, many bartenders simply bruise the mint and skip the heavy mash entirely. For a Cuban-leaning approach, the classic rule is simple: bruise, don’t shred—that way your drink stays crisp and never drifts into grassy bitterness. And because bubbles make the glass sing, keep your fizz as cold as possible. Curious which fizz to stock? Here’s a clear explainer on seltzer vs. club soda vs. sparkling water; the short version is that club soda carries a whisper of minerals while seltzer is clean and neutral.
Now, let’s pour.
The Classic Strawberry Mojito Mocktail (single-serve)
Nothing complicated, nothing fussy—just juicy strawberries, cool mint, and lively bubbles. This is the dependable blueprint that all the variations build on.
You’ll need (1 glass):
80 g strawberries, hulled and quartered
10 mint leaves
20 ml freshly squeezed lime juice
15 ml simple syrup (or to taste)
120–150 ml chilled club soda or seltzer
Ice (a mix of cubes and a small handful of crushed)
The dependable blueprint—bruise, don’t shred the mint to avoid bitterness; start with 15 ml syrup and adjust to taste.
Method: In a tall glass, gently muddle strawberries, mint, and syrup until juicy but not shredded. Add lime, fill the glass three-quarters with ice, top with fizz, then stir once or twice. Garnish with a mint crown and a strawberry slice.
Prefer a drier sip? Nudge the syrup down to 10 ml and add a tiny pinch of sea salt to brighten everything without more sweetness. Want a fruitier roadmap to try later? Swing by our pineapple mojito mocktails—sunshine in a glass.
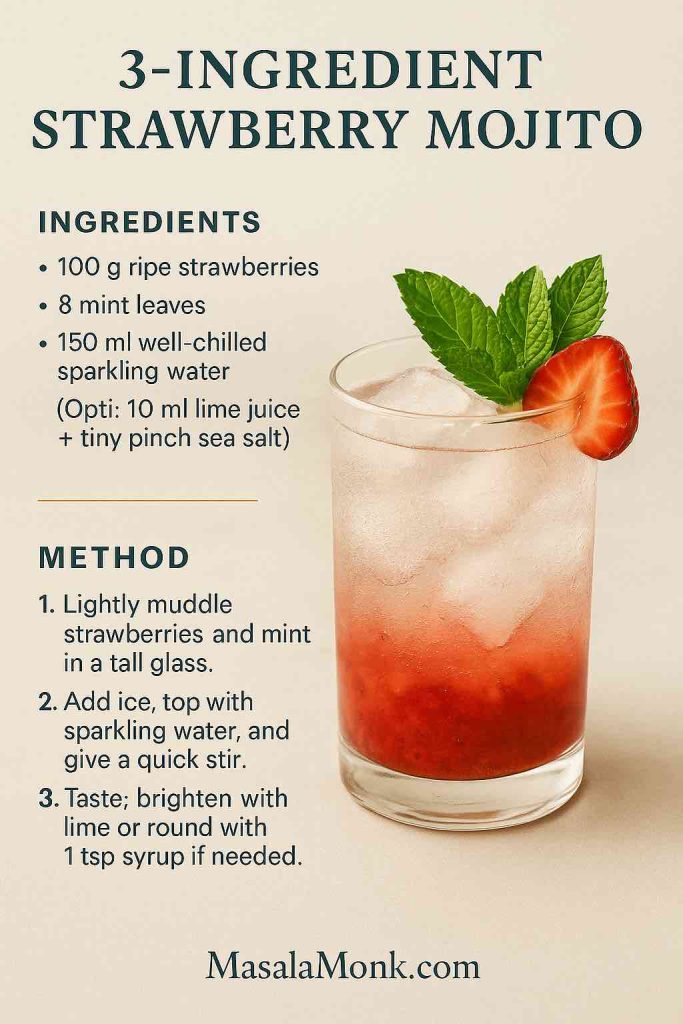
The 3-Ingredient Strawberry Virgin Mojito (no added sugar)
Some days call for simplicity. Here, ripe berries sweeten the party on their own, so you can skip syrup entirely.
You’ll need (1 glass):
100 g ripe strawberries
8 mint leaves
150 ml well-chilled sparkling water
Optional: 10 ml lime juice + a tiny pinch of sea salt
Let ripe strawberries do the sweetening; finish with 10 ml lime and a pinch of salt if the fruit needs a lift.
Method: Lightly muddle berries and mint in a tall glass. Add ice, top with sparkling water, and give a quick stir. Taste. If the berries are super sweet, a little lime brightens the edges; if they’re shy, a teaspoon of syrup rounds things out.
Have apples on the counter? When the moment strikes, a quick apple mojito mocktail is just as bright and picnic-ready.
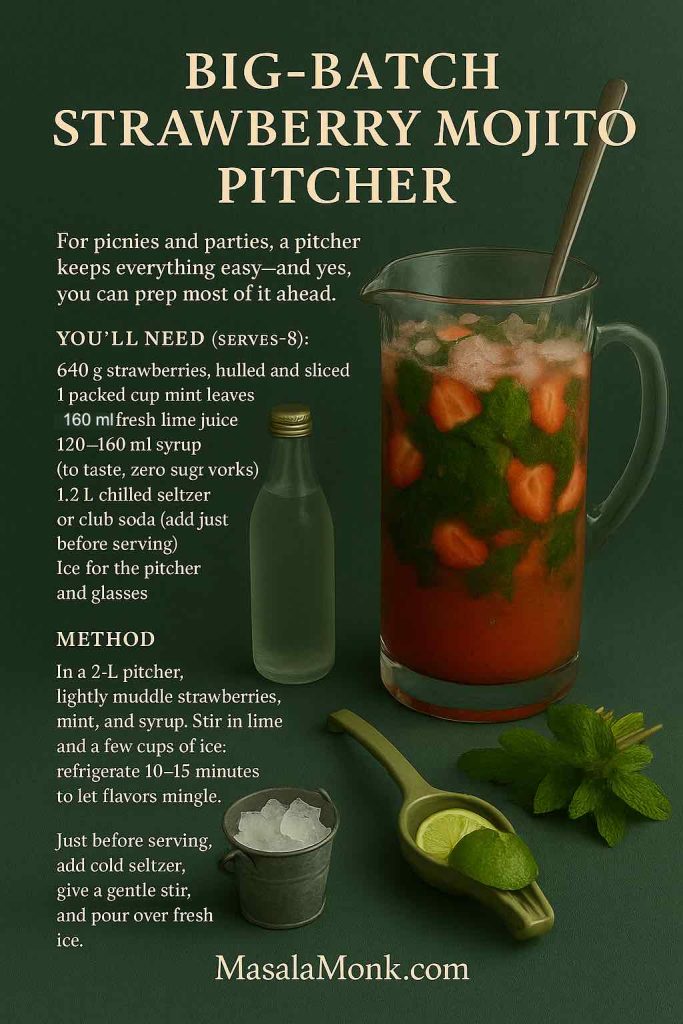
For picnics and parties, a pitcher keeps everything easy—and yes, you can prep most of it ahead.
You’ll need (serves ~8):
640 g strawberries, hulled and sliced
1 packed cup mint leaves (leaves only)
160 ml fresh lime juice
120–160 ml syrup (to taste; zero-sugar works)
1.2 L chilled seltzer or club soda (add just before serving)
Ice for the pitcher and glasses
Scale for crowds: lightly muddle berries, mint & syrup, stir in lime, chill 10–15 min, then add fizz just before pouring. Keep the pitcher on ice and set out mint, strawberry slices, and regular + zero-sugar syrups so guests can fine-tune their glass.
Method: In a 2-L pitcher, lightly muddle strawberries, mint, and syrup. Stir in lime and a few cups of ice; refrigerate 10–15 minutes to let flavors mingle. Just before serving, add cold seltzer, give a gentle stir, and pour over fresh ice.
Hosting tip: Set out extra ice, mint, strawberry slices, and both standard and zero-sugar syrups so everyone can fine-tune their glass. Keep your pitcher on a bed of ice outdoors and top with fizz in small waves so every pour stays sprightly.
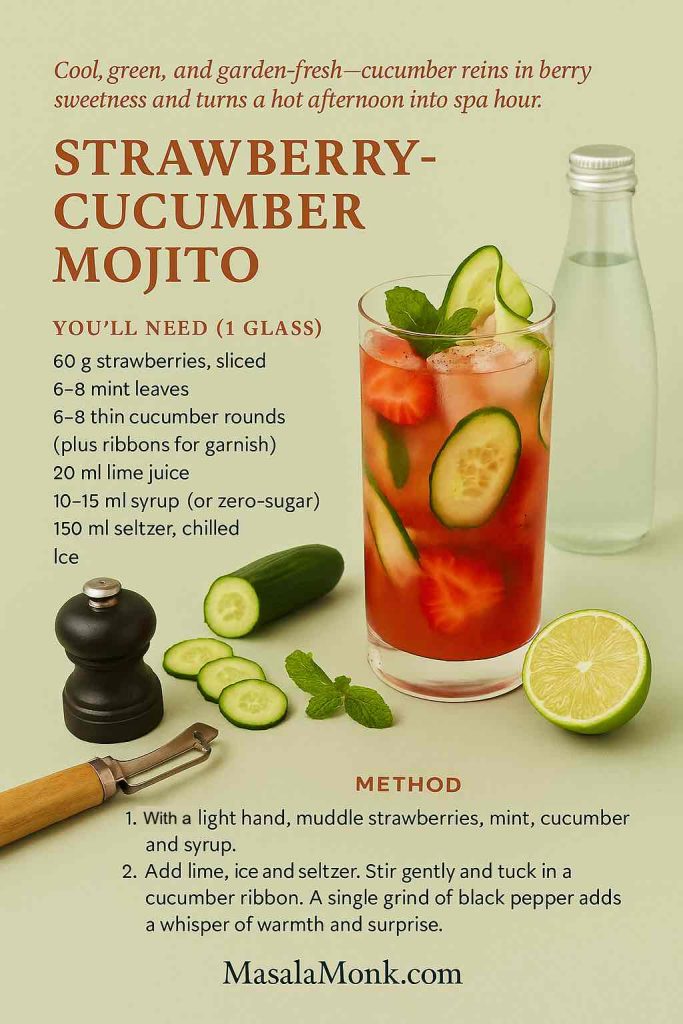
Cool, green, and garden-fresh—cucumber reins in berry sweetness and turns a hot afternoon into spa hour.
You’ll need (1 glass):
60 g strawberries, sliced
6–8 mint leaves
6–8 thin cucumber rounds (plus ribbons for garnish)
20 ml lime juice
10–15 ml syrup (or zero-sugar)
150 ml seltzer, chilled
Ice
Spa-day vibes: muddle lightly, add a cucumber ribbon for aroma, and finish with one grind of black pepper to extend the finish without extra sweetness.
Method: With a light hand, muddle strawberries, mint, cucumber, and syrup. Add lime, ice, and seltzer. Stir gently and tuck in a cucumber ribbon. A single grind of black pepper adds a whisper of warmth and surprising length.
Bright, kid-friendly, and picnic-perfect. Lemonade brings sunshine; mint keeps things tidy and crisp.
You’ll need (1 glass):
60 g strawberries
8 mint leaves
20 ml fresh lemon juice (or 50 ml light lemonade)
10–15 ml syrup (omit if your lemonade is sweet)
120 ml seltzer (or 60 ml lemonade + 60 ml seltzer)
Ice
Picnic-perfect: muddle berries + mint, add fresh lemon (or light lemonade), then top with seltzer. If using lemonade, skip the syrup.
Method: Muddle strawberries and mint with syrup (if using). Add lemon, drop in ice, and top with seltzer. Stir once and serve. Sparkling lemonade is a great two-bird option when you want more zip with fewer steps.
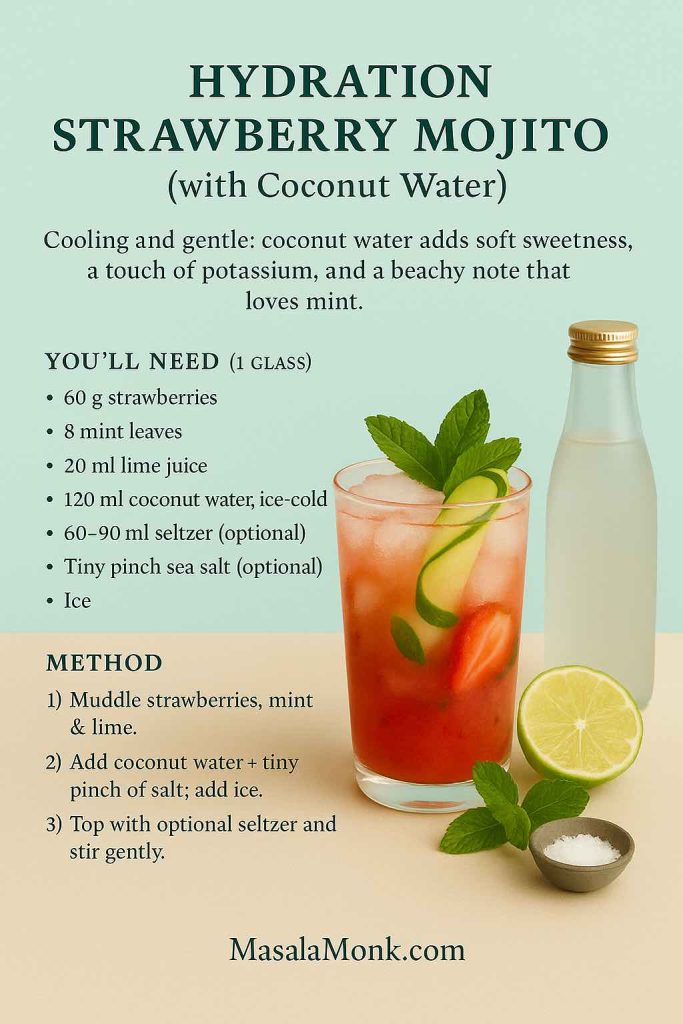
When the heat presses in, coconut water adds gentle sweetness, a little potassium, and a soft tropical note that plays beautifully with mint.
You’ll need (1 glass):
60 g strawberries
8 mint leaves
20 ml lime juice
120 ml coconut water, ice cold
60–90 ml seltzer (optional)
A tiny pinch of sea salt (optional but effective)
Ice
Beachy, light, and thirst-quenching: muddle berries + mint with lime, add coconut water and a tiny pinch of salt, then finish with cold seltzer for lift.
Method: Muddle strawberries, mint, and lime. Add coconut water and a small pinch of salt; top with ice and optional seltzer. Stir, smile, sip. There’s evidence that coconut water can hydrate similarly to some sports drinks, although it isn’t necessarily superior to plain water; for a balanced overview, Mayo Clinic is a good read.
Lively and lightly tangy, this riff leans on kombucha for bubbles and complexity; it’s a fun way to sneak in ginger notes without adding spice.
You’ll need (1 glass):
60 g strawberries
6–8 mint leaves
120 ml plain or ginger kombucha, chilled
20 ml lime juice
60 ml seltzer (optional)
10 ml syrup (optional—taste first)
Ice
Tangy + complex: muddle berries & mint, add lime, pour in chilled kombucha, and—if you want extra lift—finish with a splash of seltzer. Skip kombucha if pregnant.
Method: Lightly muddle strawberries and mint. Add lime and ice, pour in kombucha, and—if you’d like more lift—finish with a splash of seltzer. Stir gently. A paper-thin slice of fresh ginger makes a fragrant garnish. If you’re pregnant, it’s simplest to skip kombucha.
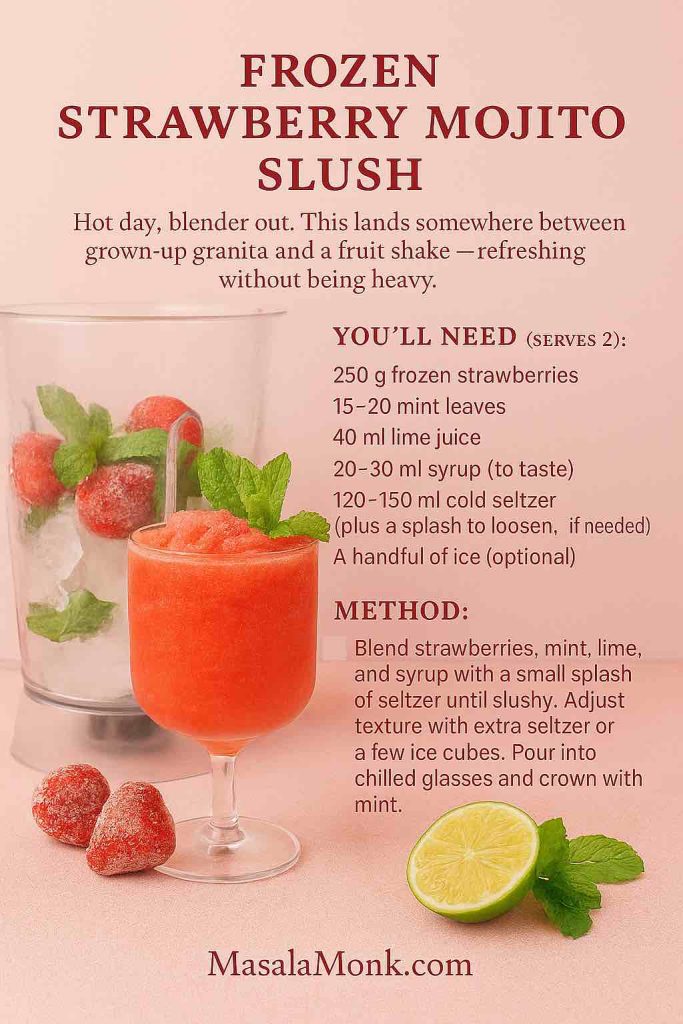
Hot day, blender out. This lands somewhere between grown-up granita and a fruit shake—refreshing without being heavy.
You’ll need (serves 2):
250 g frozen strawberries
15–20 mint leaves
40 ml lime juice
20–30 ml syrup (to taste)
120–150 ml cold seltzer (plus a splash to loosen, if needed)
A handful of ice (optional)
Blend frozen strawberries, mint, lime and syrup with a splash of cold seltzer until slushy. Adjust with extra seltzer or a few ice cubes, then pour into chilled glasses and crown with mint; a tiny pinch of salt brightens the berry flavor.
Method: Blend strawberries, mint, lime, and syrup with a small splash of seltzer until slushy. Adjust texture with extra seltzer or a few ice cubes. Pour into chilled glasses and crown with mint. A pinch of salt brightens flavors in frozen drinks where cold can mute sweetness; for a silkier feel, add 2–3 tablespoons coconut water before blending.
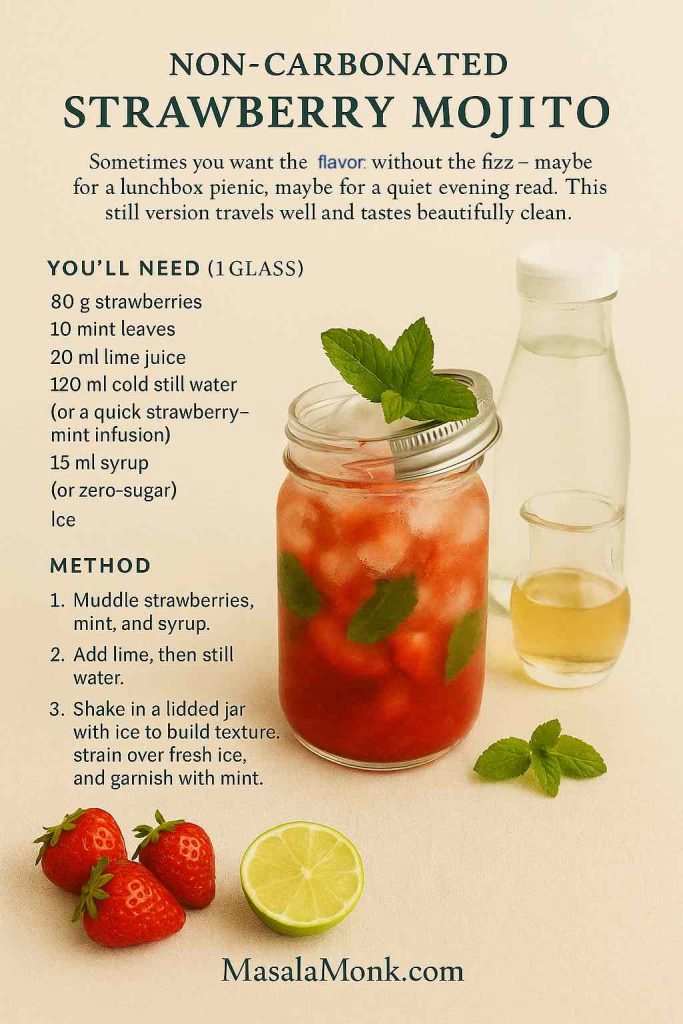
Sometimes you want the flavor without the fizz—maybe for a lunchbox picnic, maybe for a quiet evening read. This still version travels well and tastes beautifully clean.
You’ll need (1 glass):
80 g strawberries
10 mint leaves
20 ml lime juice
120 ml cold still water (or a quick strawberry-mint infusion)
15 ml syrup (or zero-sugar)
Ice
All flavor, no fizz: muddle berries + mint with syrup, add lime then still water, shake with ice for texture, strain over fresh ice, and garnish with mint.
Method: Muddle strawberries, mint, and syrup. Add lime, then still water. Shake in a lidded jar with ice to build texture, strain over fresh ice, and garnish with mint. Prefer an even lighter herb note? You can skip muddling and use whole mint leaves for a brighter, less “green” taste.
Let’s talk practicalities. Only lemons in the fruit bowl? They’ll do—lemon brightens differently than lime, but mint happily bridges the gap. No fresh strawberries? Frozen are fine; thaw and drain for the cleanest flavor (or lean into the Frozen Slush recipe). Prefer natural sweeteners? A jaggery syrup adds warm, mineral notes; a simple honey syrup brings floral depth; and cane juice syrup leans grassy and light. Meanwhile, if you’re cutting sugar hard, the allulose approach is wonderfully forgiving.
As for bubbles, seltzer vs. club soda vs. sparkling water boils down to small differences in minerals and texture, so feel free to use what you enjoy and what your store carries reliably. Whatever you choose, chill it deeply—and if you really want to impress, chill the glasses too. Cold glass, cold ice, cold fizz: the holy trinity of crisp.
Hosting? A tiny bit of structure makes the whole afternoon smoother. Prepare a chilled base (muddled berries, mint, syrup), keep a jar of pre-squeezed lime juice in the fridge, and add bubbles at the last minute so every pour stays lively. Create a self-serve station with ice, extra mint, sliced strawberries, and both standard and zero-sugar syrups so guests can steer sweetness to taste. And—because it’s magic for fruit—set out a little dish of flaky salt for those who want a pinch in the glass.
Finally, don’t be shy with personal flourishes. A few basil leaves alongside mint add herbaceous lift; a thin slice of ginger brings moodier evening energy; a spoonful of strawberry-chia jam turns the drink into playful texture. For garnish, a mint crown and strawberry fan never fail; a cucumber ribbon quickly signals the cucumber riff; a chili-salt rim works when you want a cheeky whisper of heat.
More to Sip Next
Love berry-fresh? Bookmark our lychee virgin mojitos for a floral twist that still plays beautifully with mint and lime. Prefer tangy and tropical? Take a sunny detour with pineapple mojitos. And if fizzy mixers fascinate you, keep this comparison handy: club soda vs. seltzer vs. sparkling water—it’s a quick read that helps you stock your fridge like a pro.
Printable cheat card (copy/paste)
Strawberry Mojito Mocktail (Classic) – 1 serve
Ingredients:
80 g strawberries, hulled and quartered
10 mint leaves
20 ml fresh lime juice
15 ml simple syrup (or zero-sugar syrup)
150 ml well-chilled club soda (or seltzer)
Ice
Method:
To begin, lightly crush the strawberries with the mint and syrup in a tall glass.
Next, add the lime juice and pack the glass with ice.
Afterward, crown with club soda, give a brief swirl, and finish with a mint sprig (or a slim strawberry slice).
Pro tip: Prefer a leaner profile? Trim the syrup to 10 ml; a tiny pinch of sea salt will lift the fruit beautifully.
That’s your summer playbook. Start with the classic, then wander—lighter, zestier, slushier, bigger—whatever your day calls for. And when you’ve tried a couple, tell us your favorite twist and leave a comment about it.
FAQs
1) What is a strawberry mojito mocktail, exactly?
A strawberry mojito mocktail is a zero-alcohol take on the Cuban classic: muddled strawberries and mint, bright lime juice, a touch of sweetness, and, finally, fizzy lift from seltzer or club soda. In short, it’s refreshing, fruity, and crisp—no rum required.
2) Which zero-proof mojito mocktail ingredients do I really need to keep on hand?
At minimum, you’ll want fresh (or thawed) strawberries, mint, limes, a simple syrup (regular or zero sugar), and something bubbly—sparkling water, seltzer, or club soda. Optionally, add a pinch of salt to wake up fruit, and keep crushed ice ready for that café-style texture.
3) Can I make a 3-ingredient strawberry mojito mocktail?
Absolutely. For an easy 3 ingredient mocktail, lightly muddle ripe strawberries with mint, pile in ice, and top with chilled sparkling water. If your berries are super sweet, add a squeeze of lime; if they’re a bit shy, a teaspoon of syrup rounds things out.
4) How do I keep it zero-sugar, low-calorie, or keto-friendly?
Start with berries, mint, and lime, then sweeten with allulose or erythritol syrup instead of sugar. Top with seltzer (not juice or lemonade) and you’ve got a zero sugar mocktail that still tastes full and lively—great for keto friendly virgin mocktails and skinny sips.
5) Seltzer or club soda—what’s better for a strawberry mojito mocktail?
Both are tasty; they’re just different. Seltzer is clean and neutral, while club soda has minerals that add a whisper of salinity and body. Either way, keep it ice-cold so your sparkling water mocktail stays extra crisp.
6) What if I need a pitcher for a crowd or a party?
Go big with a pitcher mocktail: scale your muddled strawberries, mint, and sweetener; chill with lime juice and ice; then, right before serving, add your fizz so it stays lively. This approach is perfect for zero proof mocktail recipes for a crowd, bridal showers, and summer brunches.
7) Can I make a non-carbonated strawberry mojito mocktail?
Definitely. For non carbonated virgin mocktails, swap the seltzer for cold still water (or a quick strawberry-mint infusion). Shake with ice to build texture, then strain over fresh ice for a clean, picnic-friendly version.
8) How do I adjust sweetness without losing balance?
First, taste your berries. If they’re ripe, start with less syrup and add gradually. If you’re using zero sugar sweeteners, remember allulose gives rounder body; erythritol can feel “cool.” Either way, a tiny pinch of sea salt can brighten fruit without extra sweetener.
9) Is a strawberry mojito mocktail safe during pregnancy?
Yes—if you keep it simple. Avoid alcoholic bitters and, if you’re cautious about fermented drinks, skip kombucha riffs. Focus on fruit, mint, lime, and sparkling water; that’s the most reliable path for pregnancy safe zero proof and virgin mocktails.
10) Can I use coconut water for a hydrating twist?
You can. Coconut water brings gentle sweetness and a soft tropical note, making a lovely hydration mocktail. Even so, keep balance in mind: add lime for snap, mint for freshness, and—optionally—finish with seltzer for lift.
11) What are smart flavor upgrades that still fit the style?
Try strawberry-cucumber for spa-day vibes, strawberry-lemonade for family-friendly brightness, or strawberry-ginger for a subtle, evening-leaning warmth. Meanwhile, for a party-ready treat, the frozen strawberry mojito slush wins on steamy afternoons.
12) Can I make it with pantry swaps if I’m low on limes?
Yes. Lemon works in a pinch; mint bridges the flavor shift. For sweeteners, jaggery (gur) syrup adds mineral depth, honey syrup brings floral notes, and cane juice syrup tastes grassy-light. If you only have club soda, not seltzer, you’re still golden.
13) What’s the best ice for a virgin strawberry mojito mocktail?
Crushed ice gives that café texture and cools quickly, while cubed ice melts slower and keeps flavors more concentrated. For pitchers, combine both: cubes in the jug, crushed in the glasses.
14) How do I write a quick mocktail ingredients list when I’m in a rush?
Keep a sticky note (or phone note) with this baseline: Strawberries + Mint + Lime + Sweetener + Seltzer + Ice. That’s your zero proof mocktail ingredients list for a classic strawberry mojito mocktail; from there, add cucumber, coconut water, or lemonade when the mood strikes.
15) Any garnishes that instantly elevate presentation?
Start with a mint crown and a strawberry fan. Then, as variations: a cucumber ribbon (cucumber riff), a chili-salt rim (spicy mood), or a sprinkle of unsweetened coconut flakes (hydration twist). Small details, big upgrade.
16) How can I keep the fizz lively until the last pour?
Chill everything—fizz, fruit base, glasses, and ice—so your bubbles don’t fade under warming dilution. Only add sparkling water right before serving, especially for pitcher mocktails. Stir gently rather than shaking to preserve carbonation.
17) What’s an effortless way to make it “healthier” without fuss?
Beyond zero sugar swaps, use extra strawberries in place of syrup for a 3 ingredient vigin mocktail, add a pinch of salt to brighten fruit, and choose seltzer instead of juice for lift without extra calories. Simple changes, fresher taste.
18) Which variations tend to be most popular based on user interactions?
The margarita and mojito families dominate, with strong interest in spicy, zero-sugar, keto/low carb, pregnancy safe, and pitcher formats. Within mojitos, strawberry, cucumber, watermelon, blueberry, and lemonade twists show consistent curiosity—happily, this guide covers those trends.
Constipation is exhausting, but lunch can actually help. These high-fiber sandwiches are built the way your gut prefers: sturdy whole-grain bread for gentle bulk, creamy legume spreads for steady fiber, seed “gel boosters” for softness, and juicy produce for moisture. Moreover, they’re practical—quick to assemble, easy to repeat, and sized to deliver meaningful fiber without feeling heavy.
Now, how much fiber do most adults need? A realistic daily target sits around 25–38 g. However, jumping there overnight can backfire. Instead, increase gradually—about 5 g extra per day each week—and pair each meal with fluids so fiber can actually hold water and move comfortably (see this concise intake overview and NIDDK hydration guidance). Meanwhile, short habits matter: drink a glass of water with your sandwich, then take a 10–15-minute walk. Little by little, those simple moves add up to relief.
Because details determine outcomes, every recipe below was designed with fiber grams, moisture, and texture in mind. In other words, the builds aren’t random—they’re engineered for comfort, regularity, and flavor you’ll actually crave tomorrow.
How much fiber these sandwiches deliver & of what kinds?
First, how much: each sandwich aims to contribute roughly 12–20 g of fiber toward your day. Which means, two thoughtfully built high-fiber sandwiches can cover most of what you need, leaving breakfast and snacks to top you up gently.
Second, which kinds: not all fibers behave the same, so the layers do different jobs.
Viscous, soluble fibers make a soft gel that holds water in the stool, which often makes passing easier. You’ll get these from oats and barley (thanks to β-glucans), plus chia and ground flax (rich in mucilage). we have used oat/barley-leaning breads, avocado-chia mixes, and flax-boosted hummus throughout. If you’re curious about the mechanics, here’s a clear look at β-glucans and stool-softening and a friendly explainer on chia’s mucilage-rich fiber.
Insoluble fibers—from bran, leafy greens, and vegetable skins—add gentle bulk and help speed transit. As a result, grated carrots, greens, and crunchy slaws live inside the sandwich, not just on the side, so every bite pulls its weight.
Moisture is the multiplier. Because fiber needs water to work, spreads are creamy, fillings are juicy, and sauces are built in rather than left out. Additionally, we suggest sipping water with the meal, since fluids help fiber function.
Finally, how the recipes are structured: each sandwich states its intent (relief or maintenance), lists realistic portions, and includes make-ahead notes, smart swaps, and small finishing touches. Therefore, you can choose what fits today—and repeat it tomorrow—without turning lunch into a project.
Why High-Fiber Sandwiches help (and how to build them)
Put simply, sandwiches make fiber doable. They bundle the right textures (soft + crisp), the right moisture (creamy + juicy), and the right amounts (measured slices and scoops) into a meal you can repeat tomorrow. Moreover, the format nudges consistency—arguably the most important factor for regularity.
They’re effortless to measure—and easy to stick with
Whole-grain slices are pre-portioned, spreads are spoonable, and veg layers are visible. Making it easy for you to assemble, eat, and actually hit useful daily fiber targets with minimal guesswork. If you like to prep once and assemble fast, this MasalaMonk idea for lentil meal-prep (as a sandwich filling) shows how a single batch can anchor multiple sandwiches during the week.
Moisture is built in by design
Dry, dense meals can backfire. We have ensured, each of these high-fiber sandwiches are built in a way that anchors moisture inside the bread: creamy hummus or yogurt-tahini underlayers, avocado folded with seeds, and juicy produce (carrot, greens, citrus segments) on top. That layering keeps bites slick rather than pasty, which, in turn, supports comfortable stool texture. If you like dairy or dairy-free yogurt as a base, a quick example is this hung curd spinach sandwich—the same idea powers our “Green Goddess” stack.
Layer order actually helps transit
Then start with a creamy spread to “seal” the crumb; next, add your fiber engine (chickpeas, lentils, or black beans) so it clings; in the end, finish with watery produce for slip. Additionally, a squeeze of lemon or a spoon of salsa adds acidity and fluid without heaviness. Small choices like these often determine whether a sandwich just sits—or genuinely supports movement.
Seeds add gentle gel—without bulky portions
A teaspoon of chia or finely ground flax disappears into spreads yet changes texture meaningfully after a glass of water. In brief, chia’s soluble, mucilage-rich fiber is well-documented (concise overview, open-access review; see also a broader nutrient profile in this MDPI review of chia’s composition: open access). For flax specifics you can use in everyday cooking, here’s a MasalaMonk primer: flax seeds for strong digestion.
The hand-held format supports satiety and travel
Because each of these high-fiber sandwiches pairs intact grains with legumes and produce, you get slower digestion and steadier fullness; which means, you’re less likely to graze later. For a clear big-picture explainer on fiber’s roles (beyond “roughage”), Harvard’s Nutrition Source summarizes the two fiber types and their effects.
Gentle routines amplify the effect
Right after eating, your body’s gastrocolic reflex naturally increases colon motility—so a brief 10–15-minute walk can nudge momentum in the right direction. For a plain-language primer, see Cleveland Clinic’s overview of the gastrocolic reflex. Moreover, even light movement supports regularity; their constipation guide underscores that exercise can stimulate the intestines. If symptoms persist despite these habits, the NIDDK’s constipation page outlines when to speak with a clinician.
Build template (at a glance)
Bread (2 slices): 100% whole-grain or sprouted; look for ≥3–4 g fiber per slice.
Spread (2–4 tbsp): hummus, white-bean mash, or yogurt-tahini; optionally stir in 1 tsp chia or ground flax.
Engine (⅓–½ cup): chickpeas, lentils, or black beans; lightly mash so it anchors.
Produce (heaped): grated carrot + leafy greens + a juicy element (cucumber, tomato, or citrus).
Finish: lemon or vinegar splash; herbs; pepper. Additionally, sip water and, if possible, take a short walk afterward.
For background reading that ties food choices to gut comfort more broadly (in case you want to deepen the “why”), this MasalaMonk primer on gut inflammation and digestive health connects everyday plant foods with a calmer baseline—useful context for readers who like understanding the bigger picture.
When constipation drags on, lunch is often the easiest place to add high fiber foods for constipation relief—without cooking an entire pot of anything. In practice, plant based foods high in fiber (beans, chickpeas, lentils, leafy greens) plus high fiber fruits and vegetables for constipation (kiwi, pear, apple, carrots) work together; as a result, you get both moisture and bulk. Along the way, foods rich in soluble fiber—like oats, barley, chia, and ground flax—form a gentle gel that supports softer stools and calmer bellies. Because you asked for a high fiber plant based diet approach, every sandwich below is fully plant-forward, practical for weekdays, and aligned with high fiber foods for gut health, colon health, and everyday digestive health. For hydration cues that make this even easier, see NIDDK’s diet & constipation guidance; for grain choices that add viscous fiber, here’s a friendly β-glucan overview.
Format you’ll see below: brief “why,” a clear ingredient list, step-by-step method, fiber-forward upgrades, and make-ahead tips—so these fiber rich foods for bowel movement become an easy habit, not homework.
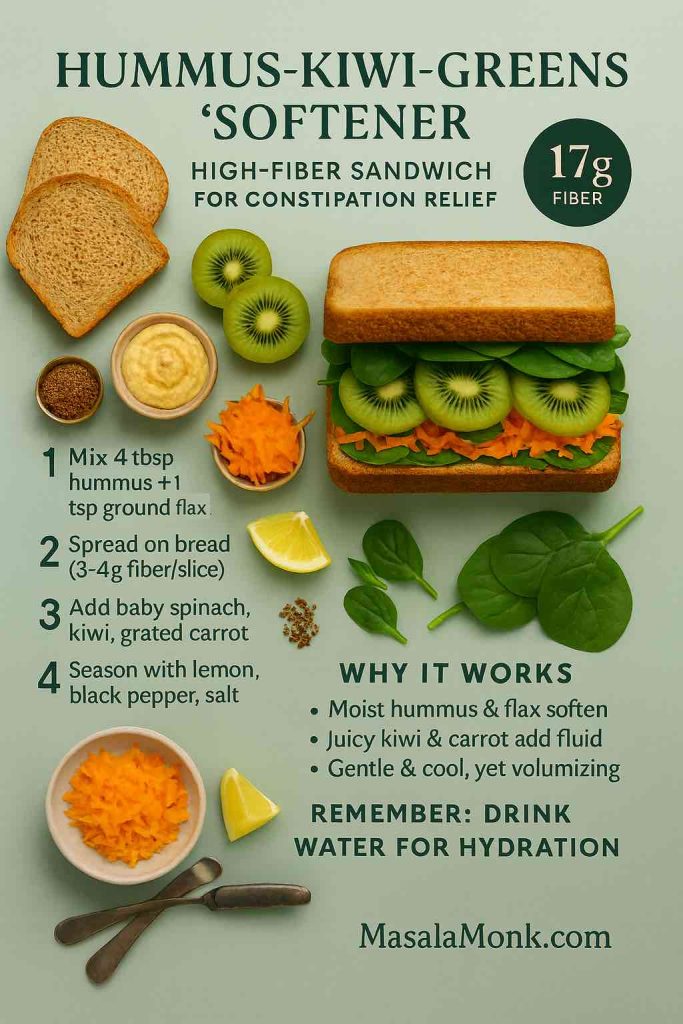
1) Hummus–Kiwi–Greens “Softener” — flagship of High-Fiber Sandwiches (Relief)
Estimated fiber: ~17 g • Taste & texture: cool, fresh, silky When to choose it: stools feel dry; you want gentle moisture without heaviness
Why it works (quickly yet gently) This is a purpose-built combo of foods that are rich in soluble fiber and high fiber fruits for constipation. Specifically, creamy hummus (legumes = plant based foods high in fiber) and a teaspoon of ground flax (mucilage) create a moist base; then, thin-sliced kiwi and a mound of grated carrot supply juicy volume. Resulting in every bite that stays soft, which supports easier bowel movements and overall gut health. If you’d like a plain-English primer on adding flax safely, skim flax seeds for strong digestion; if you prefer the science on chia/flax-style gels, here’s a concise chia fiber review for later.
Moist hummus + ground flax soften; kiwi and grated carrot add fluid; whole-grain bread supplies gentle bulk. Aim for ~17 g fiber here and drink water with the meal for best effect.
Ingredients (serves 1)
2 slices 100% whole-grain bread (≥3–4 g fiber/slice; oats or barley in the mix add foods rich in soluble fiber)
Hummus, 4 tbsp (legume base = high fiber foods for digestive health)
Ground flaxseed, 1 tsp (stirred into the spread)
Kiwi, 1 medium, thin-sliced (one of the most convenient high fiber fruits for constipation)
Baby spinach, big handful (leafy greens = fiber rich foods for gut health)
Carrot, finely grated, ½ cup (insoluble lift for bowel movement comfort)
Lemon juice, black pepper, tiny pinch of salt
Method
In a small bowl, whisk lemon into the hummus; then stir in ground flax until creamy.
Spread the mixture edge-to-edge on both slices; afterwards, pile on spinach, layer kiwi, and shower with grated carrot.
Season with pepper and a pinch of salt; and then, close gently and press once with your palm.
Fiber-forward upgrades (choose 1–2, not all)
Add 2–3 tbsp chickpeas into the hummus; which will make you push the legume count higher for a plant based high fiber diet day.
Scatter 1 tsp chia over the carrot before closing; helping you nudge the soluble fiber profile without adding bulk.
Swap bread for a dense oat-bran or barley loaf to increase β-glucans (i.e., foods rich in soluble fiber)—see β-glucan basics.
Make-ahead & serving
Grate carrot the night before; store sealed so it stays juicy.
Assemble within 10 minutes of eating (kiwi looks and tastes brightest right away).
Serve with a full glass of water; thus, the high fiber foods to ease constipation you just ate can actually hold fluid as intended.
On very sensitive days, replace raw spinach with tender arugula for similar benefits and gentler texture.
Why it fits the brief This sandwich champions high fiber foods for constipation relief without heaviness—because moisture, viscosity, and volume are layered on purpose. In turn, you’ll notice comfort during the afternoon rather than bloat
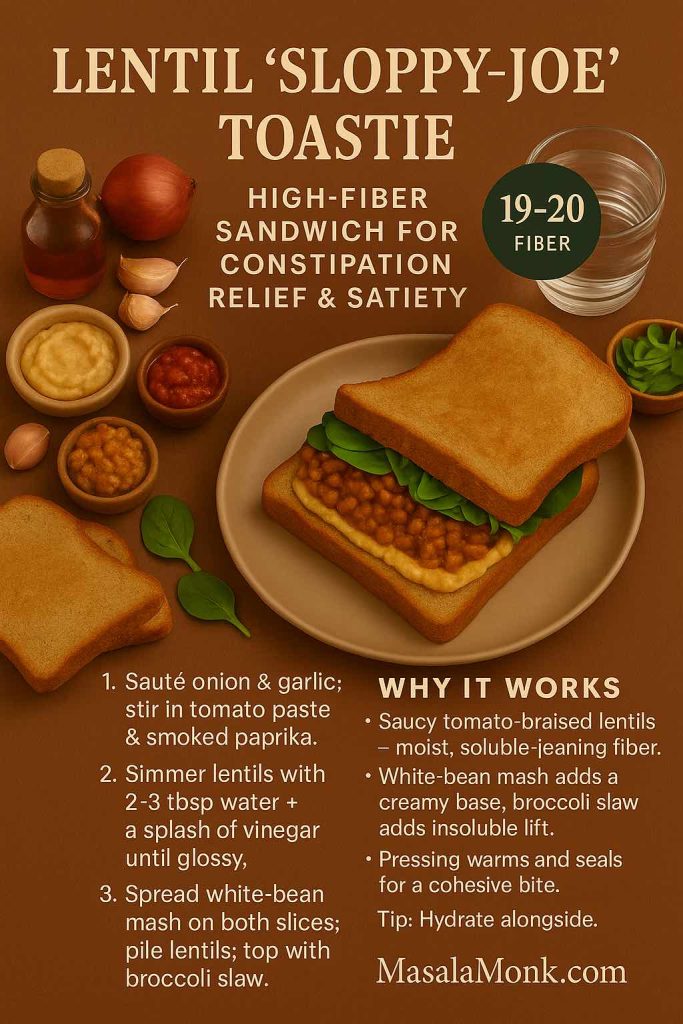
Estimated fiber: ~19–20 g • Taste & texture: warm, savory, cohesive When to choose it: you need relief and long-lasting satiety
Why it works (comfort + momentum) Here you combine two plant based foods high in fiber—a white-bean mash and saucy lentils—with a crunchy layer of broccoli slaw. Which helps you get soluble-leaning moisture from tomato-braised lentils and insoluble lift from brassica shreds. Because the filling is warm and glossy, this tastes indulgent; nevertheless, it is textbook high fiber foods for bowel movements, colon health, and all-day digestive health. Prefer batch cooking? This lentil meal-prep filling anchors several sandwiches across the week—convenient for a high fiber plant based diet.
Warm, saucy lentils + creamy white-bean mash keep the filling moist, while broccoli slaw adds insoluble lift. Press 2–3 min/side for a cohesive, ~19–20 g fiber sandwich—drink water with the meal to help the soluble fibers gel.
Ingredients (serves 1)
2 slices sprouted-grain bread (≥3–4 g fiber/slice; excellent high fiber foods for gut health)
Warm a small pan; sauté onion and garlic until tender; then add tomato paste and smoked paprika.
Stir in lentils with 2–3 tbsp water and a splash of vinegar; simmer 3–4 minutes until thick, glossy, and spoonable.
Spread white-bean mash on both bread slices; afterwards, pile on the lentils; then crown with broccoli slaw.
Press in a grill pan or sandwich press 2–3 minutes per side until toasty outside and steamy inside.
Fiber-forward upgrades (pick what fits your day)
Fold 1 tsp ground flax into the bean mash; in practice, you add foods that are rich in soluble fiber without changing flavor.
Replace one slice with an oat-bran slice for extra β-glucans (again, high fiber foods for colon health).
Add 2 tbsp grated carrot to the slaw for more insoluble volume (i.e., fiber rich fruits and vegetables for constipation in practice).
Make-ahead & serving
Simmer a bigger batch of lentils on Sunday; cool quickly and refrigerate up to 4 days (or freeze flat in bags).
Keep slaw dry until assembly so it stays crisp; alternatively, dress slaw lightly with lemon just before toasting.
Serve with a sliced apple or pear (skin on): those are easy fiber rich fruits for constipation that travel well.
Hydrate alongside; that helps the sandwich’s foods rich in soluble fiber can do their gel-forming job.
Why it fits the brief Because it layers legumes two ways, this toastie moves from “filling” to truly high fiber foods to ease constipation. Moreover, it stays moist, which many readers find is the missing piece in at-home “healthy” & high-fiber sandwiches.
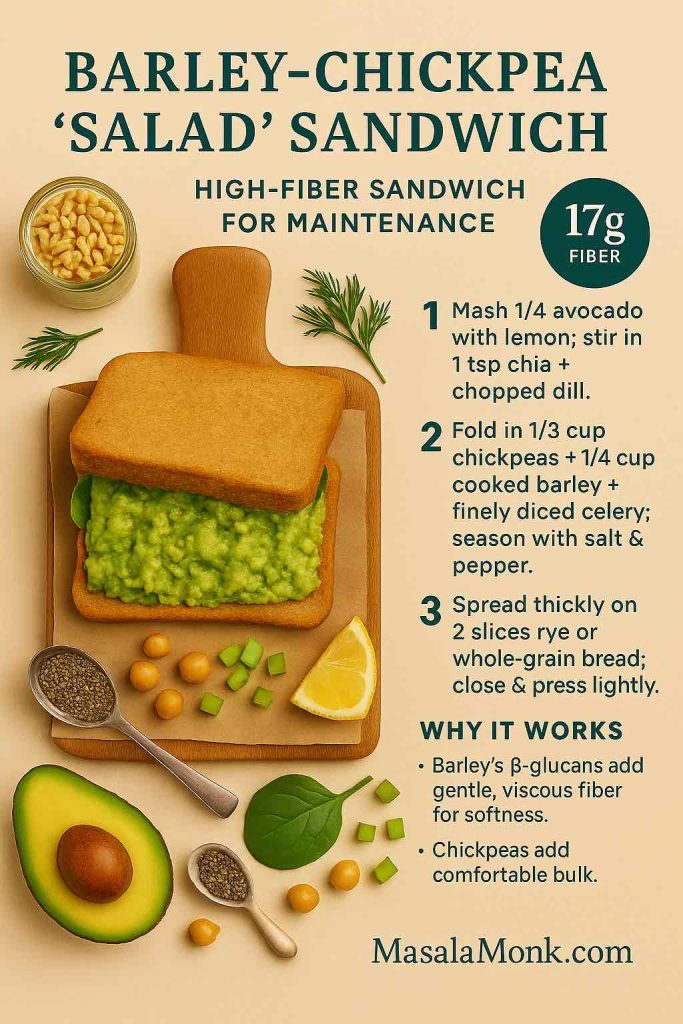
Estimated fiber: ~17 g • Taste & texture: cool, herby, packable When to choose it: you want balance, not “power relief,” especially on workdays
On days you want reliability rather than “power relief,” this build blends foods rich in soluble fiber (barley’s β-glucans) with legume bulk from chickpeas. Consequently, you get a gentle gel plus comfortable volume—exactly what high fiber foods for digestive health should deliver. If you’re curious about the science behind β-glucans and softness, here’s a clear overview.
Balanced, packable fiber: barley’s β-glucans for gentle softness, chickpeas for comfortable bulk, and an avocado–chia base to keep moisture. Spread thickly on rye/whole-grain (3–4 g fiber/slice) and sip water to help soluble fibers work.
Ingredients (serves 1)
2 slices rye or 100% whole-grain bread (≥3–4 g fiber/slice; supports high fiber foods for gut health)
Avocado, ¼ fruit, mashed (creamy base for moisture)
Chia seeds, 1 tsp (disappears into the mash; classic foods rich in soluble fiber) — background: chia’s mucilage review
Cooked chickpeas, ⅓ cup (plant based foods high in fiber)
Cooked barley, ¼ cup (β-glucans for stool comfort)
Celery (finely diced), dill, lemon, pepper, small pinch salt
Method
Mash avocado with lemon; then stir in chia and chopped dill until glossy.
Fold in chickpeas, barley, and celery; afterwards, season to taste.
Spread thickly; after that, close and press lightly for a tidy, travel-worthy sandwich.
Fiber-forward upgrades
Add 2 tbsp grated carrot for extra insoluble lift—useful among high fiber fruits and vegetables for constipation.
Swap one slice for an oat-bran slice to nudge β-glucans (again, foods rich in soluble fiber).
For herb lovers, a handful of parsley adds polyphenols without changing fiber math.
Make-ahead & serving
Mix the filling up to 48 hours ahead; which means, weekday assembly takes 2 minutes.
Serve with apple slices (skin on) for simple fiber rich fruits for constipation and satisfying crunch.
Sip water alongside; therefore, the sandwich’s soluble fibers can actually do their job.
Why it fits the brief This is a dependable high fiber plant based diet lunch: creamy, not dry; hearty, not heavy; and quietly supportive for bowel movements, colon health, and long-term gut health.
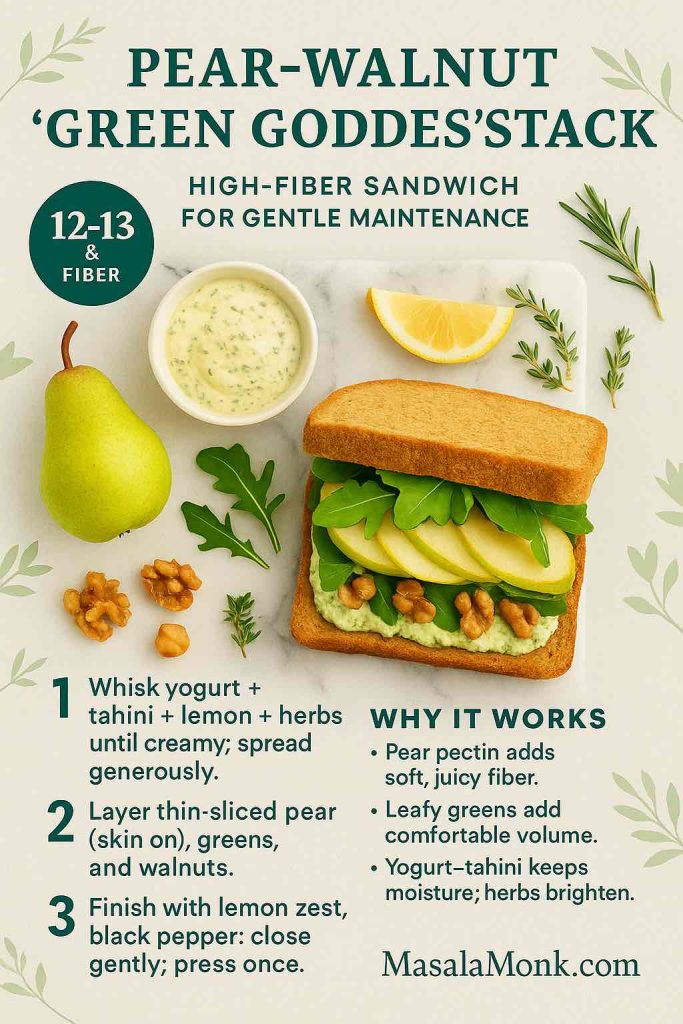
Estimated fiber: ~12–13 g • Taste & texture: juicy, herb-bright, light When to choose it: you want support without heaviness
Why it works (light yet helpful) Some days you want a lift without intensity. Here, juicy pear (skin on) brings pectin, leafy greens add volume, and a yogurt-tahini herb sauce keeps everything moist. Ultimately you get high fiber foods for constipation relief that feel bright rather than dense—ideal for easy digestive health.
Light yet effective: pear pectin provides soft, juicy fiber; greens add comfortable volume; yogurt-tahini keeps moisture so bites stay bright—not heavy. Aim for ~12–13 g fiber here and sip water to help soluble fibers do their job.
Ingredients (serves 1)
2 slices oat-bran or whole-grain bread (≥3–4 g fiber/slice)
The sauce keeps 3–4 days; making weekday builds stay fast.
Serve with a small bowl of berries for additional fiber rich fruits for constipation that don’t weigh you down.
Drink water; subsequently, the pectin and seed gels work more comfortably.
Why it fits the brief Although gentle, the stack still qualifies as high fiber foods for bowel movements, and, importantly, it supports colon health without the heaviness that sometimes derails weekday lunches.
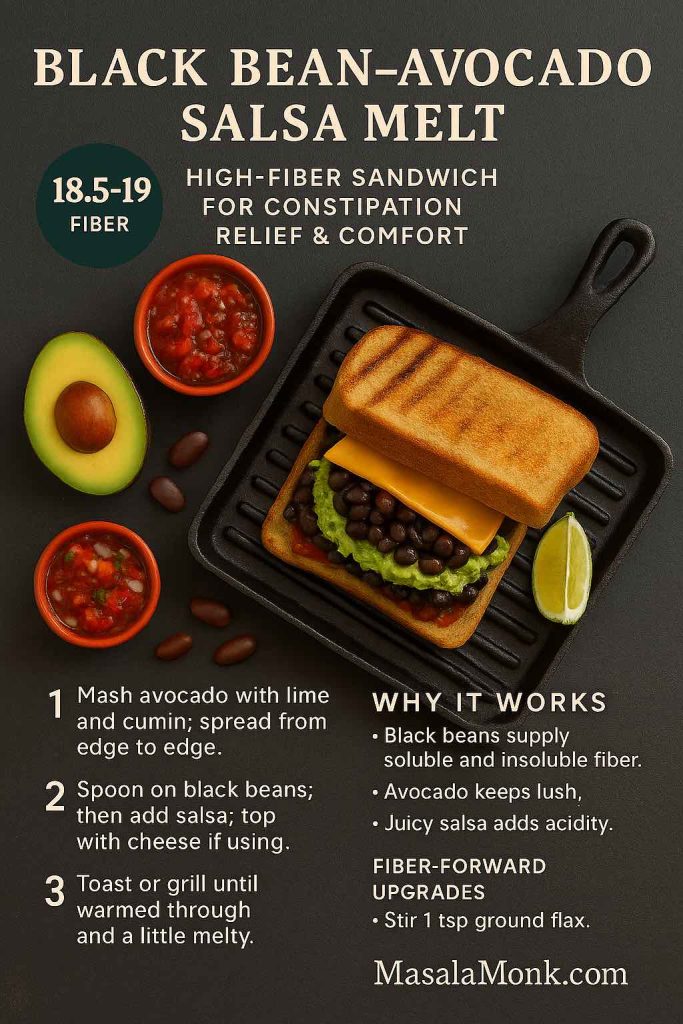
Estimated fiber: ~18.5–19 g • Taste & texture: warm, saucy, satisfying When to choose it: you need soothing relief and an easy win at dinner
Why it works (warm, saucy, effective) This is comfort food with a purpose. Black beans (core to any plant based high fiber diet) supply both soluble and insoluble fiber; avocado keeps things lush; and fresh salsa provides juicy acidity so the sandwich never feels dry. Meaning, you get high fiber foods to ease constipation that also satisfy.
Warm, saucy relief: black beans deliver soluble + insoluble fiber, avocado keeps bites lush, and salsa adds juicy acidity so the sandwich never eats dry. Toast until just melty; aim for ~18.5–19 g fiber and sip water to help fiber work comfortably.
Ingredients (serves 1)
2 slices sprouted-grain bread (≥3–4 g fiber/slice; great for high fiber foods for gut health)
Avocado, ¼ fruit, mashed
Black beans, ½ cup (lightly mashed so they cling)
Fresh tomato-onion salsa, ¼ cup (or tomato-lime if onion-sensitive)
Optional: thin slice cheddar or plant cheese
Lime, cumin, pinch salt
Method
Mash avocado with lime and a pinch of cumin; spread from edge to edge.
Spoon on black beans; then add salsa; top with cheese if using.
Toast or grill until warmed through and a little melty.
Fiber-forward upgrades
Stir 1 tsp ground flax into the avocado to lean toward foods rich in soluble fiber.
Add 2 tbsp grated carrot for extra insoluble support (a staple among high fiber fruits and vegetables for constipation).
Swap one slice for oat-bran bread to increase β-glucans.
Make-ahead & serving
Beans keep 3–4 days; meanwhile, mash just before assembly for best texture.
Serve with orange segments or cucumber spears; which makes you add fluid and crunch that amplify results.
Hydrate; in turn, these fiber rich foods for bowel movement do their job more comfortably.
Why it fits the brief It’s a weeknight win: cozy, fast, and firmly in the lane of high fiber foods for colon health and everyday digestive health.
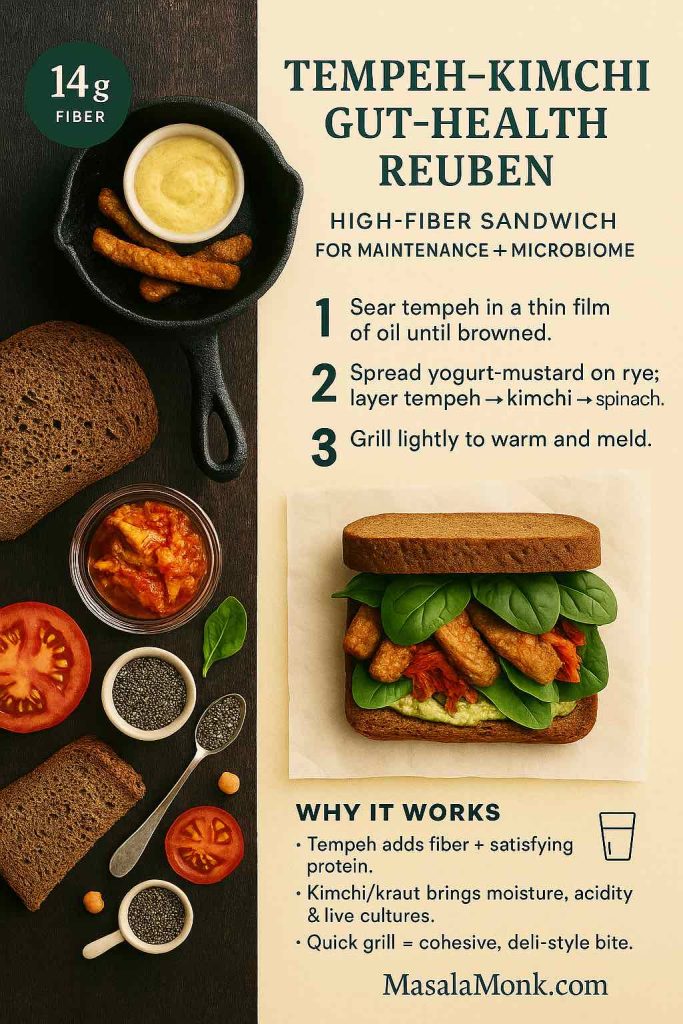
Estimated fiber: ~14 g • Taste & texture: savory-tangy, deli-style When to choose it: things are moving, and you want to keep the gut ecosystem happy
Why it works (tangy and sustaining) Once things are moving, pairing plant based foods high in fiber with fermented vegetables is a smart way to maintain momentum. Tempeh offers satisfying protein and fiber; kimchi or sauerkraut adds acidity, moisture, and live cultures; as a result, you get high fiber foods for gut health in a deli-style package. For more combinations, browse Probiotic-Rich Sandwiches.
Steady maintenance, deli-style: fiber-rich tempeh plus fermented kimchi/kraut bring moisture, acidity, and live cultures; rye adds whole-grain fiber. Grill lightly to meld. Tip—stir 1 tsp chia into the sauce or add tomato slices for extra softness and juiciness; sip water alongside.
Ingredients (serves 1)
2 slices whole-grain rye (≥3–4 g fiber/slice)
Tempeh, ~100 g, sliced and sautéed
Kimchi or sauerkraut, ¼ cup
Spinach, big handful
Yogurt-mustard (or a dairy-free version)
Method
Sear tempeh in a thin film of oil until browned; then set aside.
Add thin tomato slices for juicy slip (handy within high fiber fruits and vegetables for constipation).
Stir 1 tsp chia into the yogurt-mustard for a small soluble nudge (again, foods that are rich in soluble fiber).
Prefer milder ferments? Use kraut and a dab of pickle brine for acidity without heat.
Make-ahead & serving
Cook tempeh 2–3 days ahead; consequently, weekday assembly is trivial.
Serve with carrot sticks and apple wedges (skin on) for easy fiber rich fruits for constipation and crunch.
Water alongside, then a brief walk; helping the meal support predictable bowel movements.
Why it fits the brief This one keeps the momentum you’ve built—supporting colon health and digestive health while staying firmly in the high fiber plant based diet lane.
Sidekicks that make High-Fiber Sandwiches even more effective
Kiwifruit (1–2/day)—slice one into Sandwich #1 and enjoy the second on the side. Trials show kiwi improves bowel movements and overall comfort (kiwi RCT overview; gold-kiwi RCT).
Chia or ground flax add-ins—a teaspoon whisked into spreads boosts softness without heaviness. Chia’s mucilage is well documented (chia fiber review), and flax blends easily into hummus or avocado (see flax seeds for strong digestion).
Hydration reminder—fluids help fiber function; thus, pair every High-Fiber Sandwich with water or herbal tea (NIDDK guidance).
Gentle ramp-up (comfort matters with High-Fiber Sandwiches)
If you’re coming from a low-fiber baseline, jumping to 30+ grams immediately can feel rough. Therefore, increase gradually—about 5 g per day each week—and keep fluids steady. On a day that feels gassy, reduce raw brassicas, emphasize oats, barley, chia/flax, and use ripe pears or kiwi for a softer profile; subsequently, bring the extra crunch back as comfort improves. For a neutral reference on intake ranges, most adults do well around 25–38 g/day (scale up gradually: concise intake overview).
Ultimately, relief comes from meals that are moist, fibrous, and easy to repeat. These six High-Fiber Sandwiches were engineered for exactly that: whole-grain bread for steady bulk, legume spreads for satisfying depth, chia or ground flax for gentle gel, and fruit-veg add-ins—kiwi, pear, apple, carrots, greens—for softness and volume. Add water, take a short walk, and give it a few consistent days. Consequently, your gut will notice; meanwhile, your schedule won’t suffer; and, importantly, your lunches will finally pull their weight.
1) What makes these High-Fiber Sandwiches good for constipation relief?
Because they combine foods rich in soluble fiber (oats, barley, chia, ground flax) with insoluble sources (bran, leafy greens, vegetable skins), they add moisture and gentle bulk together. Consequently, stools hold water, bowel movements become easier, and overall digestive health feels steadier. Meanwhile, the format is practical—so you actually repeat it.
2) How many grams of fiber should I aim for with a high fiber plant based diet?
Most adults do well around 25–38 g per day. That said, increase gradually. For example, add about 5 g per day each week and space it across meals. In practice, two High-Fiber Sandwiches can provide a big share, while breakfast and snacks top up the rest.
3) Which ingredients are the best high fiber foods for constipation relief inside a sandwich?
Start with plant based foods high in fiber: chickpeas, lentils, and black beans. Then, add foods that are rich in soluble fiber—chia, ground flax, oats, and barley—for gel-forming softness. Finally, tuck in high fiber fruits and vegetables for constipation like kiwi, pear, apple (skin on), carrots, and leafy greens for comfortable volume.
4) Are there specific fiber rich fruits for constipation that work especially well between bread?
Yes—pears and apples (with the skin), berries, and kiwi slot neatly into layers. Moreover, citrus segments and grated carrot add juiciness without heaviness. In turn, those choices support bowel movements while keeping sandwiches fresh and bright.
5) What bread should I pick for high fiber foods for gut health?
Choose 100% whole-grain or sprouted loaves that list whole grain first and give at least 3–4 g fiber per slice. Better yet, rotate rye, oat-bran, and barley-forward breads to keep textures interesting and to boost foods rich in soluble fiber via β-glucans.
6) I feel gassy when I jump into a plant based high fiber diet. What should I tweak?
First, slow the ramp—add fiber gradually. Next, emphasize moist builds with foods that are rich in soluble fiber (chia, ground flax, oats, barley) and slightly reduce raw brassicas for a few days. Subsequently, bring crunch back as comfort improves. Hydration and a brief walk after meals often help.
7) How can I hydrate wisely so high fiber foods to ease constipation actually work?
Pair each sandwich with a full glass of water. Additionally, use juicy layers—tomato, cucumber, citrus segments—to keep bites moist. Consequently, soluble fibers can form the soft gel that supports smoother bowel movements.
8) What are smart add-ins for high fiber foods for colon health?
Sprinkle 1 teaspoon of chia or finely ground flax into spreads; fold beans into hummus; or add a spoon of barley or oat-bran to legume salads. Therefore, you raise soluble fiber without making the sandwich bulky or dry.
9) Can I keep these High-Fiber Sandwiches fully vegan?
Absolutely. In fact, a high fiber plant based diet is the default here. Use hummus, white-bean mash, avocado-chia spreads, and yogurt-style dairy-free sauces. Meanwhile, tempeh, kimchi, and sauerkraut bring plant-forward protein and tang that support gut health.
10) What are easy meal-prep moves so my high fiber foods for digestive health stick all week?
Batch-cook lentils and chickpeas; chill barley; pre-grate carrots; wash greens; and keep ground flax and chia within arm’s reach. Consequently, assembly takes five minutes, and you’ll actually repeat the habit.
11) How do I balance high fiber foods for bowel movements with a sensitive stomach?
Begin with softer, moist builds: creamy spreads, thin-sliced fruit, and tender greens. Moreover, keep portions moderate, chew thoroughly, and add a short post-meal walk. On balance, that trio supports comfort while still moving fiber intake upward.
12) Are raw veggies mandatory, or can I still get high fiber foods for constipation relief with gentler textures?
You can. Lightly sautéed onions/peppers, roasted carrots, or softened greens still count. In practice, you’ll retain fiber while improving tolerance. Therefore, choose textures your gut likes and keep moisture high.
13) Which spreads quietly raise foods rich in soluble fiber without changing flavor?
Hummus mixed with 1 tsp ground flax, avocado blended with 1 tsp chia, or yogurt-tahini whisked with oat-bran. Subsequently, you’ll notice creamier bites and better stool softness—without extra weight.
14) Do I need fruit at every meal to hit high fiber foods for gut health targets?
Not necessarily, but it helps. For instance, one high fiber fruits for constipation choice (pear, apple, berries, or kiwi) inside or beside a sandwich boosts totals and adds moisture. Meanwhile, legumes and whole-grain bread carry the rest.
15) What’s the simplest “starter” High-Fiber Sandwich if I’m brand-new to this?
Begin with whole-grain bread, hummus + 1 tsp ground flax, thin-sliced pear or apple, and a handful of spinach. Therefore, you’ll get foods rich in soluble fiber plus gentle bulk in a mild, friendly package.
16) How do I keep high fiber foods for colon health from feeling dry or dense?
Layer moisture at every step: creamy spread, juicy produce, and a quick acidity hit (lemon, vinegar, salsa). Consequently, the sandwich eats soft, not stodgy—and your bowel movements tend to follow suit.
17) Are there kid-friendly options that still count as plant based foods high in fiber?
Yes: mashed black beans with mild salsa and avocado on soft whole-grain bread; chickpea “salad” with finely diced cucumber; or thin pear slices with yogurt-tahini. Moreover, cutting sandwiches into small squares improves traction with picky eaters.
18) How can I vary flavors yet stay within high fiber foods for digestive health?
Rotate breads (rye, oat-bran, sprouted), spreads (hummus, white-bean, avocado-chia), and high fiber fruits and vegetables for constipation (pear, apple, kiwi, carrot, greens). In turn, you’ll keep taste buds happy while the fiber keeps working.
19) Do these ideas help if I’m focused on high fiber foods for gut health beyond constipation?
Generally, yes. While everyone’s different, a steady mix of soluble and insoluble fiber plus plant diversity often supports gut health and overall comfort. Nevertheless, adjust portions and textures to your tolerance.
20) What’s a quick checklist before I make any High-Fiber Sandwiches?
Whole-grain bread (3–4 g fiber/slice) ✅ Legume base (⅓–½ cup) ✅ Seed booster (1 tsp chia or ground flax) ✅ Juicy produce (heaped) ✅ Water alongside + brief walk ✅ Therefore, you’ve covered high fiber foods for constipation relief and set up a predictable, comfortable day.
When the air turns crisp and mornings get slower, a Healthy Pumpkin Spice Latte is exactly the kind of cozy you can feel good about. Right from the start, this recipe prioritizes real pumpkin purée, balanced spice, and smart sweeteners, so your Healthy Pumpkin Spice Latte tastes indulgent while staying light. For even better iced results, you might glance at our post on iced coffee methods; understanding cold brew vs. iced espresso vs. shaken lattes instantly upgrades texture.
Why This Version Is a Truly Healthy Pumpkin Spice Latte
To begin with, we build flavor from real pumpkin and a precise spice blend (cinnamon, ginger, nutmeg, clove) rather than relying on multiple pumps of syrup. As a result, your Healthy Pumpkin Spice Latte delivers warmth, body, and aroma without a sugar crash. Additionally, you can steer calories by milk choice—unsweetened almond for the leanest profile, skim for dairy protein without fat, or oat for extra creaminess. For context and honest comparisons, the official café baselines are here: Starbucks hot PSL nutrition and Starbucks iced PSL nutrition (starbucks.com). You’ll see how quickly sugar and calories climb with standard builds.
Moreover, using real pumpkin gives you a little fiber and micronutrients with very modest sugars. If you like specifics, skim the canned pumpkin nutrition profile (MyFoodData, USDA-based). Put simply: the Healthy Pumpkin Spice Latte approach leans on whole ingredients and method control, not just “less syrup.”
Ingredients for a Healthy Pumpkin Spice Latte (1 Serving, ~12 oz / 355 ml)
Before we begin, gather everything in one place; preparation makes the pour seamless. Then, follow the lists below—organized so you can choose quickly without second-guessing. Choose one milk and one sweetener; the rest stays the same.
Core base (must-have)
Espresso: 30–60 ml (1–2 shots) or ~90 ml strong brewed coffee Tip: Start with 1 shot for balance; add a second if you prefer a bolder Healthy Pumpkin Spice Latte.
Pumpkin purée: 30 g (2 Tbsp), 100% pumpkin (not pie filling)
Vanilla extract: ½ tsp
Fine salt: a small pinch (it rounds sweetness and spice)
Milk (pick one)
Unsweetened almond milk — 200 ml (¾ cup + 1 Tbsp): ultra-light and lowest in calories.
Skim milk — 200 ml: lean dairy with extra protein and a clean latte finish.
Natural: 1–2 tsp maple syrup or honey for classic café sweetness.
Low-glycemic twist (optional): 1–2 tsp allulose for clean sweetness without a cooling aftertaste.
Because pumpkin softens bitterness, you’ll often need less sweetener than you expect.
For iced Healthy Pumpkin Spice Latte
Ice: ~200 g (heaping cup), plus extra for the glass
Optional cold foam: 60 ml milk (of your choice), frothed separately
Flavor extras (optional, but lovely)
Citrus spark: the faintest whisper of orange zest (⅛ tsp) brightens the spices.
Caramel note: ¼ tsp molasses introduces depth without much sugar.
Saffron warmth: a few strands steeped in a splash of your milk add aromatic complexity.
Equipment (simple is fine)
Whisk or handheld frother (for hot microfoam)
Shaker or jar with lid (for the iced, frothy finish)
Small saucepan (if making the hot version)
Quick metric/US snapshot
Espresso 30–60 ml = 1–2 shots
Milk 200 ml = ~¾ cup + 1 Tbsp
Pumpkin purée 30 g = 2 Tbsp
Spice blend = 1 tsp total
Finally, to keep your Healthy Pumpkin Spice Latte consistent day after day, pre-mix a small jar of the spice blend and store it airtight; subsequently, each cup becomes a simple “scoop and whisk.” Do not miss our full post on how to make how to make pumpkin pie spice blend, and its variants.
Method: Hot Healthy Pumpkin Spice Latte (≈10 Minutes)
First, warm the base: in a small saucepan over medium-low, whisk milk, pumpkin purée, spice blend, vanilla, sweetener, and a pinch of salt for 3–4 minutes until steaming—avoid a rolling boil to preserve aroma. Next, froth to a latte-like texture using a whisk, handheld frother, or (carefully) a heat-safe jar. Meanwhile, pull 1–2 shots of espresso into a mug (or pour in hot strong coffee). Finally, combine by topping the coffee with your pumpkin milk. Taste; adjust sweetness or spice. Because pumpkin adds body and softens bitterness, you may need less sweetener than expected—another reason this is a Healthy Pumpkin Spice Latte you’ll actually crave daily.
First, brew and cool: pull espresso and let it stand 1–2 minutes, or use a cold espresso concentrate. Then, shake: in a cocktail shaker or jar, combine espresso, cold milk, pumpkin purée, spice, vanilla, sweetener, and ice; shake 10–15 seconds until chilled and lightly frothy. Afterward, strain over fresh ice to avoid extra dilution. For a café-style finish, top with cold foam; see How to Make Cold Foam (Better Homes & Gardens) and a clever, low-cost option in Why I Love the French Press (Serious Eats). As a result, your iced Healthy Pumpkin Spice Latte will have the silky cap you love—no special machine needed. And if you want to go deeper on cold methods, circle back to our post on iced coffee methods.
Quick Recipe Card for Healthy Pumpkin Spice Latte (Hot or Iced)
Flavor extras: 1/8 tsp orange zest; 1/4 tsp molasses; a few saffron strands (steeped).
Grande (~16 oz): scale by 1.3–1.4×.
Estimated nutrition (almond milk base): ~90 kcal; ~10 g carbs; ~4 g sugar; ~3 g fat; ~2 g protein.
Macros, Comparisons, and Sensible Tweaks for a Healthy Pumpkin Spice Latte
Because milk choice drives most of the calories, start there. Per ~12 oz serving (with 30 g pumpkin purée and zero-cal sweetener), expect roughly:
Unsweetened almond milk: ~90 kcal, ~10 g carbs, ~4 g sugar, ~3 g fat, ~2 g protein
Skim milk: ~135 kcal, ~21 g carbs, ~14 g sugar, ~0 g fat, ~9 g protein
Unsweetened oat milk: ~170 kcal, ~22 g carbs, ~7 g sugar, ~6 g fat, ~3 g protein
If you add 2 tsp maple syrup, plan for about +34 kcal and +~9 g sugar. Even so, maple is assertive, so a small amount provides plenty of flavor. Meanwhile, remember that pumpkin purée adds a little fiber and body with modest sugars; for numbers, keep this canned pumpkin nutrition page (MyFoodData) handy.
For perspective, compare your Healthy Pumpkin Spice Latte to Starbucks hot PSL nutrition or Starbucks iced PSL nutrition (starbucks.com). On balance, the homemade cup stays lean because you control milk and sweetener instead of defaulting to multiple syrup pumps.
Variations That Keep Your Healthy Pumpkin Spice Latte Fresh
Keto / Low-Carb Healthy Pumpkin Spice Latte: Choose unsweetened almond milk and a zero-cal sweetener. If you also track caffeine, try one espresso shot and adjust later. For a cozy non-coffee day, our vegan keto smoothie kick-start echoes fall spice while staying low in sugar.
Vegan Healthy Pumpkin Spice Latte: Pick almond or oat milk and sweeten with monk fruit or maple. Oat brings café-style creaminess; almond keeps calories lean. Either way, the pumpkin + spice profile remains the star.
No-Coffee / Decaf Healthy Pumpkin Spice Latte: Swap espresso for strong chai or rooibos, or simply use steamed milk. Brew a small tea concentrate and treat it like espresso in the method; the spices harmonize beautifully.
Troubleshooting and Pro Tips for Your Healthy Pumpkin Spice Latte
Spice settling: Before heating, whisk the spice into the pumpkin purée; the purée helps suspend fine particles so they don’t sink.
Too thin: Add 1–2 tsp more pumpkin purée or reduce milk by 20–30 ml to concentrate texture.
Not pumpkiny enough: Increase purée to 40 g and add ¼ tsp more cinnamon; if the flavor turns “muddy,” reduce clove first—it’s potent.
No frother, no problem: A French press makes quick microfoam; see this French press overview (Serious Eats).
Iced texture matters: Shake vigorously to produce tiny bubbles and a creamier sensation, even with almond milk. Additionally, always strain over fresh ice.
Batching for guests: Prepare a larger batch of the spiced milk base and keep it warm. For safety, stay out of the “danger zone.” Review USDA slow-cooker tips (usda.gov) and the simple keep-hot guideline ≥ 140°F / 60°C (FoodSafety.gov). Then add espresso to each mug just before serving so the coffee stays vibrant.
How to Slot a Healthy Pumpkin Spice Latte Into Your Week
Realistically, most of us want easy repetition. Consequently, try this cadence:
Weekdays: Unsweetened almond milk + zero-cal sweetener; make the hot version in the morning and the iced version in the afternoon.
Weekends: Switch to oat milk, add a small splash of maple, and treat it like dessert—no apology needed.
Meal prep: Mix a three-day base (milk + pumpkin + spice + vanilla + sweetener) and refrigerate. Before each cup, re-shake or whisk, then add espresso and heat or shake over ice. In practice, this keeps your Healthy Pumpkin Spice Latte consistent without fuss.
By the way, when you want a thicker, post-workout option that still hits fall notes, peek at our pumpkin seed smoothie ideas. It’s not a latte, certainly, but it’s seasonally aligned and satisfying.
Why This Healthy Pumpkin Spice Latte Keeps Working
At any rate, the magic is simple: whole ingredients and deliberate technique. Because you aren’t locked into fixed syrup pumps, you can adjust sweetness in tiny steps. Because you froth (or shake) properly, you can dial creaminess regardless of milk. And because you use pumpkin purée, you add body and color without runaway sugar. In short, the Healthy Pumpkin Spice Latte respects flavor and goals.
Meanwhile, it’s flexible. Prefer perfumey spice? Increase cinnamon and nutmeg while easing clove. Want more body without extra calories? Froth a small portion of milk into cold foam and spoon it on top. Need stronger coffee presence? Use two shots, then balance with 1–2 extra teaspoons of pumpkin. Finally, if you want to fine-tune the iced path, revisit our post on iced coffee methods. And keep these two official references nearby for honest comparisons as you tweak: Starbucks hot PSL nutrition and Starbucks iced PSL nutrition (starbucks.com).
FAQs
1) What exactly makes this a Healthy Pumpkin Spice Latte?
Because we build flavor from real pumpkin purée and a balanced spice blend—rather than multiple syrup pumps—you get body, aroma, and warmth with fewer added sugars. Additionally, you control milk and sweetener, so calories and carbs stay in check.
2) How many calories are in one serving of Pumpkin Spice Latte?
Typically, 12 oz lands around ~90 kcal with unsweetened almond milk, ~135 kcal with skim, and ~170 kcal with unsweetened oat. Of course, add 30–40 kcal if you stir in 2 teaspoons of maple syrup.
3) Can I make a Healthy Pumpkin Spice Latte without coffee?
Absolutely. Instead of espresso, use strong chai or rooibos, or simply steamed milk. Consequently, you keep the cozy pumpkin-spice profile while skipping caffeine.
4) How do I make a veganPumpkin Spice Latte?
Simply choose almond or oat milk and a plant-based sweetener (e.g., monk fruit or maple). As a result, the texture remains creamy while the drink stays dairy-free.
5) How do I keep my Pumpkin Spice Latteketo / low-carb?
First, select unsweetened almond milk. Then, sweeten with a zero-calorie option like stevia or a monk-fruit blend. Therefore, you’ll reduce net carbs while keeping flavor intact.
6) Does this recipe of Pumpkin Spice Latte use real pumpkin?
Yes—each serving uses about 30 g (2 Tbsp) of 100% pumpkin purée. Accordingly, you get a touch of fiber and body with modest sugars, unlike syrups alone.
7) Can I make an iced Healthy Pumpkin Spice Latte that still tastes rich?
Definitely. Shake the drink with ice for 10–15 seconds; that agitation adds tiny bubbles and creaminess. Then, for café-style texture, crown it with a small spoonful of cold foam.
8) What’s the best milk for a Healthy Pumpkin Spice Latte?
It depends. Unsweetened almond milk is leanest, skim milk adds protein with minimal fat, and oat milk yields the lushest mouthfeel. In short, pick based on goals: calories, protein, or creaminess.
9) How can I cut sugar but keep flavor in Pumpkin Spice Latte?
Start with zero-calorie sweeteners and rely on pumpkin + spice for depth. Moreover, a small pinch of salt and a splash of vanilla round perception of sweetness so you can use less.
10) How do I prevent spices from sinking to the bottom of Pumpkin Spice Latte?
Before heating, whisk the spice directly into the pumpkin purée; the purée suspends fine particles. Likewise, give the finished drink a quick swirl before the final sip.
11) Can I batch this for guests or meal prep?
Yes. Prepare the spiced milk base (milk, pumpkin, spice, vanilla, sweetener) and keep it warm for serving or chill up to 3 days. Afterwards, add espresso to each cup to keep the coffee vibrant.
12) Is there a slow-cooker version of Healthy Pumpkin Spice Latte?
Certainly. For gatherings, warm the spiced milk base on Low, then hold on Warm. Subsequently, pour espresso into each mug and top with the hot base. Stir before each pour so spices stay even.
13) What’s the right espresso dose—one shot or two?
Begin with one shot for balance. Then, if you prefer stronger coffee notes, add a second shot and, if needed, slightly increase pumpkin purée (by 1–2 tsp) to keep harmony.
14) Can I make a grande-size Healthy Pumpkin Spice Latte?
Yes—scale ingredients by 1.3–1.4× for ~16 oz. Nevertheless, taste as you go and adjust sweetness gradually; it’s easier to add than to dial back.
15) How do I get thicker body of Pumpkin Spice Latte without extra calories?
First, froth a small portion of your milk to create microfoam; next, spoon it on top. Additionally, bump pumpkin purée by 1–2 teaspoons for natural viscosity.
16) What if I want a pumpkin spice chai instead of a coffee latte?
Simply swap the espresso for strong chai concentrate. Consequently, you’ll get a spiced, tea-forward variation that pairs beautifully with pumpkin and vanilla.
17) Which sweetener tastes closest to café sweetness?
For most palates, a monk-fruit/erythritol blend reads clean. Alternatively, 1–2 teaspoons of maple syrup deliver classic café character—just budget the added calories.
18) How should I store leftovers?
Cool the spiced milk base quickly and refrigerate in an airtight jar for up to 3 days. Then, shake before using and add fresh espresso when serving hot or iced.
19) Can I use pumpkin pie spice instead of a custom blend?
Yes. Use 1 teaspoon of a quality pumpkin pie spice. However, if clove dominates, reduce the total to ¾ teaspoon and compensate with a pinch of extra cinnamon.
20) Any tips for a copycat café feel at home?
Indeed. Froth milk (or make cold foam), strain iced drinks over fresh ice, and dust the top lightly with cinnamon. Furthermore, serve in a pre-warmed mug (hot) or a chilled glass (iced) for a professional finish.
As the air turns crisp and kitchens come alive again, a reliable homemade pumpkin pie spice becomes your most versatile fall tool. Instead of chasing labels, you’ll craft a balanced DIY pumpkin spice blend once and, subsequently, use it confidently in pies, breakfasts, drinks, and even savory sides. Moreover, we’ll cover why to toast or bloom spices for fuller aroma; we’ll also clarify tricky ingredients—especially allspice—so first-timers feel right at home.
What Is Homemade Pumpkin Pie Spice (and Why It Works)?
At its core, pumpkin pie spice is a warm baking blend—no actual pumpkin required. Typically, cinnamon provides body; ginger adds lift; nutmeg rounds the flavor; allspice and cloves deepen the base. Historically, cooks have paired these spices with pumpkin and other squashes for generations; for a readable lens on how the blend evolved, see The Food Historian’s look at the secret history of pumpkin pie spice. Meanwhile, if you’ve ever wondered whether pumpkin products contain pumpkin or simply the spice profile, this quick explainer clarifies the distinction: Is there actual pumpkin in pumpkin spice?
Allspice, defined: Despite the name, allspice is not a mixture. Rather, it’s the dried unripe berry of Pimenta dioica, often described as naturally echoing cinnamon, nutmeg, and clove. For a concise primer, see Wikipedia: Allspice; for a friendly culinary explainer, glance at Food & Wine: What Is Allspice?.
The Master Mix for Homemade Pumpkin Pie Spice (Volume + Weight)
Before we branch into chai pumpkin spice, ginger-forward, or clove-light variants, let’s establish a balanced base you can scale anywhere.
By volume (about 6 Tbsp total)
3 Tbsp cinnamon
2 tsp ginger
2 tsp nutmeg
1½ tsp allspice
1½ tsp cloves
By weight (for precision)
Cinnamon 30 g · Ginger 8 g · Nutmeg 8 g · Allspice 4 g · Cloves 4 g
Stir thoroughly and store airtight. For a 9-inch pie filling, use 1–1½ tsp; for batters, beverages, and oats, start with ½–1 tsp per cup and adjust to taste. Even so, for bolder aroma, consider the technique below.
Technique That Matters: Toast or Bloom Your Spice Blend
First, toasting whole spices amplifies volatile aromatics; second, blooming ground spices in a little fat or syrup dissolves fat-soluble flavor compounds so they perfume the dish rather than taste dusty. Practically speaking, warm whole spices gently in a dry skillet just until fragrant; cool; then grind and blend. Alternatively, in wet recipes, bloom the spice mix 30–60 seconds in melted butter or warm syrup before adding the rest. For the why and how, see Blooming Spices (Serious Eats).
Variations of Homemade Pumpkin Pie Spice You’ll Actually Use
Because palates vary—and because different recipes benefit from different accents—use the master mix as a base and nudge it thoughtfully:
Chai-leaning pumpkin spice — add ½ tsp cardamom and a pinch of black pepper to each 6-Tbsp batch for cozy tea-house vibes; for extraction cues (blooming/tempering), borrow method ideas from MasalaMonk’s chai recipes.
Ginger-forward pumpkin spice — increase ginger by 25–50% for snappier cookies and quick breads.
Clove-light pumpkin spice — halve cloves; slightly increase allspice for warmth without intensity.
Savory pumpkin spice — omit cloves and allspice; add a whisper of coriander and white pepper for squash soups and roasted vegetables (see a primer on toasting seeds in MasalaMonk’s coriander insights).
Apple-pie crossover — reduce nutmeg and boost cinnamon; this leans more fruit-forward while staying familiar.
Furthermore, remember: many seasonal items rely on the spice blend alone; actual pumpkin purée is optional depending on the recipe.
Classic Pumpkin Pie from Scratch (Using Your DIY Blend)
Makes one 9-inch pie · Bake 45–55 minutes
Filling (one 9-inch pie)
2 large eggs + 1 yolk
1⅔ cups pumpkin purée
¾ cup evaporated milk or cream (full-fat coconut milk works, too)
½ cup brown sugar + ¼ cup white sugar
1½ tsp homemade pumpkin pie spice
½ tsp fine salt
1 tsp vanilla (optional)
Method (precise yet simple)
Whisk filling until smooth.
Pour into a partially baked crust.
Bake at 190 °C / 375 °F until edges set and the center softly quivers. For a silky custard, pull around 65–70 °C / 150–160 °F (yes, a thermometer helps). See ThermoWorks: Secrets to Silky Pumpkin Pie for doneness cues.
Tip: Many “pumpkin” pies benefit from sweet squashes; if you enjoy a denser, slightly sweeter profile, try a butternut-forward purée.
Because the blend is flexible—and because busy mornings demand shortcuts—mix it into simple templates you can repeat all season. Additionally, the internal guides below help with ratios, texture, and make-ahead strategies.
Overnight oats with pumpkin spice — stir ½ tsp spice + 2 tsp maple per cup of oats; for method fundamentals and ratios, see Harnessing the Power of Oats and Chia.
Chia pudding (pumpkin spice twist) — use ½ tsp spice per cup of liquid; whisk, rest, whisk again, then chill. For variations and ratio reminders, try Keto Chia Pudding with Almond Milk or this fruit-first angle: Chia-Seed Mango Pudding.
Pumpkin spice granola — toss 2 tsp spice per ~8 cups of oats/nuts before baking. Because DIY granola lets you control sweetness and oil, skim Weight-Loss-Friendly Granola Tips.
Pumpkin spice syrup for coffee or tea — bloom 1–2 tsp spice in simple syrup; then use 1–2 Tbsp per cup of coffee, tea, or steamed milk. For spice-first extraction cues (very chai-adjacent), see MasalaMonk’s chai methods.
Roasted squash & roasted pumpkin seeds — for 500 g squash: 1 tsp blend + ½ tsp salt; for seeds: 1 tsp blend per 2 cups seeds, roast low and slow.
Smoothies — for additional fall flavor, fold the blend into pumpkin-seed smoothies; start with these pumpkin seed smoothie ideas.
Nutrition Notes
Pumpkin—and its close cousins like butternut and kabocha—naturally brings fiber and beta-carotene to the table, so every slice or spoonful feels a little more nourishing. Meanwhile, roasted pepitas (pumpkin seeds) add gentle protein, useful minerals, and satisfying crunch, which means your pies, oats, and salads can taste indulgent yet still feel balanced.
If you’re curious about exact numbers, you can quickly verify them. First, head to USDA FoodData Central; then, use its FoodData Central search to look up specific entries like pumpkin purée or roasted seeds. For faster snapshots, you might also check MyFoodData’s canned pumpkin and MyFoodData’s roasted pepitas; however, when you need the most authoritative citation, it’s still best to reference USDA.
Finally, as you fold this homemade pumpkin pie spice into breakfasts or desserts, consider a small sprinkle of pepitas on top. Not only do they add texture, but they also gently boost protein—so your cozy fall treats feel just a bit more sustaining.
Storage & Freshness (So Your Blend Stays Vibrant)
Because ground spices fade, store your homemade pumpkin pie spice in an airtight jar away from light and heat; label it and use within several months for best aroma. Whenever possible, buy whole spices, toast lightly, and grind just before blending; consequently, you’ll extend flavor and control texture. Curious about the chemistry? Revisit the blooming/tempering guide to see how gentle heat unlocks fat-soluble aromatics.
FAQs about Homemade Pumpkin Pie Spice
1) What is homemade pumpkin pie spice made of?
A classic DIY pumpkin spice blend usually includes cinnamon, ginger, nutmeg, allspice, and cloves. Moreover, you can tweak ratios—for instance, go ginger-forward for snap or clove-light for a gentler finish.
2) How much pumpkin spice should I use in a 9-inch pumpkin pie?
As a rule of thumb, start with 1–1½ teaspoons of your homemade pumpkin pie spice per pie filling; then, adjust to taste after a quick test bake or by spoon-testing a warm sample of the custard.
3) How much should I add to coffee, tea, or lattes?
Begin with ¼–½ teaspoon per cup. For even fuller aroma, first bloom the spice in a spoon of hot syrup or milk, and then stir it into the drink.
4) Can I make a chai-leaning pumpkin spice?
Absolutely. Simply add a pinch of black pepper and ½ teaspoon cardamom per small batch; consequently, you’ll get cozy chai vibes without overpowering sweetness.
5) What if I find cloves too strong?
However tasty cloves are, they can dominate. Halve the cloves and, if you like, nudge up allspice slightly to keep warmth without harshness.
6) What exactly is allspice—is it a mix?
Despite the name, allspice is not a blend. Instead, it’s the dried berry of Pimenta dioica that tastes like a natural echo of cinnamon, nutmeg, and clove.
7) How long does homemade pumpkin pie spice stay fresh?
Generally, ground blends are most vibrant for 3–6 months in an airtight jar kept cool, dark, and dry. Beyond that, flavor slowly fades—so, label the date and mix smaller batches.
8) Should I toast or bloom the spices?
Yes—first toast whole spices lightly before grinding for deeper aroma; second, bloom ground spice 30–60 seconds in warm fat or syrup. Consequently, your recipes taste rounder and less “dusty.”
9) Can I make a savory pumpkin spice for soups and roasted veg?
Certainly. Omit cloves and allspice; meanwhile, add a whisper of coriander and a pinch of white pepper. Then, use about 1 teaspoon per 500 g of squash or veg plus salt.
10) What’s the difference between pumpkin pie spice and apple pie spice?
Both are warmly spiced; nevertheless, apple-pie blends often lean heavier on cinnamon and lighter on nutmeg/clove. If you want a crossover, simply reduce nutmeg a touch and keep cinnamon prominent.
11) Can I substitute mace for nutmeg or skip allspice?
Yes. Use ½ the amount of mace for nutmeg to start (mace is potent). If you’re out of allspice, replace it with equal parts cinnamon and nutmeg, then taste and adjust.
12) Is the blend vegan and gluten-free?
By default, yes—the spices are plant-based and gluten-free. Still, check for cross-contamination warnings if allergies are a concern, and, importantly, avoid anti-caking additives if you need a very clean label.
13) Should I use fresh pumpkin purée or canned for pie?
Either works. Canned is consistent and convenient; meanwhile, fresh (or sweet winter squash like butternut) can taste slightly sweeter and denser. In any case, drain watery purée to avoid a loose custard.
14) How do I fix a too-spicy or clove-heavy mix?
First, dilute by adding more cinnamon and a pinch of ginger. Next, retest in a small batch (e.g., oatmeal) before using it in a full pie. In short, balance intensity before you scale up.
15) What are smart storage practices for maximum flavor?
Store your DIY blend in a small, opaque, airtight jar; furthermore, keep it away from heat, light, and moisture. If possible, grind just what you need monthly and top up in small increments.
16) Can I use the blend beyond desserts—say, in breakfasts?
Definitely. Try overnight oats, granola, chia pudding, and smoothies. Subsequently, you’ll get cozy flavor with little effort—start around ½–1 teaspoon per cup of base and refine from there.