If you’ve ever wanted to enjoy the zesty, vibrant experience of a margarita without the alcohol, you’re in the right place. Whether you’re looking to reduce alcohol intake, want something inclusive for all ages at your party, or simply love the flavor of citrus-forward cocktails, a well-crafted margarita mocktail hits all the right notes.
This guide walks you through everything you need to know to create the perfect margarita mocktail. From understanding flavor balance to experimenting with advanced techniques, we’ll cover it all.
🌿 Why Choose a Margarita Mocktail?
Margarita mocktails aren’t just substitutes for the real thing; they’re exciting, refreshing drinks in their own right. They offer:
- Complex flavor profiles
- Room for creativity
- A guilt-free experience
- Health-conscious ingredients
🍹 The Classic Margarita Mocktail Formula
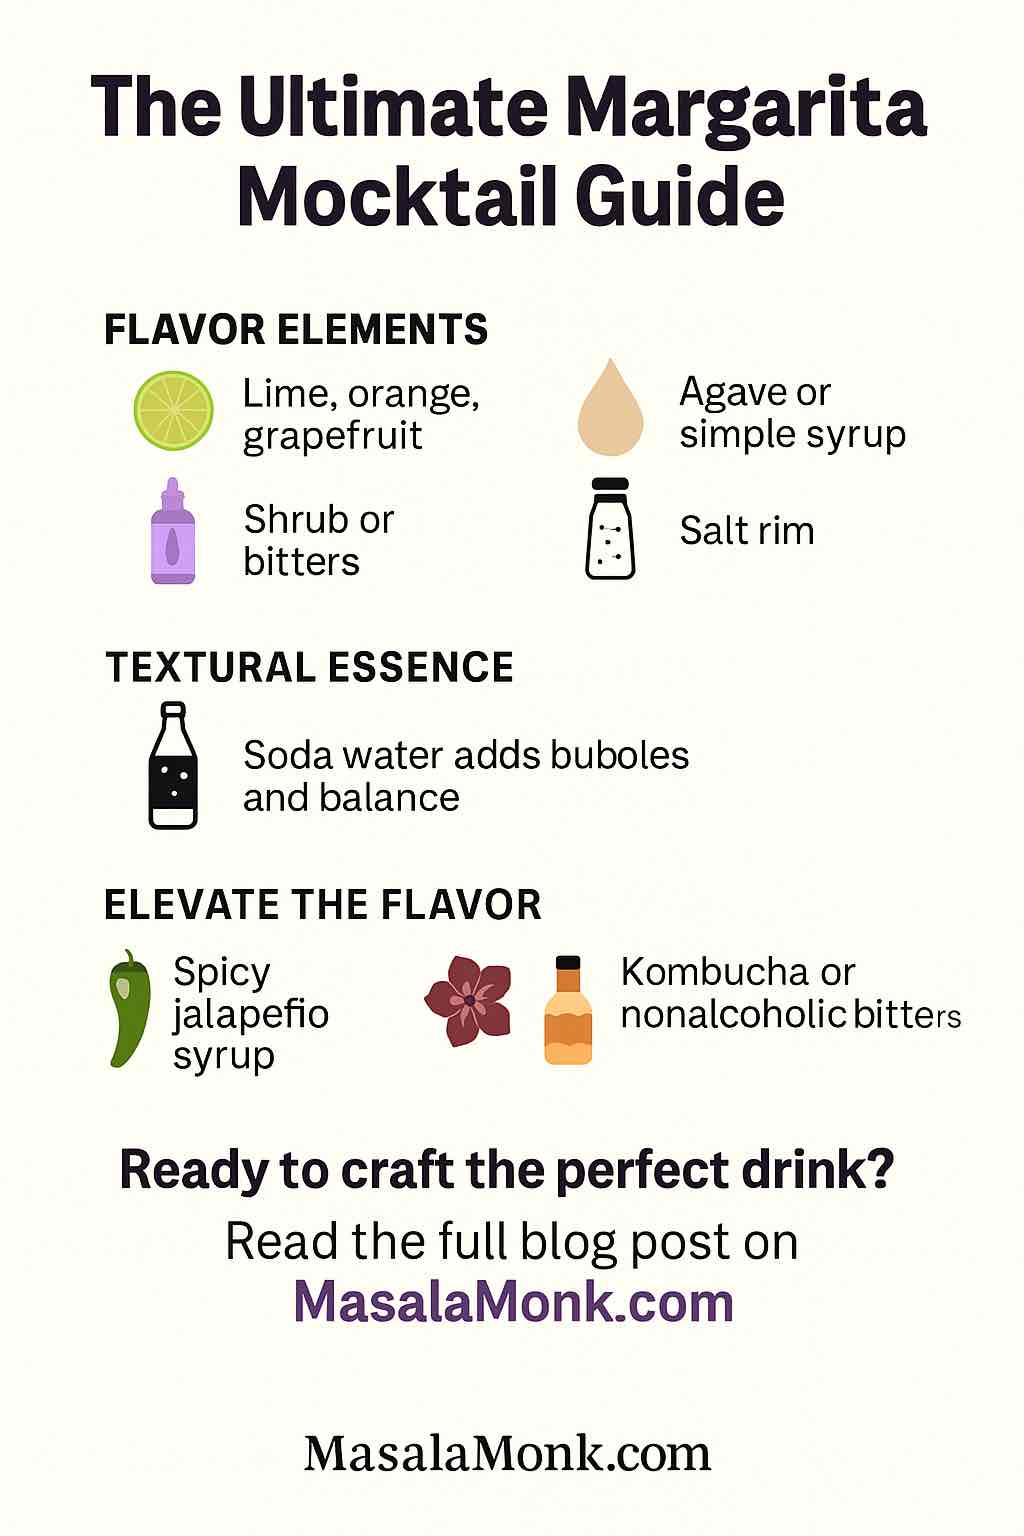
At its heart, a good margarita mocktail requires a balance of four core flavors:
- Sour: Fresh lime juice is the star
- Sweet: Agave syrup, simple syrup, or honey
- Bitter: Optional, but helps simulate the depth of tequila
- Salty: Rim of the glass to enhance taste
Base Recipe (Single Serving):
- 1.5 oz fresh lime juice
- 0.5 oz orange juice
- 0.75 oz agave syrup (adjust to taste)
- 2 oz sparkling water (or club soda)
- Ice
- Salt or Tajín for the rim
Steps:
- Rim your glass: Rub a lime wedge around the edge and dip into salt or Tajín.
- In a shaker, combine lime juice, orange juice, and agave syrup with ice.
- Shake vigorously for 10–15 seconds.
- Strain into the rimmed glass filled with fresh ice.
- Top with sparkling water and gently stir.
- Garnish with a lime wheel or wedge.
🧠 Flavor Variations to Elevate Your Mocktail
🍓 1. Strawberry Lime Margarita Mocktail
- Muddle 2–3 ripe strawberries before shaking
- Use a splash of elderflower syrup for floral depth
- Garnish with a basil leaf
🥚 2. Spicy Jalapeño Grapefruit
- Add 2 slices of fresh jalapeño to the shaker
- Substitute orange juice with fresh grapefruit juice
- Use Tajín and smoked salt for the rim
🧉 3. Cucumber Mint Cooler
- Muddle cucumber and mint in the shaker
- Use honey syrup instead of agave
- Top with cucumber sparkling water
🌸 4. Hibiscus Basil Margarita
- Make a hibiscus-basil syrup (steep dried hibiscus and fresh basil in hot sugar water)
- Replace plain agave with this syrup
- Garnish with edible flowers
🧬 Advanced Techniques for Flavor Depth
Use Non-Alcoholic Spirits: Brands like Lyre’s and Ritual offer zero-proof tequilas that can replicate the agave complexity.
Infused Syrups: Homemade syrups with herbs (rosemary, thyme), spices (ginger, cinnamon), or chiles can introduce new layers of flavor.
Shrubs & Vinegars: A dash of apple cider vinegar or a fruit shrub adds brightness and a subtle bite.
Bitters: Use alcohol-free bitters to round out your mocktail. Just a few drops can mimic complexity.
🪜 Tips for Hosting with Mocktails
- Create a DIY Station: Let guests rim their glasses and choose garnishes.
- Serve in Pitchers: Multiply the base recipe and top with sparkling water just before serving.
- Offer Variety: Prepare a few different syrups and juice bases in advance.
🕊️ Final Thoughts
Crafting a perfect margarita mocktail isn’t about mimicking alcohol—it’s about building something new and just as satisfying. With fresh ingredients, balanced flavors, and a little creativity, you can turn any gathering (or solo evening) into a fiesta.
Whether you prefer yours fruity, spicy, herbal, or frozen, the key is to start with quality ingredients and adjust based on your taste. Don’t be afraid to experiment, taste as you go, and most importantly, enjoy the process.
Cheers to mocktail magic!
Frequently Asked Questions (FAQs)
1. Can I make a margarita mocktail without a shaker?
Yes! Use a mason jar with a lid or stir the ingredients vigorously in a glass before adding ice and soda. Just be sure to mix well.
2. What’s the best substitute for agave syrup?
You can use honey syrup (equal parts honey and water), maple syrup, or simple syrup (sugar + water) based on your flavor preference.
3. Can I make it ahead of time?
Yes, but only the base (juice + sweetener) should be prepped ahead. Add sparkling water and ice just before serving to retain fizz.
4. What if I want a frozen version?
Blend the base ingredients with a cup of ice until slushy. Skip the soda or add a splash after blending for a fizzy twist.
5. How do I make it spicy without it being overwhelming?
Use 1–2 thin jalapeño slices in the shaker and strain them out. Adjust based on heat tolerance.
6. Is there a low-sugar version of this mocktail?
Yes! Use fresh juices and opt for stevia or monk fruit sweetener. Also, unsweetened sparkling water helps cut sugar.
7. Can kids drink this?
Absolutely. It’s alcohol-free and can be adjusted in sweetness or sourness to suit younger palates.
8. Are there ready-made zero-proof tequilas that are worth trying?
Yes, brands like Ritual, Lyre’s, and Monday offer alcohol-free tequilas that add depth and authenticity.
9. What’s the difference between using sparkling water vs. tonic or soda?
Sparkling water is neutral, while tonic adds bitterness and soda adds sweetness. Choose based on your flavor goal.
10. How do I rim the glass professionally?
Moisten the glass rim with a lime wedge, then roll it in a mix of coarse salt, sugar, or Tajín on a flat plate. Chill the glass for a clean finish.