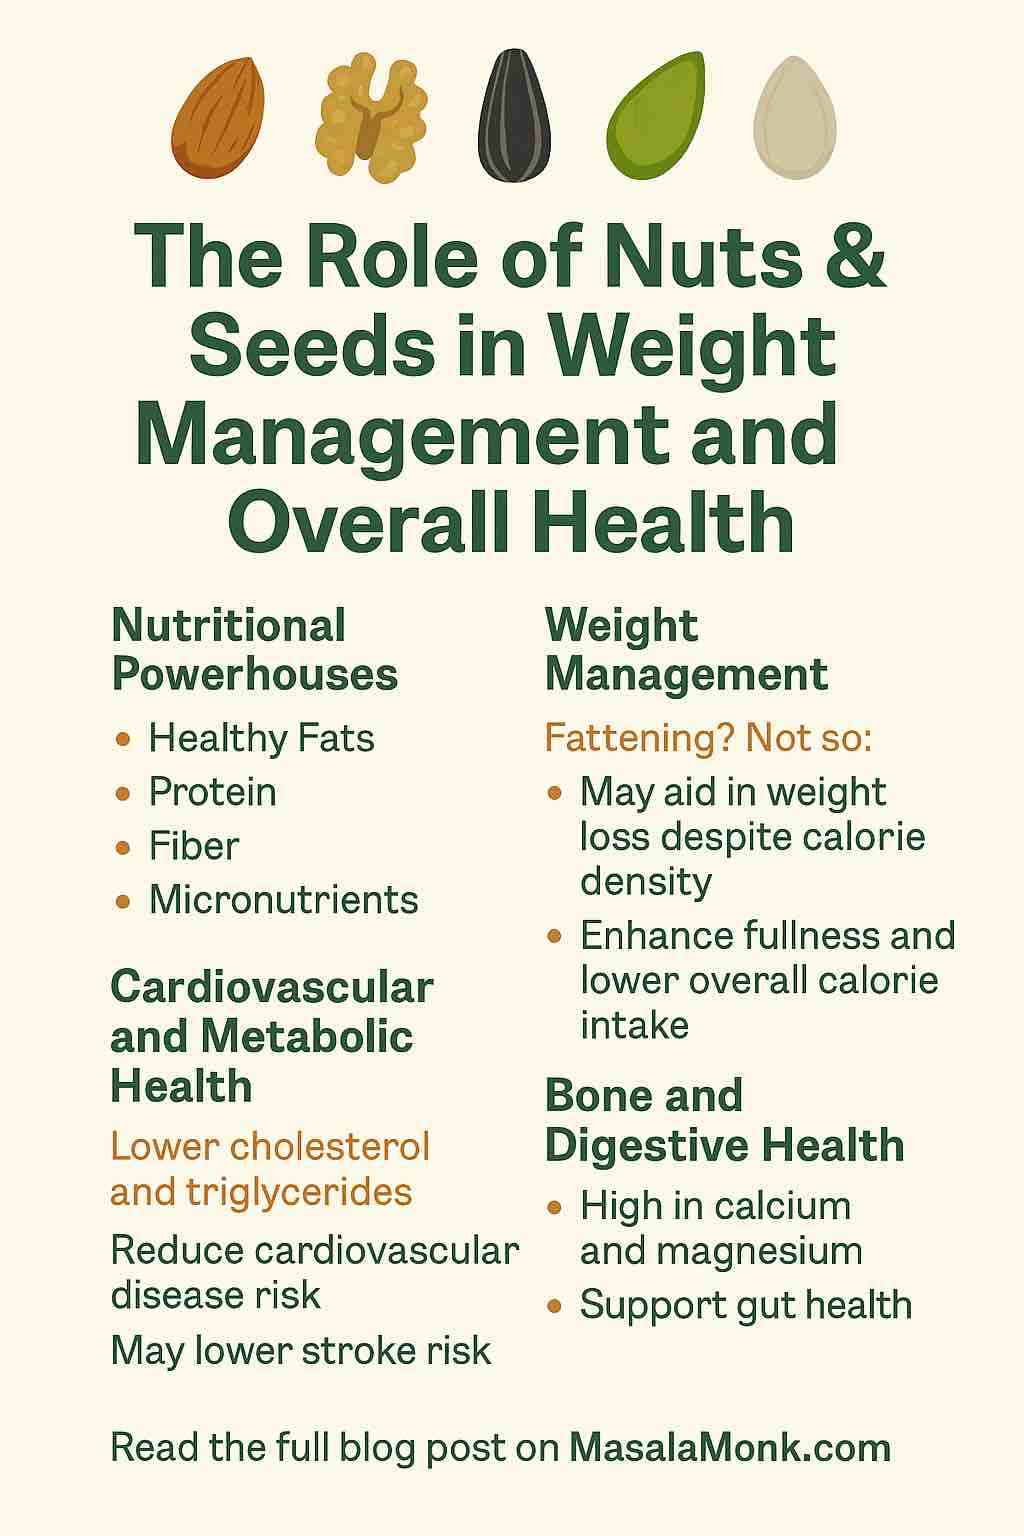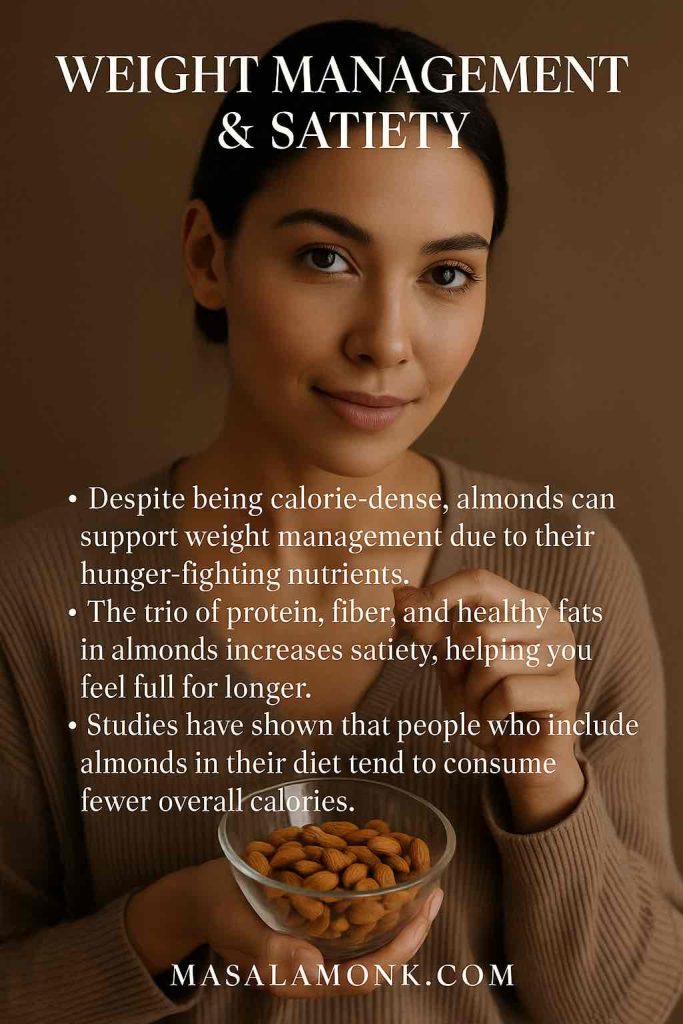
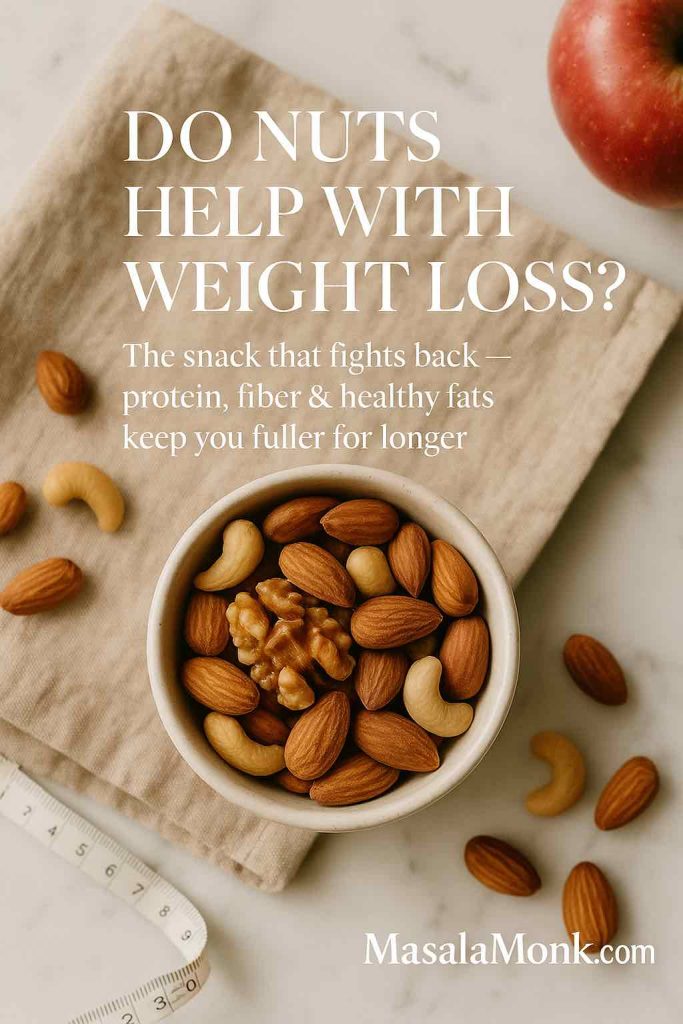
When most people think of nuts, the first thing that comes to mind is calories. It’s true: nuts are calorie-dense. A small handful can pack in 150–200 calories, which may seem counterintuitive if you’re trying to lose weight. But here’s the surprise — research consistently shows that people who include nuts in their diets often have lower body weight, smaller waistlines, and better metabolic health compared to those who avoid them.
So, what makes nuts special? Their unique balance of protein, healthy fats, and fiber works together to curb hunger, stabilize blood sugar, and keep cravings at bay. Instead of reaching for processed snacks that leave you hungrier, nuts can help you feel satisfied for longer.
👉 Quick answer if you’re in a hurry:
The best nuts for weight loss are almonds, walnuts, pistachios, and peanuts. These are high in protein and fiber, support fat metabolism, and fit easily into a balanced diet.
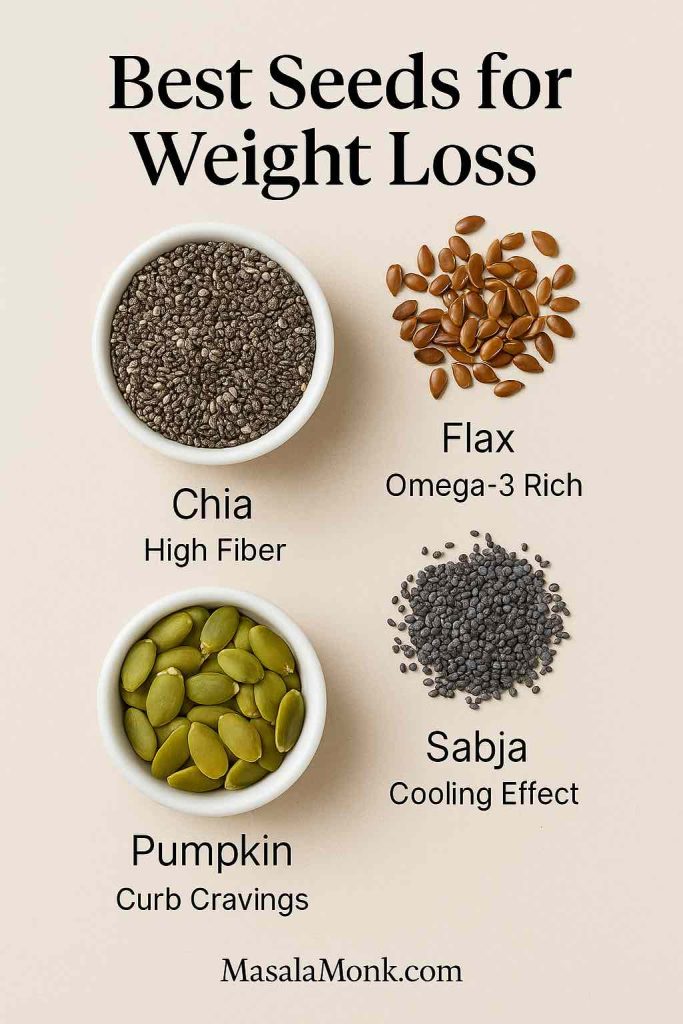
Also Read: Best Nuts and Seeds for Weight Loss (Chia, Flax, Almonds & More)
But the real magic lies in the details — and that’s what we’ll explore next.
Why Nuts Can Help With Weight Loss
Nuts aren’t a “miracle food,” but they offer a combination of qualities that make them perfect for anyone looking to shed extra pounds:
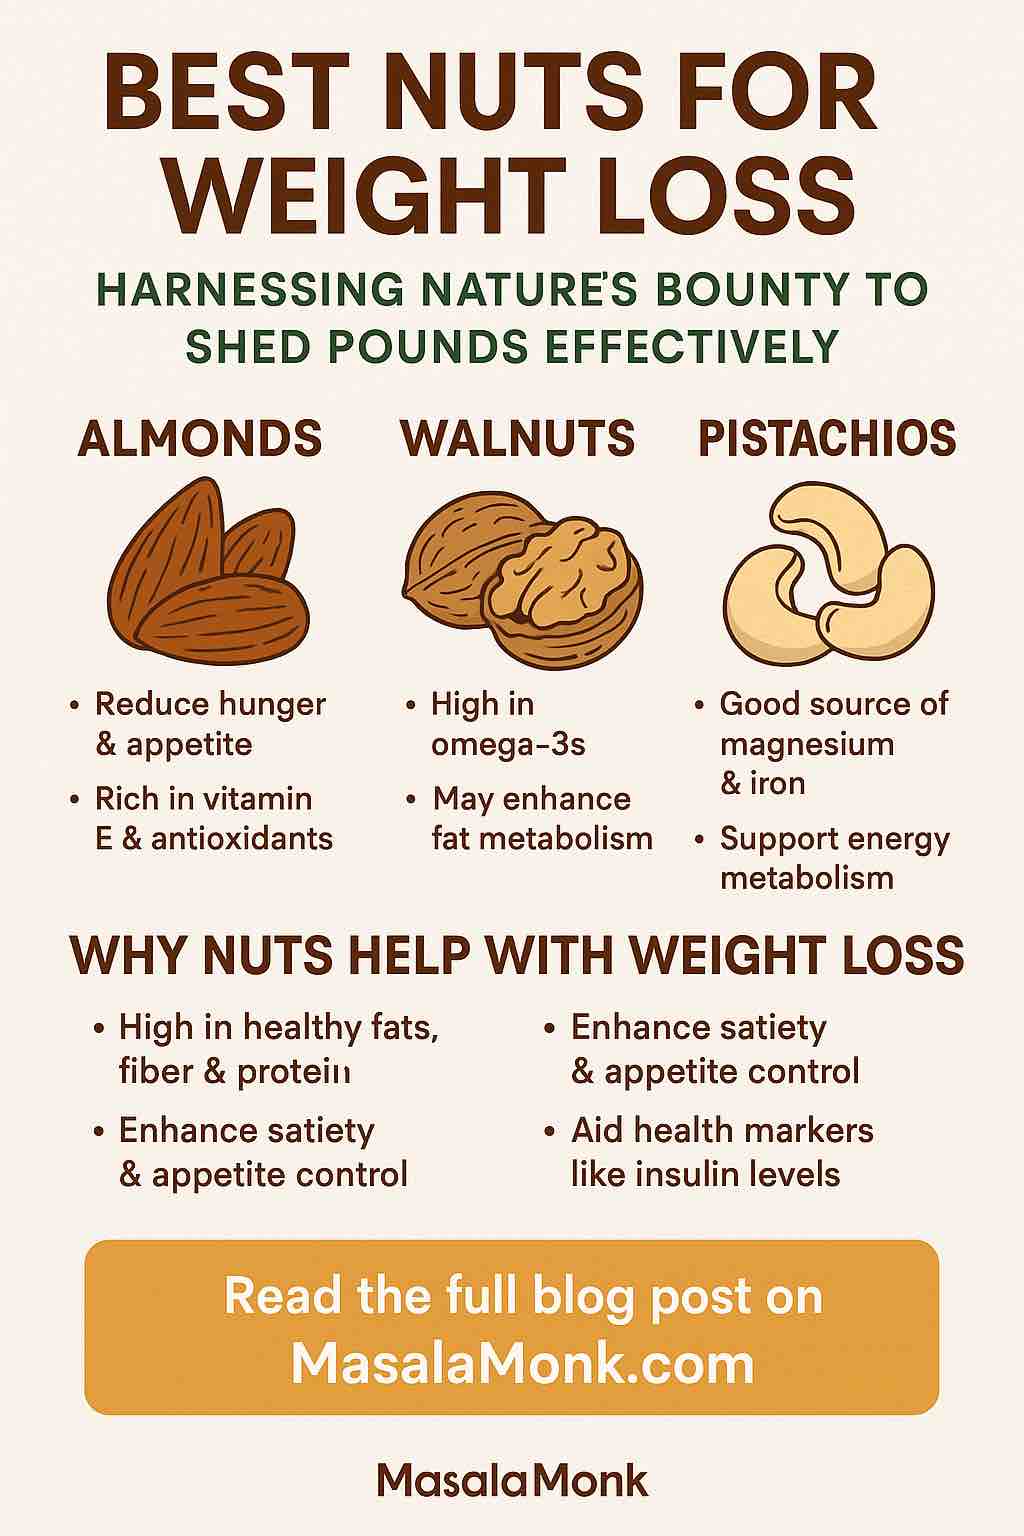
- Protein power: Protein boosts satiety and helps preserve lean muscle while you’re losing fat.
- Fiber for fullness: The fiber in nuts slows digestion, which means you stay fuller for longer and snack less.
- Healthy fats: Monounsaturated and polyunsaturated fats keep blood sugar levels stable, preventing the crash-and-crave cycle.
- Thermogenic effect: Studies suggest that nuts slightly increase calorie burn during digestion, meaning your body uses more energy to process them.
- Portion control friendly: Unlike chips or cookies, a small handful of nuts is often enough to satisfy hunger — provided you stick to a modest portion.
Now that we know why nuts can help, let’s dive into the specifics. Each nut has its own unique set of nutrients and benefits, and some are more powerful for weight loss than others.
Do Read: How to Eat 100 Grams of Protein a Day
Best Nuts for Weight Loss (Ranked and Explained)
If you’ve ever wondered why so many weight-loss experts recommend nuts, the answer is simple: they’re a snack that fights back. While chips, cookies, or candy bars give you a quick hit of sugar or salt followed by a crash, nuts provide steady energy, hunger control, and real nutrition.
Still, not every nut is equal when it comes to losing weight. Some are better at curbing appetite, others support fat metabolism, and a few are best eaten in moderation. The goal isn’t to eat them by the bucket, but to use the right nut, in the right portion, at the right time.
Let’s go nut by nut—starting with almonds and walnuts, two heavyweights in the weight-loss world—so you’ll know exactly why to include them in your diet and how to do it without sabotaging progress.
Almonds for Weight Loss
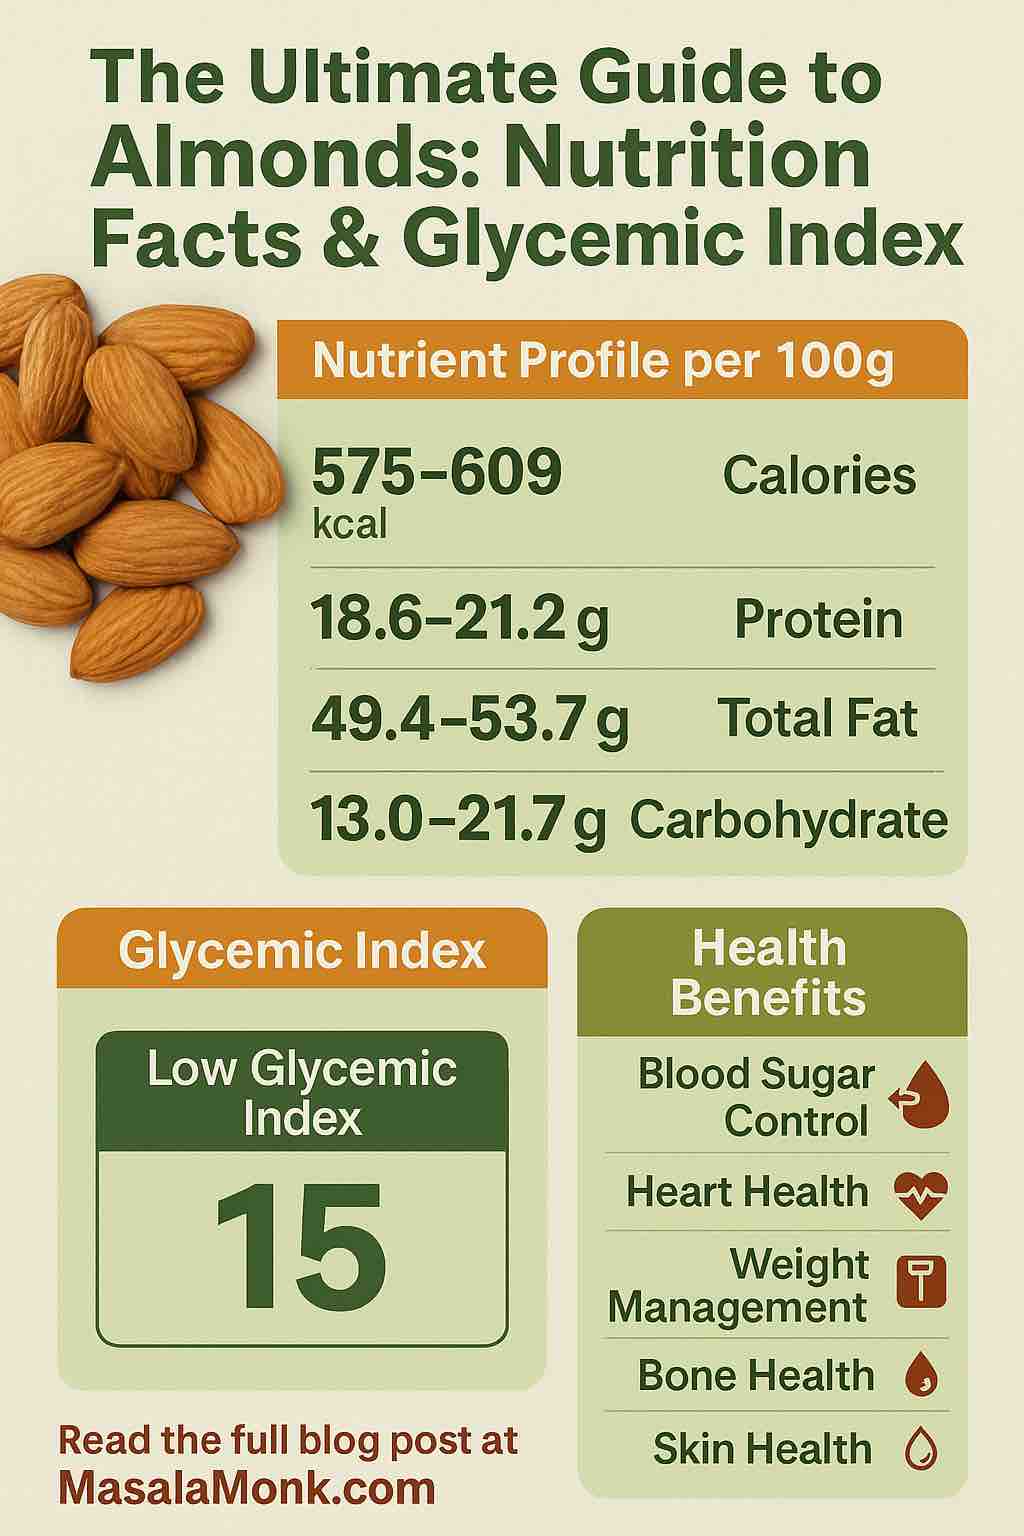
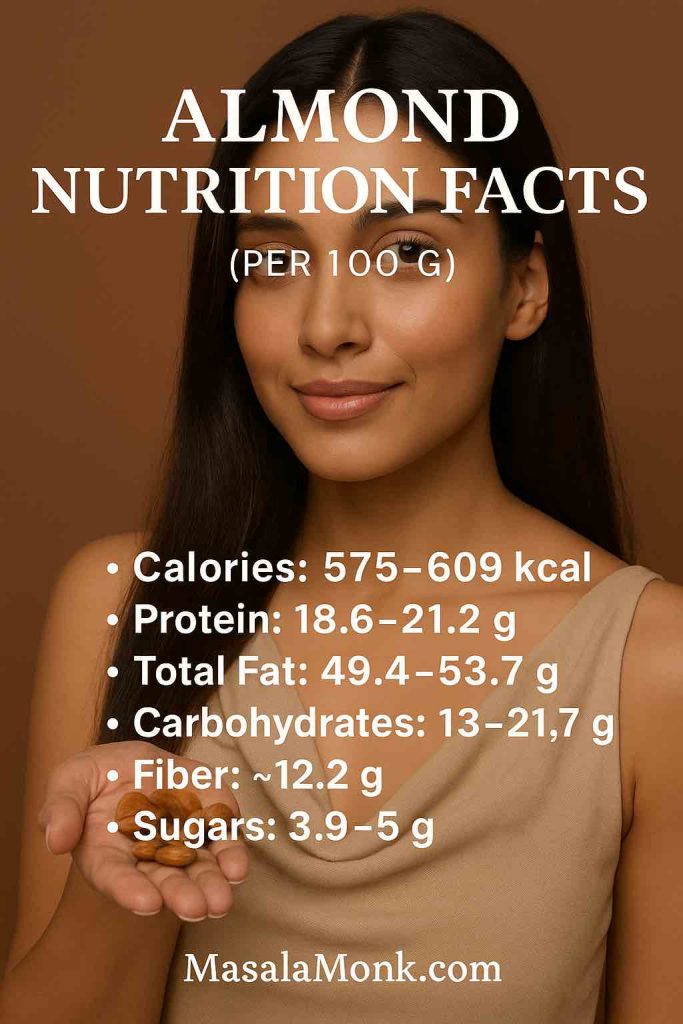
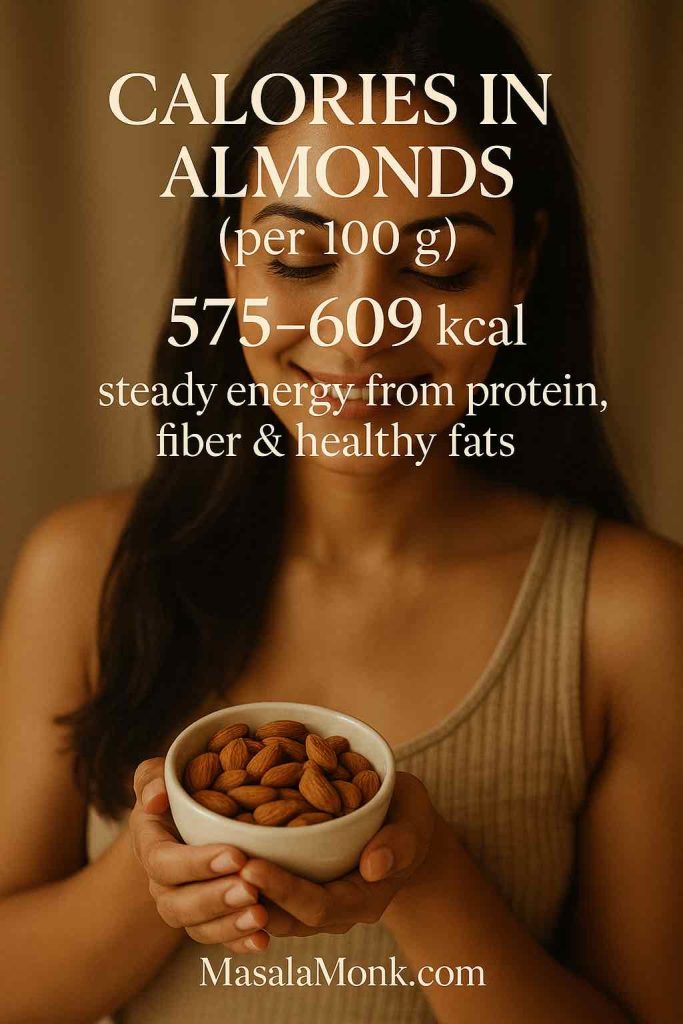
Almonds are the superstar of weight-loss nuts, and for good reason. They’re rich in protein, fiber, and healthy fats—all nutrients that slow digestion and keep you feeling satisfied. Ever notice how a handful of almonds leaves you full far longer than a handful of crackers? That’s the almond advantage.
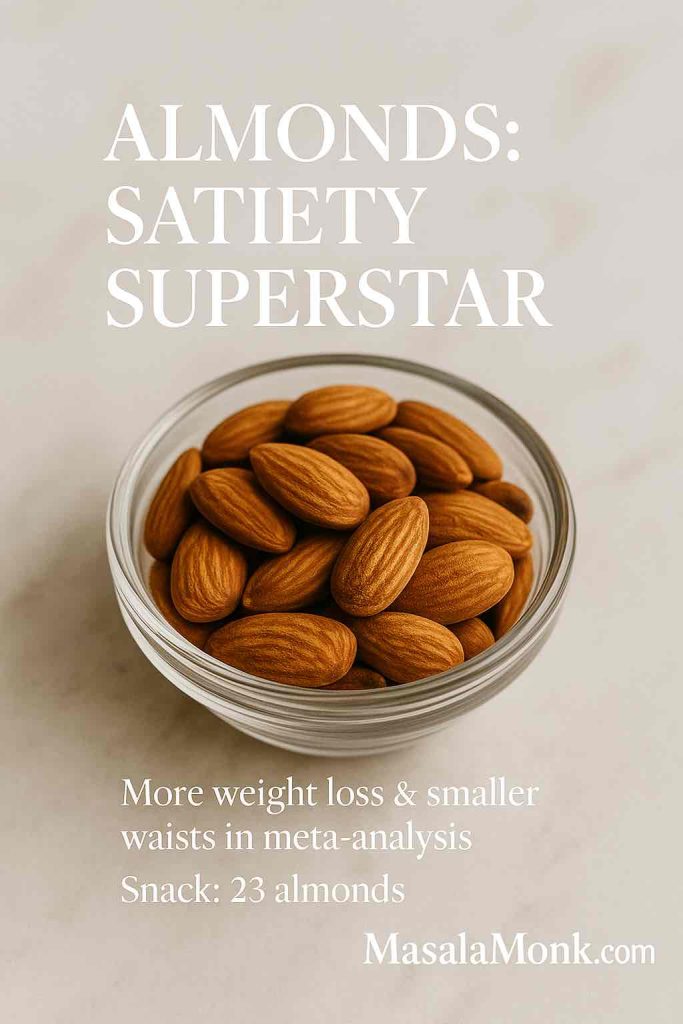
But it’s not just a feeling—research backs it up. A meta-analysis of 62 clinical trials found that people who included almonds in their diet lost more weight, had lower BMI, and trimmed their waistlines compared to those who didn’t. The waist reduction was especially significant—around 2.4 cm on average (NIH study). Another study from Oregon State University showed that swapping a daily muffin or cracker snack for almonds led to smaller waists, better cholesterol levels, and even healthier gut bacteria (Oregon State News).
💡 How to add almonds to your weight-loss diet:
- As a snack: Carry a small handful (about 23 almonds). The crunch satisfies the need to chew, and the portion is just enough to tide you over without excess calories.
- At breakfast: Sprinkle slivered almonds on oatmeal, chia pudding, or Greek yogurt.
- In meals: Toss roasted almonds into salads for crunch instead of croutons, or blend them into smoothies.
- With fruit: Pair almond butter (unsweetened) with apple or banana slices for a filling, fiber-rich snack.
⚠️ Watch out for: Honey-roasted or salted almonds. They may taste good but often add extra sugars and sodium, undoing the weight-loss benefits.
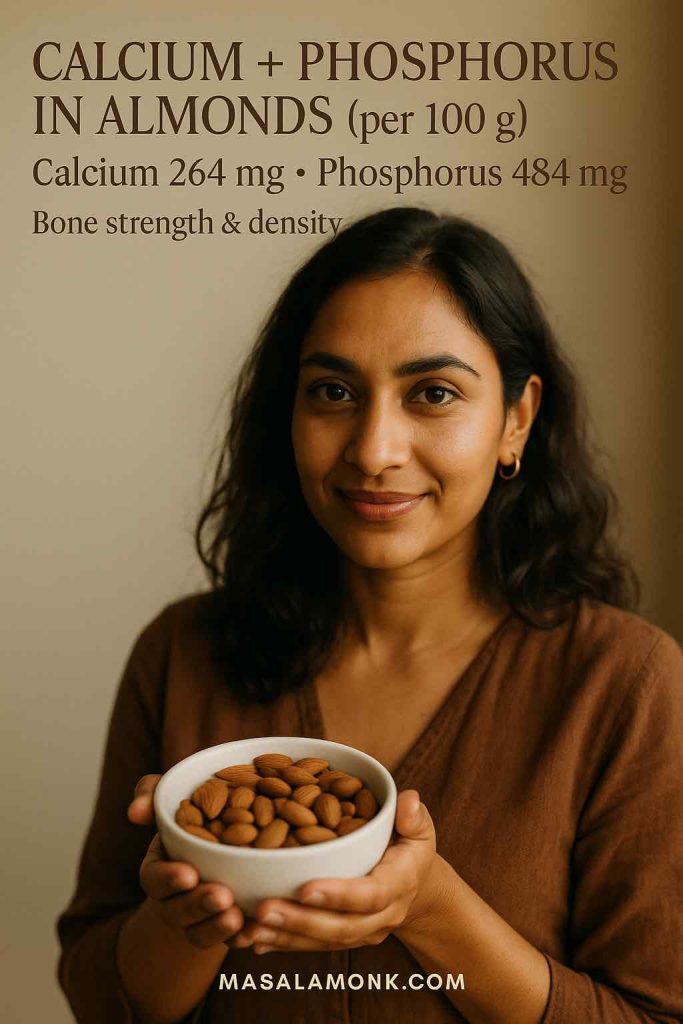
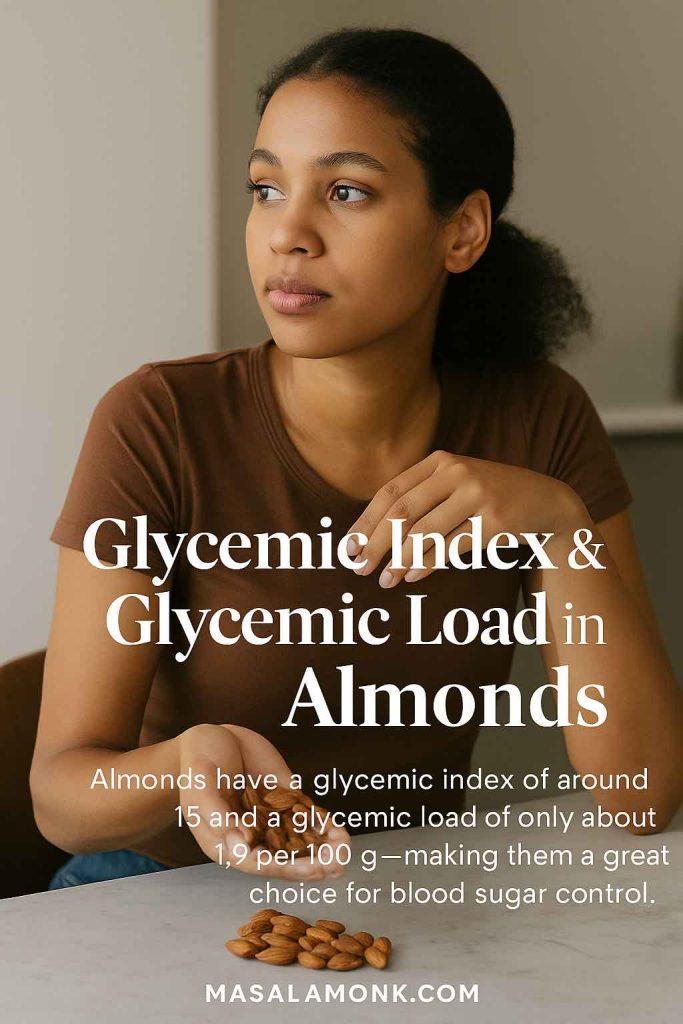
Also Read: Almonds Nutrition Facts 100g & Glycemic Index Impact
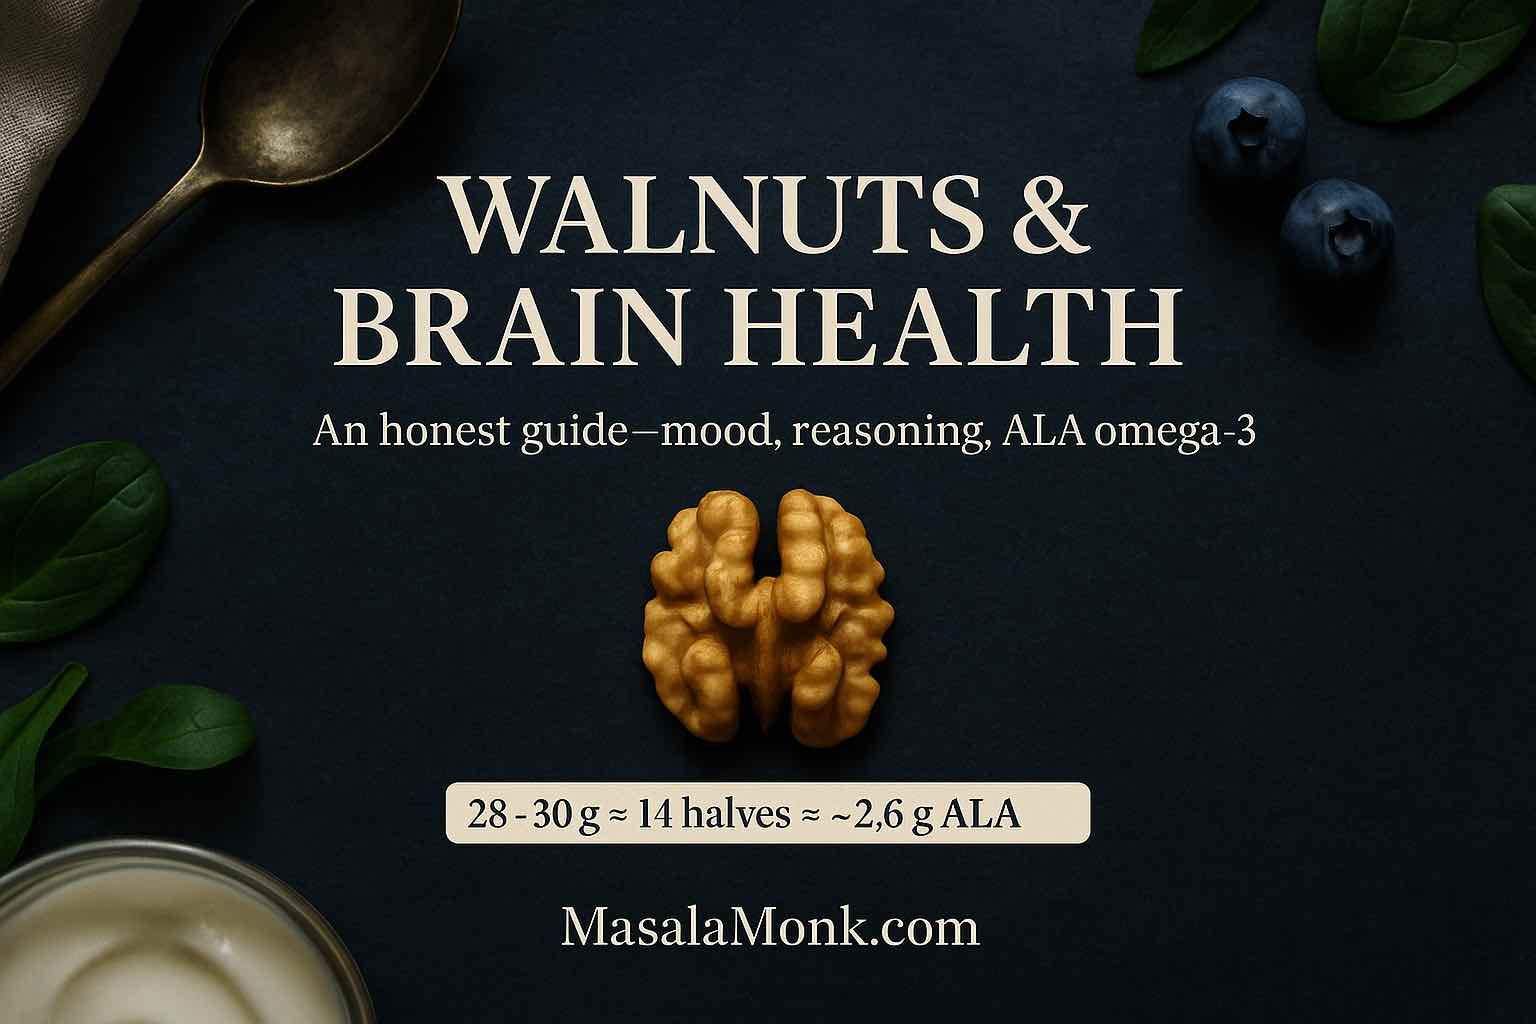
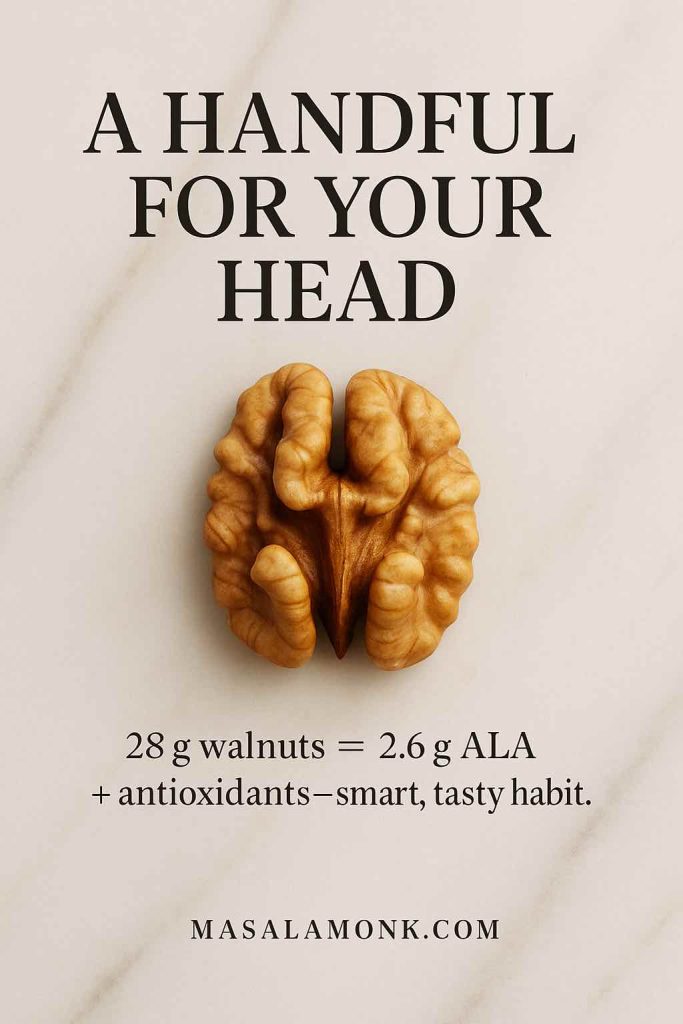
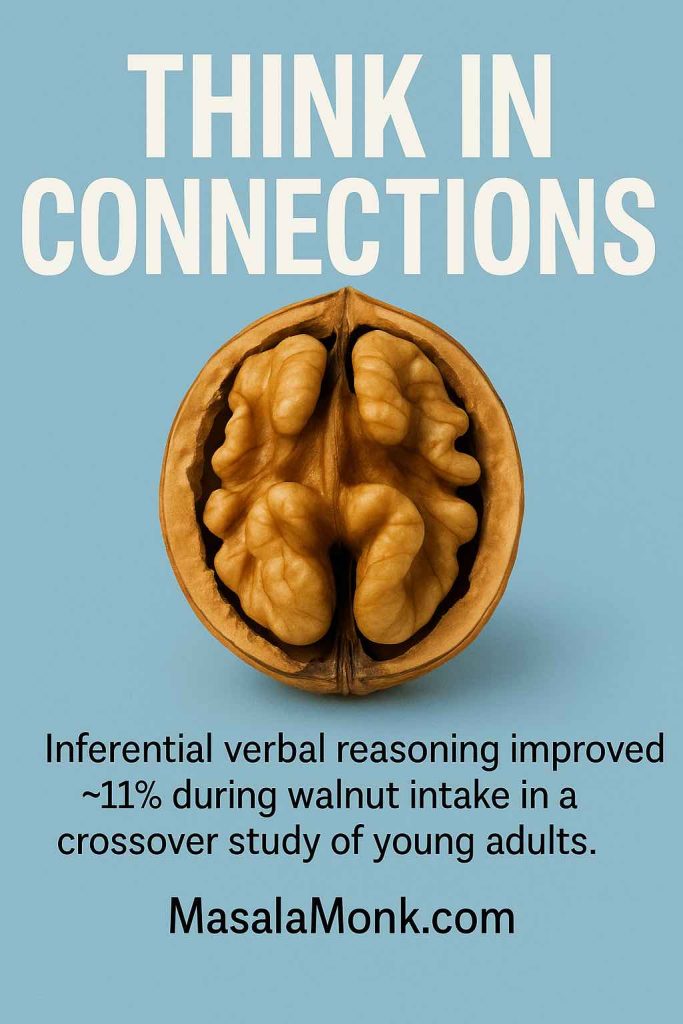
Walnuts for Weight Loss
Walnuts are a little different. They may not lead to dramatic weight loss on their own, but they play an essential supporting role. Packed with omega-3 fatty acids, they’re fantastic for heart health and may help regulate appetite.
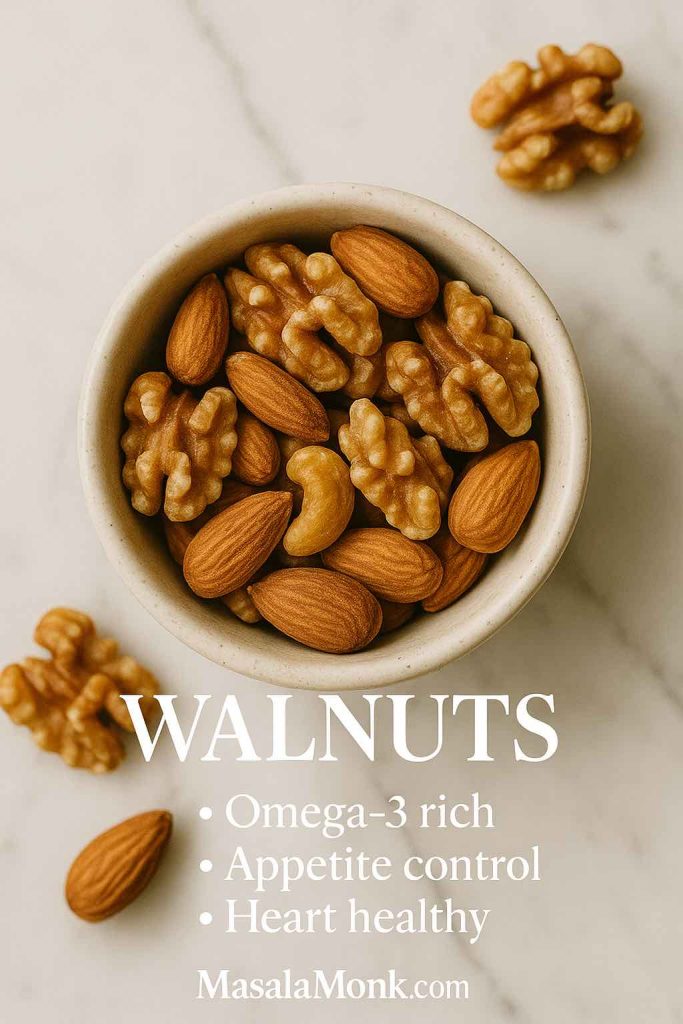
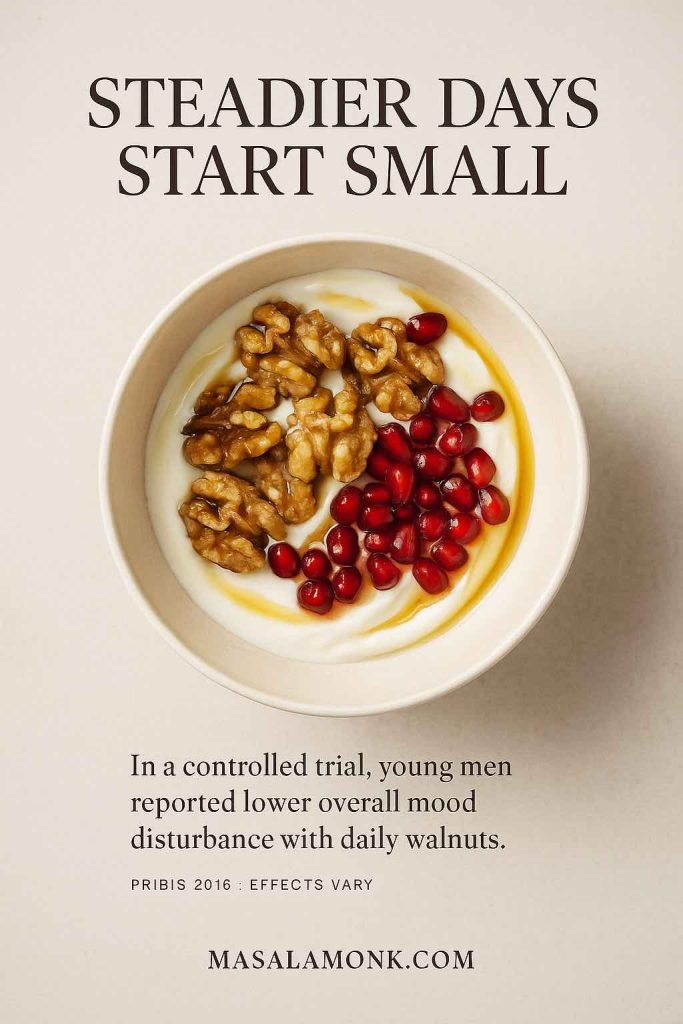
A randomized controlled trial published in Nutrition Journal showed that people following a reduced-calorie diet including walnuts lost just as much weight as those on a standard low-calorie plan—but with added bonuses. The walnut group had better improvements in blood pressure and cholesterol, which means walnuts can help you slim down while protecting long-term health (Nutrition Journal).
What’s even more fascinating is how walnuts may influence the brain. Researchers at Beth Israel Deaconess Medical Center used brain imaging to show that eating walnuts activated regions linked to appetite control, helping participants feel fuller and resist unhealthy food cravings (Beth Israel Study).
💡 How to add walnuts to your weight-loss diet:
- In breakfast bowls: Stir chopped walnuts into overnight oats, porridge, or smoothie bowls.
- As a salad topper: Use walnuts instead of fried croutons or cheese.
- In cooking: Add crushed walnuts to roasted veggies or grain bowls for texture and healthy fats.
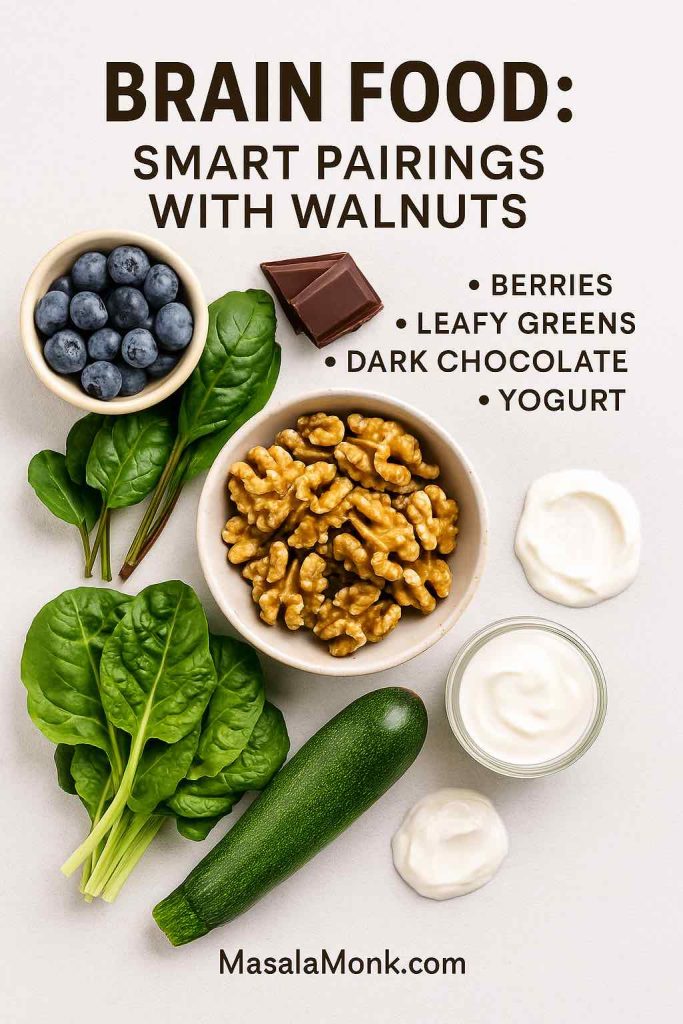
- Snack idea: Mix a few walnuts with a couple of dark chocolate chips for a satisfying treat that curbs sweet cravings without going overboard.
⚠️ Watch out for: Glazed walnuts or candied walnut mixes. They’re loaded with sugar and calories that cancel out the benefits.
Do Read: Walnuts and Weight Loss: Nurturing Health with Nature’s Powerhouse
Pistachios for Weight Loss
Pistachios are often dubbed the “mindful nut” — simply because eating them in-shell makes you slow down and tune into your hunger. That small pause can curb overeating and help you manage portions more naturally.
In fact, pistachios clock in at around 160 calories per ounce (roughly 49 nuts), making them one of the lower-calorie options with good bulk for satisfaction.
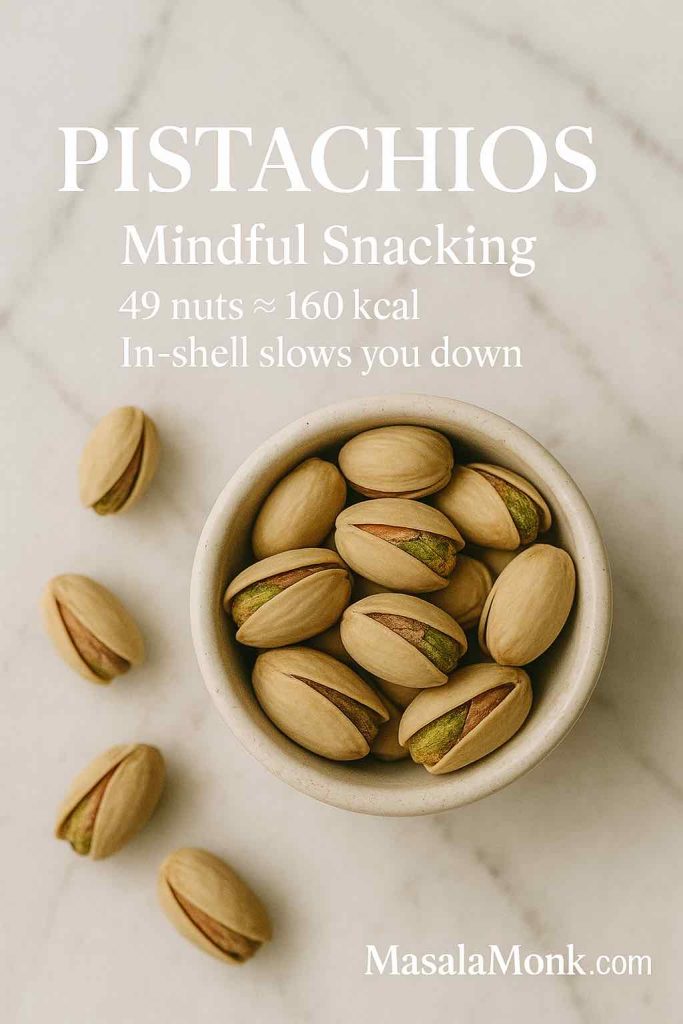
Research backs up their role in weight management: one four-month randomized trial showed that folks adding pistachios daily to their weight-loss efforts lost a similar amount of weight and trimmed their waistlines, plus saw meaningful drops in blood pressure and better nutrient intake (PubMed RCT). A meta-analysis of randomised trials also confirmed that pistachio-rich diets led to small but significant reductions in BMI when compared to controls (PubMed Meta-analysis).
How to add pistachios to your weight-loss diet:
- As a snack: Keep a pre-portioned ounce of in-shell pistachios handy to replace chips.
- Meal topping: Toss shelled pistachios into salads, roasted veggies, or grain bowls for extra bite.
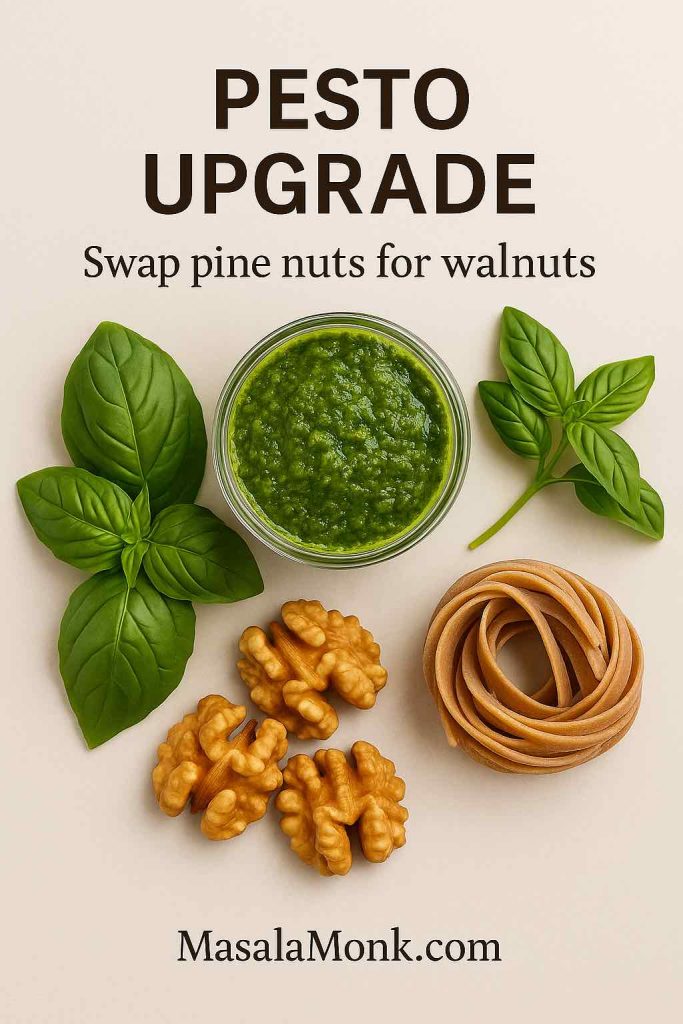
- Sauce boost: Swap pine nuts in homemade pesto with pistachios for a lighter, nutrient-dense twist.
⚠ Watch out for: Salted or flavored pistachios—they can sneak in sodium or sugar that counteracts the benefits. Best to stick with unsalted, in-shell versions.
Suggested Read: Pistachios and Weight Loss: The Green Powerhouse for a Healthy You
Peanuts for Weight Loss
Though technically legumes, peanuts earn their spot on this list. Affordable, protein-rich, and satisfying, they’re a snack-friendly option with real weight-loss benefits.
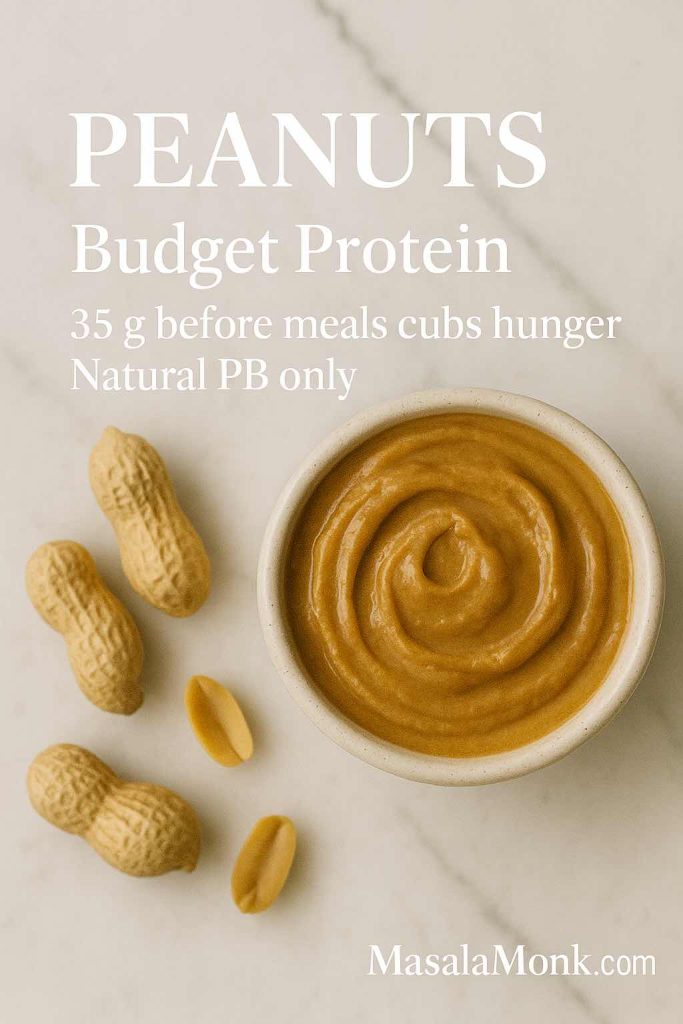
One 6-month randomized controlled trial found that eating 35 g of peanuts before two main meals daily resulted in weight loss comparable to a traditional low-fat diet—but with better reductions in systolic blood pressure (Nutrients RCT). Another study highlighted similar findings, showing minor drops in weight and waist size and improved intake of healthy nutrients when peanuts were part of a structured diet (PubMed ADA-Plan Study).
How to add peanuts to your weight-loss diet:
- Pre-meal snack: Eat a 35 g handful of unsalted, dry-roasted peanuts before a meal to curb hunger.
- Add crunch: Sprinkle crushed peanuts over salads, stir-fries, or noodles for texture and protein.
- Peanut butter hack: Spread natural peanut butter (just peanuts, no added sugar) on fruit or whole-grain toast—but keep it measured.
⚠ Watch out for: Honey-roasted or salted peanuts—they load on sodium and sugar. Peanuts are easy to overconsume, so watch your portion.
Do Read: Peanuts and Weight Loss: Separating Fact from Fiction
Cashews for Weight Loss
Cashews, with their creamy texture, are easy to overlook — yet they can fit into a smart weight-loss strategy when eaten in moderation. A one-ounce serving (about 18 cashews) delivers roughly 155 calories, healthy monounsaturated fats, and essential micronutrients like magnesium and zinc, which support energy and satiety.
Research shows cashews don’t contribute to weight gain when included in a balanced diet. A clinical trial demonstrated that adding 15 g of Brazil nuts and 30 g of cashews to an energy-restricted diet improved body composition — specifically, reducing body fat percentage and improving lean mass — without negatively affecting weight loss progress (Br J Nutr RCT).
Another recent 8-week randomized controlled trial found that individuals consuming cashews experienced similar weight loss compared to controls, but also gained heart and liver health benefits — including reductions in markers like ApoB and improved liver enzymes — when included in a calorie-controlled diet (Front Nutr RCT).
💡 How to add cashews to your weight-loss diet:
- Snack wisely: Stick to around 18 raw or dry-roasted cashews per serving.
- Cooking: Use cashews in curries or stir-fries as a creamy substitute for heavy dairy.
- Nut butter: Opt for natural cashew butter without added sugars or oils.
⚠️ Watch out for: Salted or candied cashews — these can undo the benefits with excess sugar and sodium.
Also Read: Cashews and Weight Loss: Unveiling the Nutritional Gems
Brazil Nuts for Weight Loss
Brazil nuts are standout for their selenium content — just one or two nuts a day generally meet your recommended intake. Selenium is vital for thyroid function, which in turn regulates metabolism and energy levels.
A recent trial in overweight women found that daily consumption of 8 g (~2 Brazil nuts) as part of an energy-restricted diet significantly reduced inflammation markers (like CRP and IL-8) and improved intestinal permeability, compared to a nut-free diet, even though both groups lost similar amounts of weight (J Nutr Controlled Trial). Another study showed that Brazil nut + cashew intake in a restricted diet improved overall body composition (reducing body fat percentage) and selenium status in women at cardiometabolic risk (Br J Nutr RCT).
💡 How to add Brazil nuts to your weight-loss diet:
- Daily dose: Keep it to just 1–2 Brazil nuts per day for selenium support.
- Snack mix: Add one to homemade trail mix for variety and immunity perks.
- Smoothie addition: Blend a single nut in for creaminess and operational nutrition.
⚠️ Watch out for: Overconsumption — Brazil nuts are so rich in selenium that eating more than 4–5 per day regularly can lead to toxicity. Stick to the safe 1–2 nut guideline.
Do Read: Brazil Nuts for Selenium Boost: 5 Morning Smoothies for Balanced Health
Hazelnuts for Weight Loss
Hazelnuts are quietly powerful: fiber + healthy fats + vitamin E make them naturally satisfying, so a small handful can keep you full without feeling heavy. One ounce (about 21 nuts) has ~178 calories and ~4g protein—great for a mid-afternoon tide-you-over snack.
What does the research say? A systematic review and Bayesian meta-analysis found that hazelnut-enriched diets lowered LDL and total cholesterol while BMI remained unchanged—exactly what you want when weight control is the goal (Nutrients meta-analysis) (Perna et al., 2016). A 12-week randomized trial adding 30–60 g/day of hazelnuts improved diet quality and did not adversely affect body composition in overweight adults (PubMed RCT) (Tey et al., 2013).
How to add hazelnuts to your weight-loss diet:
- Snack swap: ~20 raw hazelnuts with coffee/tea instead of biscuits.
- Breakfast crunch: Chop over oatmeal, Greek yogurt, or chia pudding.
- Savory boost: Toast lightly and toss onto roasted veggies or salads.
⚠ Watch out for: Chocolate-coated hazelnuts and sweet spreads (e.g., Nutella) — sugar flips the script.
Do Read: Hazelnuts in Your Diet: 5 Keto Smoothie Ideas for Efficient Weight Loss
Macadamia Nuts for Weight Loss
Buttery macadamias feel “indulgent,” yet in controlled portions they’re weight-neutral and very satiating. One ounce (10–12 nuts) is ~200 calories, mostly heart-healthy monounsaturated fat (think olive-oil vibes), with minimal carbs.
In an 8-week randomized crossover trial in adults with abdominal obesity, adding macadamias (~15% of calories) did not change weight, BMI, body fat, or waist; lipids trended modestly down (J Nutr Sci RCT) (Jones et al., 2023). A companion 8-week study reported no significant changes in weight, BMI, waist, or % body fat when macadamias were included daily (Current Developments in Nutrition) (Jones et al., 2020).
How to add macadamias to your weight-loss diet:
- Portion plan: Cap at ~10 nuts; chew slowly.
- Meal upgrade: Chop into salads or grain bowls for creamy crunch.
- Yogurt topper: 1–2 tbsp chopped with berries for a satisfying finish.
⚠ Watch out for: Easy to over-eat (calorie-dense). Pre-portion; avoid honey-roasted mixes.
Do Read: Vegan Keto Smoothie Kick-Start: 5 Macadamia Nut Recipes for Nutrient-Packed Mornings
Pecans for Weight Loss
Pecans are naturally sweet and buttery, with fiber + polyphenols that play nice with cardiometabolic health. A small handful (19 halves) is ~196 calories—so the trick is portion plus substitution.
A 12-week randomized controlled trial (138 adults at cardiometabolic risk) showed that replacing usual snacks with ~57 g/day pecans significantly reduced LDL, non-HDL, total cholesterol and triglycerides, and improved overall diet quality; weight change was small and non-significant (+0.7 kg vs control), underscoring the need for portion control (AJCN RCT) (Hart et al., 2025). Earlier RCT work also found 8-week pecan diets lowered LDL, TG and ApoB vs control (J Nutrition RCT) (Guarneiri et al., 2021).
How to add pecans to your weight-loss diet:
- Snack swap: 10–12 halves instead of cookies/chips.
- Breakfast: Stir into oatmeal/yogurt; pair with cinnamon + apple.
- Savory: Toast lightly and toss over roasted squash or salads.
⚠ Watch out for: Candied or praline pecans = sugar bombs. Keep portions tight to avoid creeping calories.
Do Read: Nuts for Heart Health: Harnessing the Nutritional Powerhouse for a Healthy Cardiovascular System
Pine Nuts for Weight Loss
Tiny but mighty, pine nuts bring buttery flavor and help you slow down and savor food. The interesting angle here is satiety signaling: a unique fatty acid (pinolenic acid) may boost fullness hormones.
In a placebo-controlled human trial, Korean pine nut oil increased satiety hormones (CCK, GLP-1) and reduced prospective food intake shortly after consumption (Lipids in Health & Disease RCT) (Pasman et al., 2008). More recently, delayed-release pine-nut-oil free fatty acids delivered to the small intestine reduced appetite via GLP-1 in an acute study (Clinical Nutrition) (Sørensen et al., 2021). These are short-term appetite studies, not long-term weight-loss trials—use pine nuts as a tool for fullness, not a magic bullet.
How to add pine nuts to your weight-loss diet:
- Salad finisher: 1–2 tbsp toasted goes a long way.
- Pesto play: Blend with basil + lemon; use thinly to flavor big bowls.
- Grain bowls: Sprinkle over quinoa/veg to boost satisfaction.
⚠ Watch out for: Calorie density (measure, don’t pour) and rare “pine mouth” aftertaste. Buy fresh; store chilled.
Suggested Read: Pine Nuts and Weight Loss: A Natural Aid for Shedding Extra Pounds?
🥜 Best Nut Butters for Weight Loss
Nut butters are a creamy comfort food — and yes, they can actually help with weight loss when used wisely. The secret lies in sticking to natural, unsweetened versions (just nuts, maybe salt) and keeping your portions under control. A spoonful here and there can boost satiety, help you avoid junk snacks, and deliver healthy fats and protein that keep you energized.
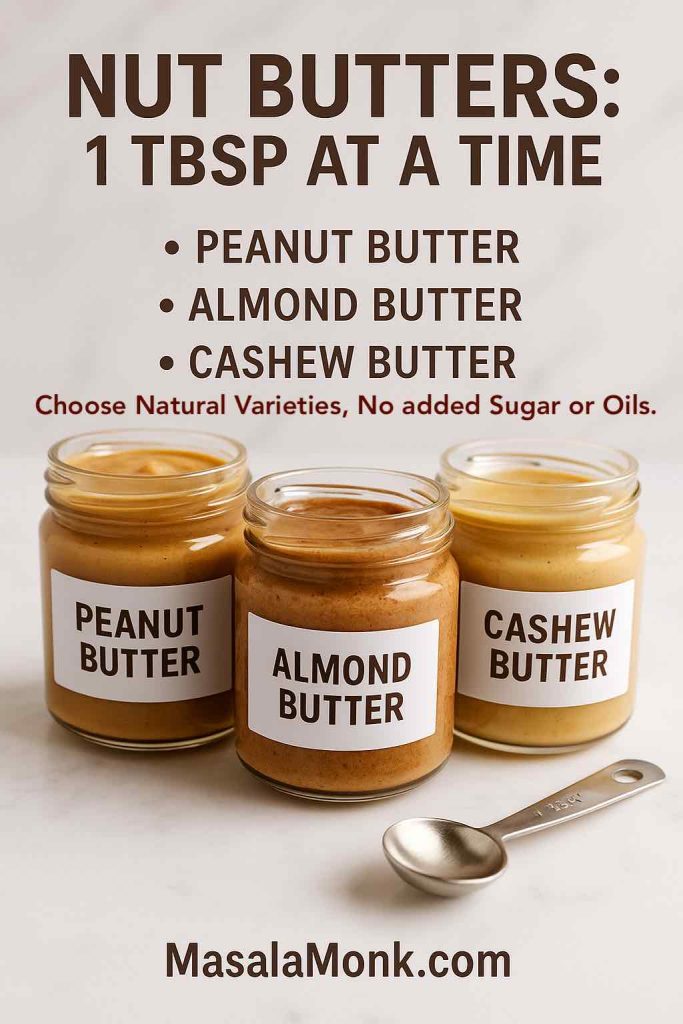
Let’s break it down by type.
🥜 Peanut Butter for Weight Loss
Peanut butter is the classic choice. It’s affordable, protein-packed, and one of the most studied when it comes to appetite control. Two tablespoons give you ~190 calories, 7g protein, 2g fiber, and a dose of heart-healthy fats.
Research backs it up: a 6-month randomized controlled trial found that people who ate 35 g of peanuts before two main meals daily lost as much weight as those on a traditional low-fat diet — but also had greater improvements in blood pressure (Petersen et al., 2022). Another crossover study showed that peanut or peanut butter snacks increased satiety and reduced blood sugar spikes compared to a grain-bar snack (Johnston et al., 2013).
💡 How to add peanut butter to your diet:
- Use 1 tbsp on apple or banana slices to tide you over.
- Stir into oatmeal or smoothies for protein and creaminess.
- Try it as a pre-meal snack (1–2 tbsp) to help prevent overeating.
⚠️ Watch out for: Skippy, Jif, or other supermarket brands often add sugar, palm oil, or hydrogenated fats. Look for jars labeled “just peanuts.”
🌰 Almond Butter for Weight Loss
Almond butter feels a little more gourmet — and it comes with extra benefits. Two tablespoons provide ~190 calories, 7g protein, 3g fiber, and lots of vitamin E and magnesium.
While research on almond butter itself is limited, studies on whole almonds show why this spread can be a smart choice. A controlled satiety trial found that people who ate almonds as a snack compensated naturally at later meals, so total daily calorie intake didn’t increase despite the snack’s calories (Hull et al., 2015). Long-term studies also show that people who regularly eat nuts or peanut butter don’t gain more weight — in fact, they often have smaller waistlines over time (Bes-Rastrollo et al., 2009).
💡 How to add almond butter to your diet:
- Spread thinly on whole-grain toast or crispbread.
- Use as a dip for celery, carrots, or apple slices.
- Mix into Greek yogurt or chia pudding for extra richness.
⚠️ Watch out for: Even natural almond butter is calorie-dense. Stick to 1–2 tbsp at a time.
🌰 Cashew Butter for Weight Loss
Cashew butter is smooth, slightly sweet, and often used as a dairy substitute in sauces. Two tablespoons provide ~180 calories, 6g protein, and valuable minerals like magnesium and zinc.
Clinical studies on cashews show real promise: a calorie-restricted RCT found that diets including cashews (and Brazil nuts) improved body composition — reducing fat percentage and preserving lean mass — without slowing weight loss (Cardoso et al., 2022). Another 8-week trial reported improved cholesterol and liver enzyme levels in people eating cashews, even though both groups lost the same amount of weight (Xiao et al., 2023).
💡 How to add cashew butter to your diet:
- Spread on whole-grain crackers instead of cheese.
- Stir into stir-fries or curries for a creamy base.
- Blend into smoothies for natural sweetness.
⚠️ Watch out for: Many store-bought cashew butters contain added sugar or oils. Always check the label.
✅ Bottom line: Peanut, almond, and cashew butter can all fit into a weight-loss plan when natural, unsweetened, and portioned. Peanut butter shines for satiety and pre-meal appetite control, almond butter offers extra nutrients and satiety balance, and cashew butter brings creaminess with metabolic perks.
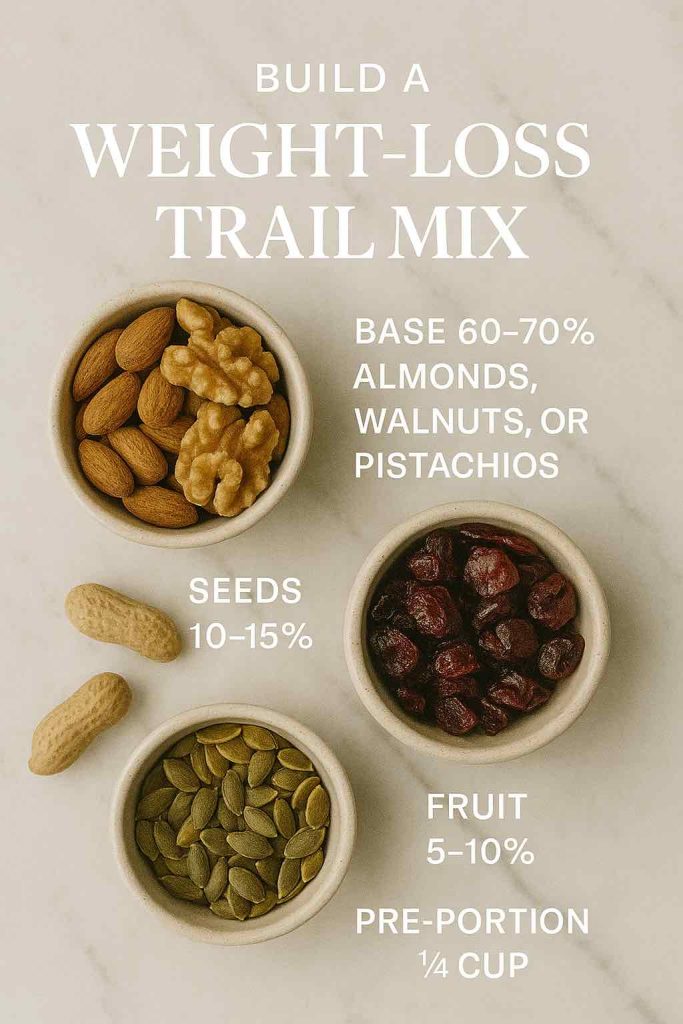
🥜 Trail Mix & Mixed Nuts for Weight Loss
Trail mix can be a double-edged sword. Done right, it’s portable, filling, and nutrient-dense. Done wrong (with sugar, candy, or salty coatings), it’s basically dessert in disguise.
The beauty of homemade trail mix is that you’re in control. You pick the nuts, the extras, and the portions — turning it into a snack that supports your weight-loss goals rather than sabotaging them.
🌰 Why Homemade Trail Mix Helps
- Balanced nutrition: A mix of nuts, seeds, and a touch of fruit delivers protein, fiber, and healthy fats.
- Craving control: The variety of textures — crunch, chew, sweetness — satisfies snack cravings without overeating.
- Portable fuel: Easy to keep in a bag, desk drawer, or glove compartment for hunger emergencies.
💡 How to Build It
- Base nuts (60–70%)
- Almonds, walnuts, pistachios, or peanuts. These are the most filling and protein-rich.
- Secondary nuts (15–20%)
- Cashews, pecans, hazelnuts, or Brazil nuts. Adds flavor variety and micronutrients.
- Seeds (10–15%)
- Pumpkin or sunflower seeds for extra protein, minerals, and crunch.
- Fruit (5–10%)
- Unsweetened raisins, cranberries, cherries, or apricots. Adds natural sweetness without candy.
- Optional extras (tiny sprinkle)
- Dark chocolate chips (70%+) or shredded coconut if you want a touch of indulgence.
✅ Smart Portion Tips
- Pre-portion into ¼ cup servings (about a small handful). That’s ~150–200 calories.
- Store in small jars or zip bags so you don’t overdo it.
- Use it as a snack between meals — not a free-for-all snack bowl.
⚠️ What to Skip
- Sugary add-ins: Yogurt-covered raisins, M&Ms, or candy pieces.
- Over-salted nuts: Sodium-heavy mixes can undo the health benefits.
- Store-bought “deluxe” blends: Usually loaded with sugar, oils, or fried fruit.
👉 Bottom line: Homemade trail mix is a customizable, portion-controlled snack that works with weight loss, not against it. Stick to raw or dry-roasted nuts, unsweetened fruit, and just a pinch of extras to keep it satisfying and guilt-free.
🚫 Worst Nuts for Weight Loss
Not all nuts are created equal. While all provide healthy fats, protein, and nutrients, some varieties are harder to fit into a calorie-conscious plan. The problem isn’t the nut itself — it’s usually the calorie density or the way it’s processed (salted, candied, or honey-roasted).
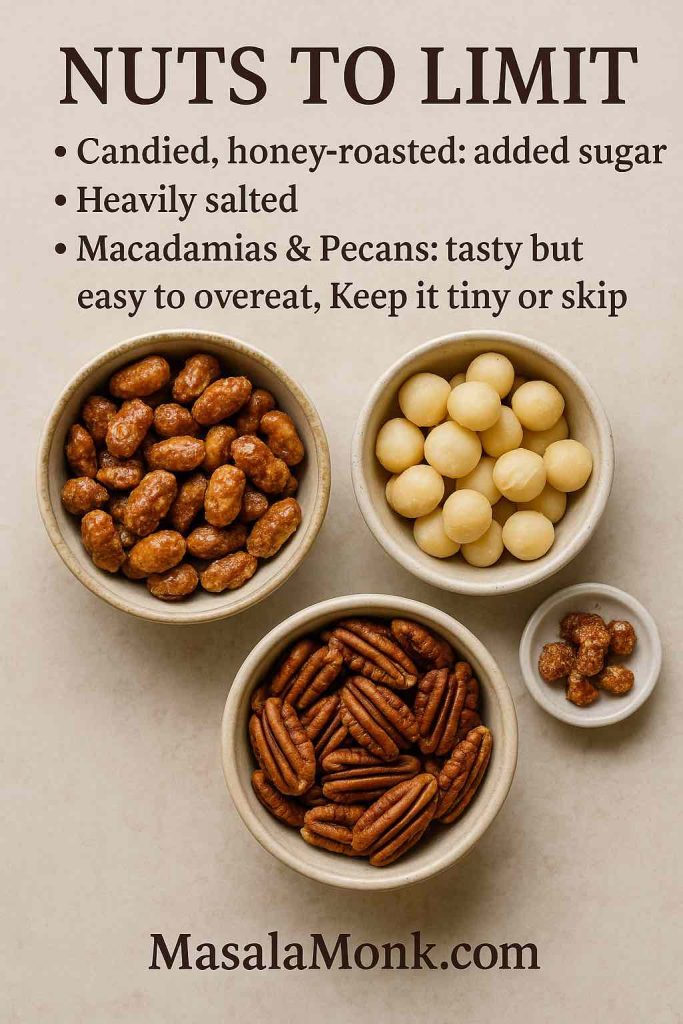
Here are the main ones to watch out for if your goal is losing weight:
Macadamia Nuts
Even though they are featured in featured in Weight Loss freindly list as well, however they are super easy to go overboard.
- Calories per ounce: ~200 (just 10–12 nuts).
- Buttery and delicious, macadamias are mostly fat with little protein or fiber to keep you full. That makes them easy to overeat without much satiety payoff.
- They’re fine in small amounts, but not the best choice if you’re trying to manage hunger.
Pecans
Again Pecans are so delicious that is super easy to go overboard with these and mess up your goals.
- Calories per ounce: ~196 (about 19 halves).
- Naturally sweet and tasty, pecans pack more calories than many other nuts, with lower protein content.
- A small handful can easily turn into two, pushing you over your calorie limit fast.
Candied, Honey-Roasted, or Flavored Nuts
- The biggest trap isn’t a specific nut but how it’s prepared.
- Honey-roasted almonds, maple pecans, or BBQ cashews often come coated in sugar, oils, or flavorings — turning a healthy snack into a dessert-level calorie bomb.
- These versions can also spike cravings instead of controlling them.
Salted & Processed Nut Mixes
- Heavily salted peanuts or bar nuts can sneak in massive amounts of sodium, leading to bloating and making you thirstier (which sometimes gets mistaken for hunger).
- Pre-made mixes often include fried corn bits, pretzels, or candy — all of which derail the weight-loss benefits of the nuts themselves.
⚖️ Bottom Line
If you love macadamias or pecans, you don’t have to give them up completely — just keep the portions tiny (think 5–6 nuts, not a handful). But if weight loss is your goal, you’ll get more satiety for fewer calories by focusing on almonds, walnuts, pistachios, and peanuts instead.
🥜 Practical Tips for Eating Nuts for Weight Loss
Nuts can absolutely support your weight-loss journey — but like any calorie-dense food, how you eat them makes all the difference. Here are some tips to keep them working in your favor:
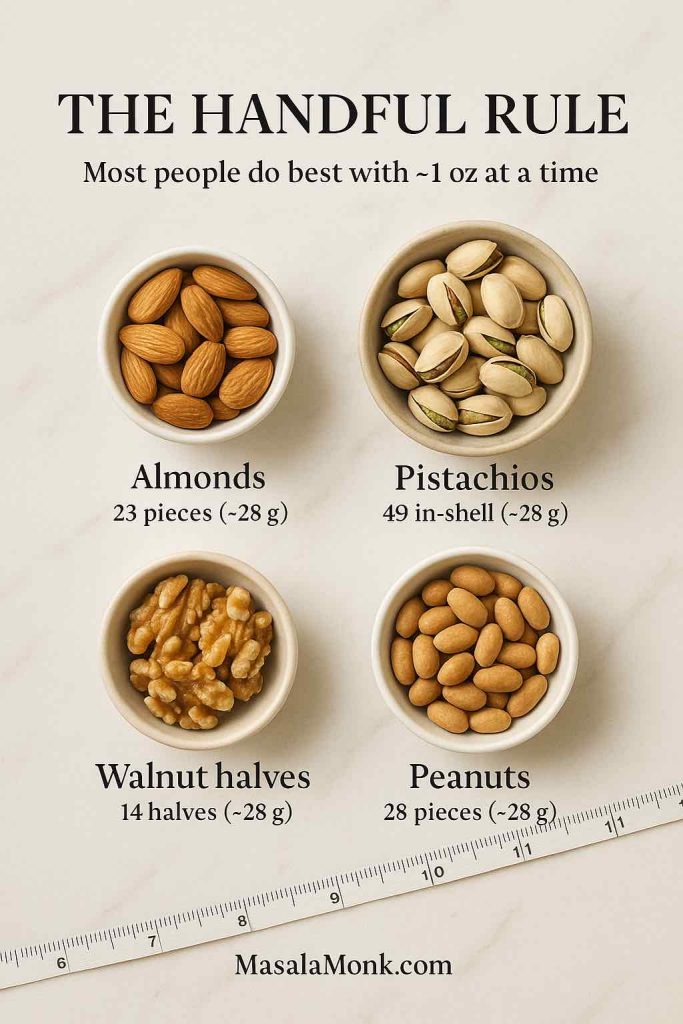
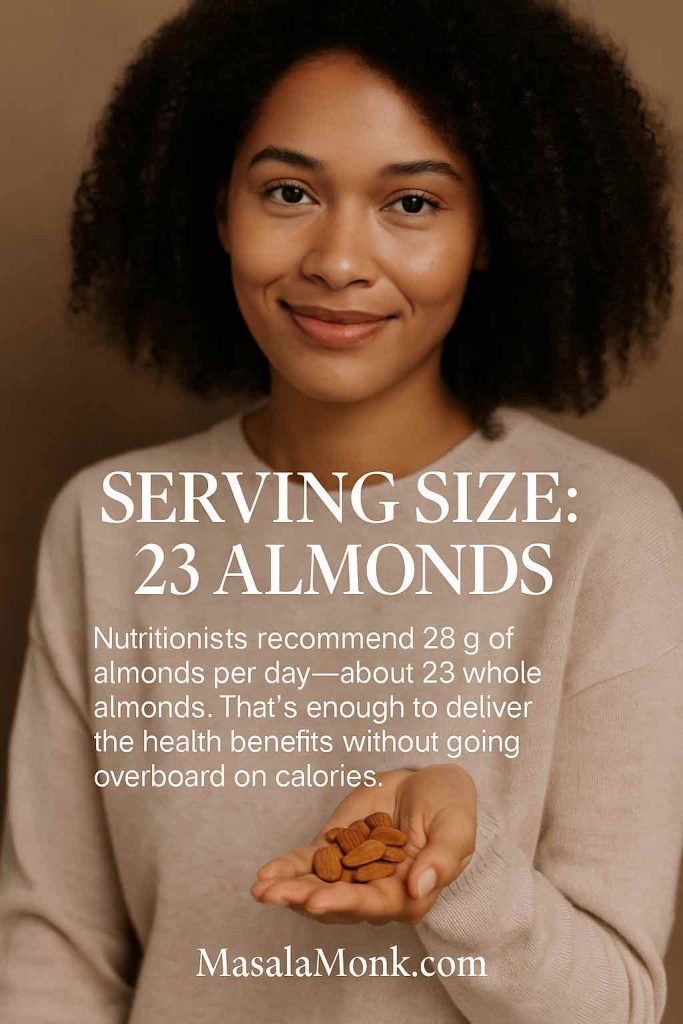
- Stick to the “handful rule”: About 1 ounce (a small handful, ~23 almonds or 49 pistachios). Pre-portion them into small containers or bags so you don’t go overboard.
- Use nuts as a swap, not an add-on: Replace chips, cookies, or muffins with nuts. Don’t just add nuts on top of your regular snacks.
- Snack smarter with timing: Nuts before meals can help reduce hunger and lead to smaller portions at mealtime.
- Go for raw or dry-roasted: Skip oils, coatings, and added flavors. Natural versions have the same crunch without unnecessary calories.
- Pair with protein or produce: Nuts plus fruit, Greek yogurt, or veggies make a more balanced, filling snack.
- Watch flavored varieties: Honey-roasted, candied, or BBQ-coated nuts can undo the benefits.
- Nut butters count too: Just stick to natural jars (only nuts, maybe salt) and measure 1–2 tbsp at a time.
- Mix it up: Rotate between almonds, walnuts, pistachios, and peanuts to cover a wider nutrient spectrum.
🌟 Conclusion: Nuts That Work With Your Goals
Nuts aren’t the enemy of weight loss — in fact, they can be one of your greatest allies. Their protein, fiber, and healthy fats help you feel full, satisfied, and less likely to reach for junk food.
The key is moderation and mindfulness:
- A handful of almonds, walnuts, pistachios, or peanuts a day can keep hunger in check.
- Nut butters and trail mix can work beautifully — if you keep them natural and portioned.
- Avoid candied, honey-roasted, or overly salted varieties.
👉 Action step for tomorrow: Instead of grabbing chips or cookies, try a small handful of almonds with fruit, or a spoon of peanut butter with apple slices. Tiny swaps like this can add up to big results for your waistline and health.
❓ Frequently Asked Questions About Nuts and Weight Loss
1. Which nut is best for weight loss?
While all nuts can be part of a healthy diet, almonds, walnuts, pistachios, and peanuts stand out for weight loss. This is because they combine protein, fiber, and healthy fats that promote satiety and help prevent overeating. For example, almonds are especially filling, walnuts support appetite regulation through omega-3s, pistachios offer bulk for fewer calories, and peanuts are affordable yet protein-rich. Therefore, if you’re trying to slim down, focusing on these four nuts gives you the most “fullness per calorie.”
2. How many nuts should I eat per day to lose weight?
The sweet spot is usually 1 ounce per day — roughly a small handful. To give you perspective, that’s about 23 almonds, 14 walnut halves, 49 pistachios, or 28 peanuts. This amount delivers enough protein and fiber to keep you full without tipping your calorie balance in the wrong direction. Eating significantly more can add up quickly since nuts are calorie-dense, but sticking to a measured portion makes them a smart, sustainable daily habit.
3. Are roasted nuts good for weight loss?
Yes, roasted nuts can absolutely be part of a weight-loss diet, but there’s a key detail to watch: how they’re roasted. Dry-roasted nuts, which are heated without extra oil or sugar, keep their nutrient profile intact. However, many packaged roasted nuts are fried in added oils, heavily salted, or coated in flavors like honey or barbecue. Those versions add unnecessary calories and sodium, which can work against your weight goals. So, roasted is fine — just make sure the label says “dry-roasted” and nothing more.
4. Can nuts help with belly fat specifically?
Nuts don’t directly burn belly fat — no food can target fat loss in one body area. However, nuts can help reduce overall calorie intake and improve metabolic health, which indirectly supports belly fat reduction. For instance, their healthy fats and fiber stabilize blood sugar and prevent the crash-and-crave cycle that often leads to overeating. Over time, consistent nut consumption as part of a calorie-controlled diet may lead to a smaller waistline, even if the fat loss isn’t “spot targeted.”
5. What is the lowest-calorie nut for weight loss?
Pistachios are often considered the lowest-calorie option. An ounce of pistachios (about 49 nuts) provides ~160 calories, making them lighter than walnuts, pecans, or macadamias. Cashews also rank fairly low at about 155 calories per ounce. Because pistachios come in shells, they also slow down your eating, giving your body more time to register fullness. This makes them both calorie-efficient and portion-control-friendly — a rare win-win.
6. Are peanuts good for weight loss even though they’re legumes?
Yes — in fact, peanuts and peanut butter have some of the strongest evidence for weight management. Despite technically being legumes, peanuts provide a nutrient profile similar to tree nuts: protein, fiber, and healthy fats. Several clinical studies show that peanuts can increase satiety and help people maintain or lose weight when included in a structured diet. So don’t let their “legume status” fool you; peanuts are just as effective as traditional nuts for weight loss.
7. Is peanut butter fattening, or can it help with weight loss?
Peanut butter has a bad reputation because it’s calorie-dense — about 190 calories per 2 tablespoons. However, when eaten in moderation, it can actually support weight loss. The protein and fat in peanut butter keep you full, and research shows that peanut preloads (eating peanuts or peanut butter before a meal) reduce hunger and total calorie intake later. The key is choosing natural peanut butter (just peanuts and maybe salt) and measuring your serving size carefully — usually 1 to 2 tablespoons.
8. Can I eat nuts at night if I’m trying to lose weight?
Yes, you can eat nuts in the evening, and in some cases, it may even help. Late-night cravings often lead people toward chips, cookies, or other processed snacks. Swapping those for a small handful of nuts provides lasting satiety and prevents you from waking up hungrier the next morning. The key is portion size: stick to a small handful, and avoid sugar-coated or salted varieties. In other words, nuts at night are fine as long as they replace less healthy options, not add extra calories.
9. Should I eat nuts raw, soaked, or roasted?
Raw and dry-roasted nuts are equally good choices for weight loss. Some people soak nuts to improve digestibility, which is fine if it helps you, but it doesn’t make them more effective for weight loss. The real difference comes down to additives: raw or dry-roasted nuts keep things simple, while oil-roasted, salted, or flavored nuts can sneak in calories, sodium, or sugar. So the best choice depends on your taste preference, but for weight management, plain raw or dry-roasted is ideal.
10. What are the worst nuts for weight loss?
Macadamia nuts and pecans aren’t “bad” for you, but they’re very calorie-dense and lower in protein than other nuts, so they don’t provide the same satiety bang for your calorie buck. The real danger, though, comes from flavored nuts — think candied pecans, honey-roasted peanuts, or chocolate-covered almonds. These can easily double or triple the calories and sugar, turning a healthy snack into a dessert. For weight loss, stick with natural, unflavored nuts, and keep the indulgent versions for rare occasions.
11. Can mixed nuts help me lose weight?
Yes, but the way you put the mix together matters. A homemade mix of almonds, walnuts, pistachios, and a sprinkle of seeds can be an excellent weight-loss snack. However, most store-bought “deluxe nut mixes” are loaded with salted nuts, fried corn, pretzels, and sugary fruit or chocolate. These add-ins increase calories without much nutrition. So mixed nuts can absolutely help with weight management — but the safest way is to make your own blend at home.
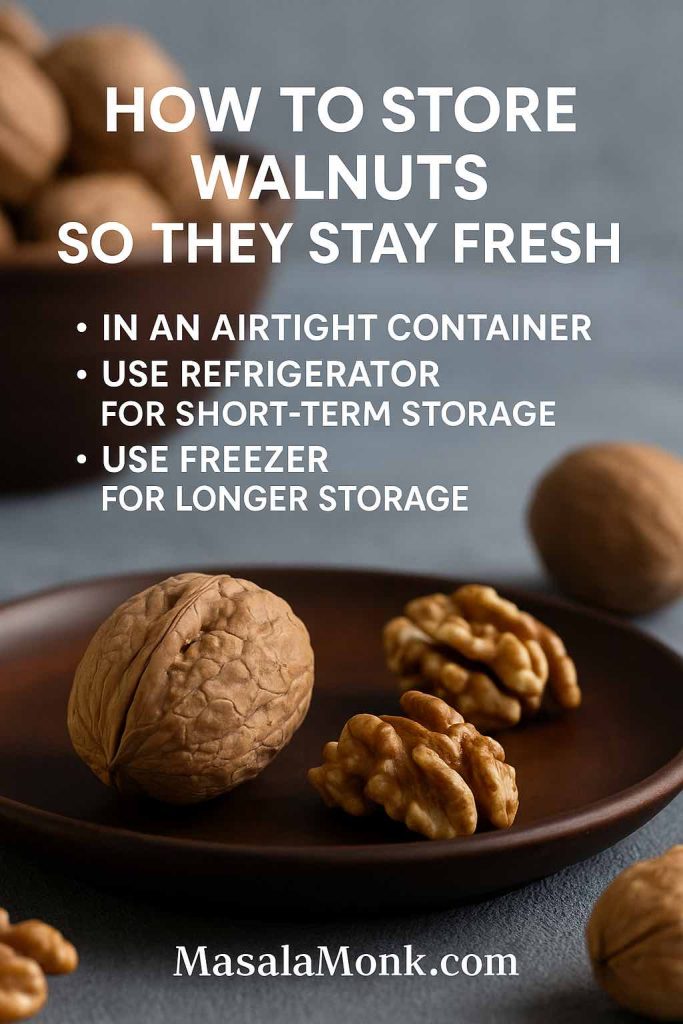
12. How should I store nuts to keep them fresh?
Nuts are high in natural oils, which means they can go rancid if stored improperly. To keep them fresh and tasty, store nuts in airtight containers in a cool, dark place. For long-term storage, refrigerate or even freeze them — this can extend freshness for months without affecting texture. Fresh-tasting nuts are not only healthier but also more satisfying, helping you stick to your weight-loss goals without reaching for processed snacks.