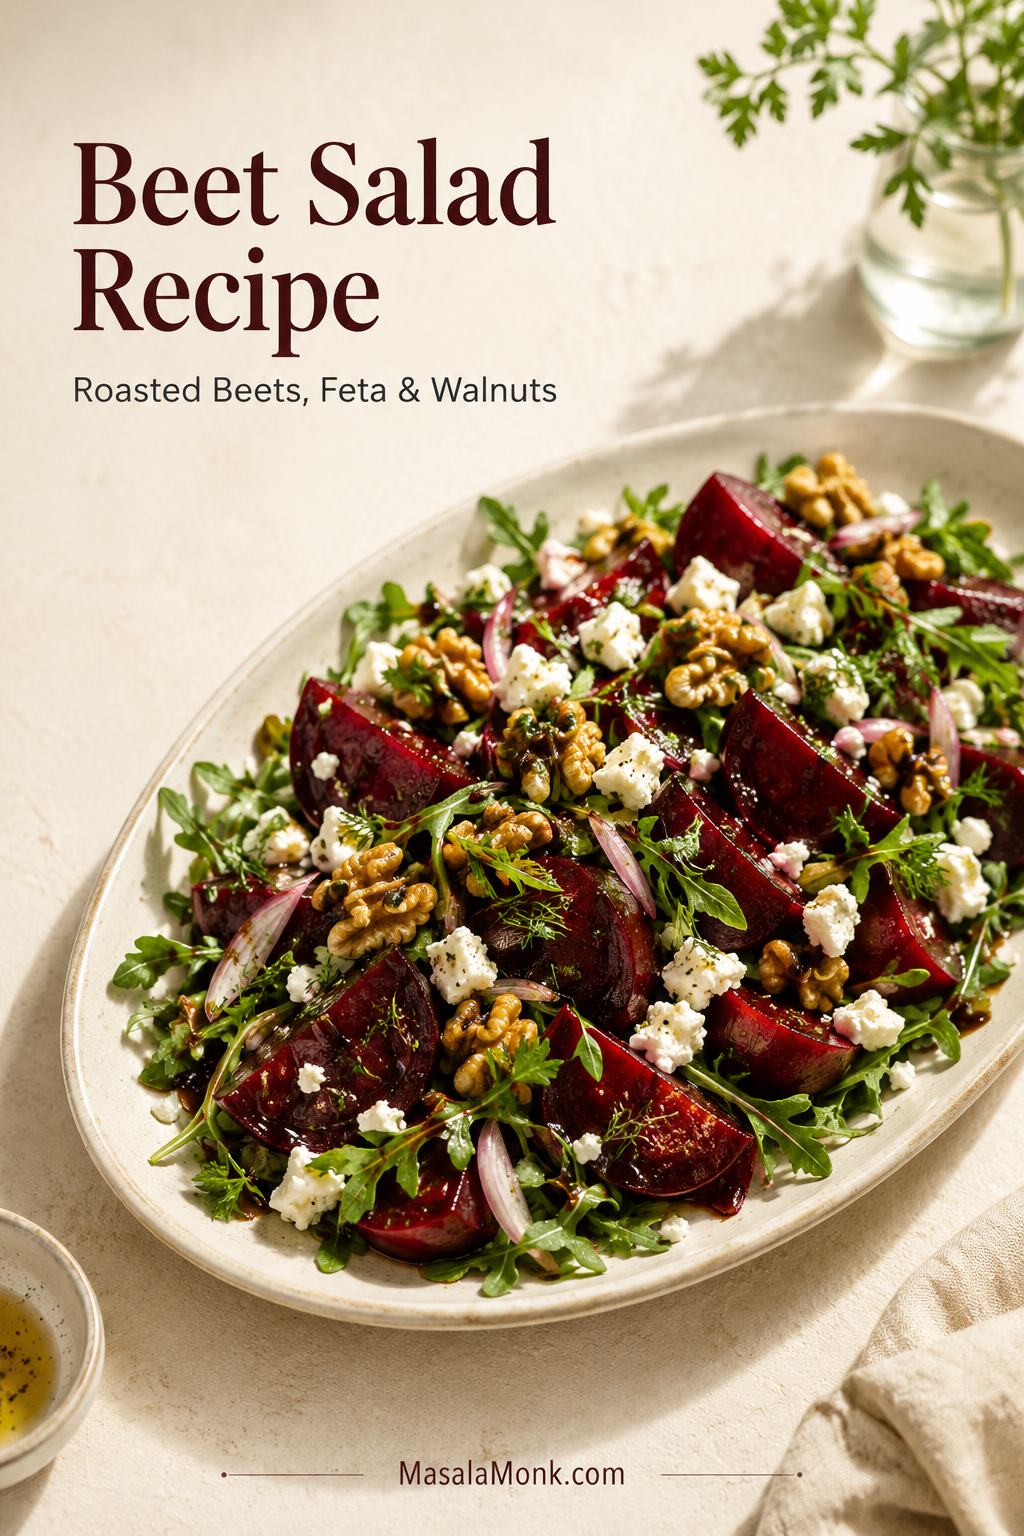
A good beet salad recipe should be more than earthy beets with cheese sprinkled on top. It should feel bright, crisp, salty, sweet, and fresh in the same bite: tender roasted beets, briny feta, toasted walnuts, peppery greens, fresh herbs, and a lemon-balsamic dressing that keeps everything lively.
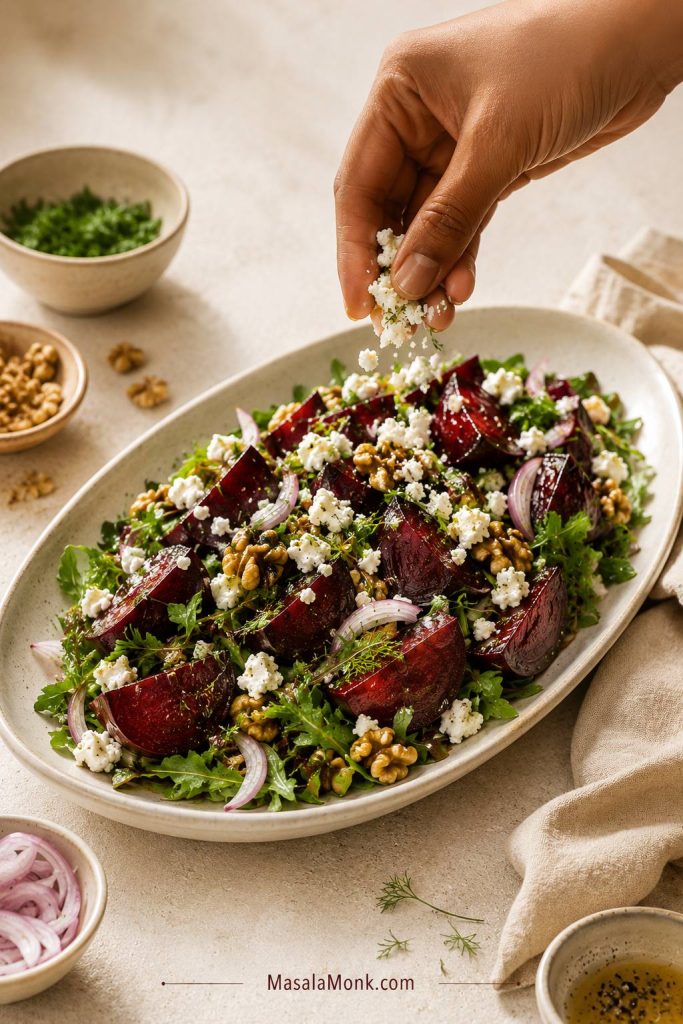
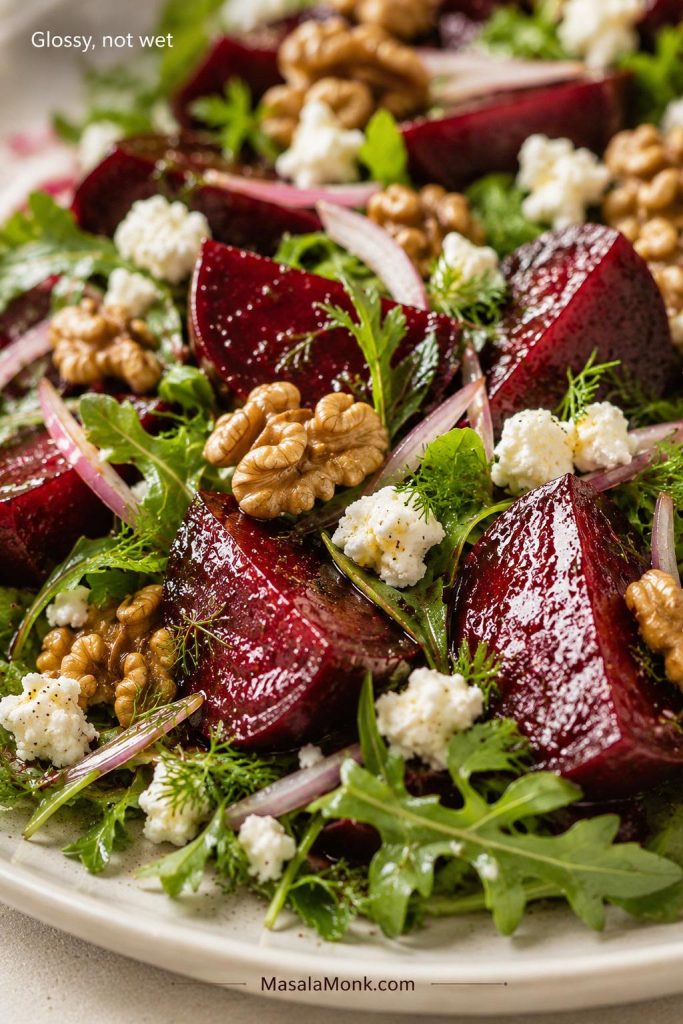
It should look as good as it tastes too: ruby beet wedges, white feta, green herbs, toasted walnuts, and glossy greens that still look fresh.
This version looks like a special-occasion salad, but most of the work is simple: roast the beets, cool and peel them, dress the greens lightly, then layer everything so the salad stays colorful instead of wet, muddy, or fully pink.
Beets are dramatic. They stain the board, tint the vinaigrette, and can turn feta pink if the salad is tossed too hard. They can also taste muddy without enough acid, salt, herbs, and crunch. This recipe gives them a fair chance: roasted until sweet, dressed until bright, and finished with enough contrast to make every bite lively. If you know them as beetroot, same idea: roasted beetroot, feta, walnuts, greens, herbs, and a tangy vinaigrette.
Quick Answer: Beet Salad at a Glance
Fast recipe snapshot: Roast whole beets at 400°F / 200°C until tender, cool and peel, then layer with arugula or rocket, feta, toasted walnuts, herbs, shallot, and lemon-balsamic Dijon dressing. For a 15-minute version, use cooked, canned, vacuum-packed, or leftover roasted beets.
| Go-to beet method | Roasted whole beets for the deepest, sweetest flavor |
| Roast time | 35–45 minutes for small beets, 45–60 minutes for medium, 60–75 minutes for large |
| Serves | 4 as a side, or 2 as a larger salad |
| Greens | Arugula / rocket for peppery bite; spinach for a milder salad |
| Dressing | Lemon-balsamic Dijon vinaigrette |
| Make-ahead plan | Roast beets and make dressing ahead; assemble close to serving |
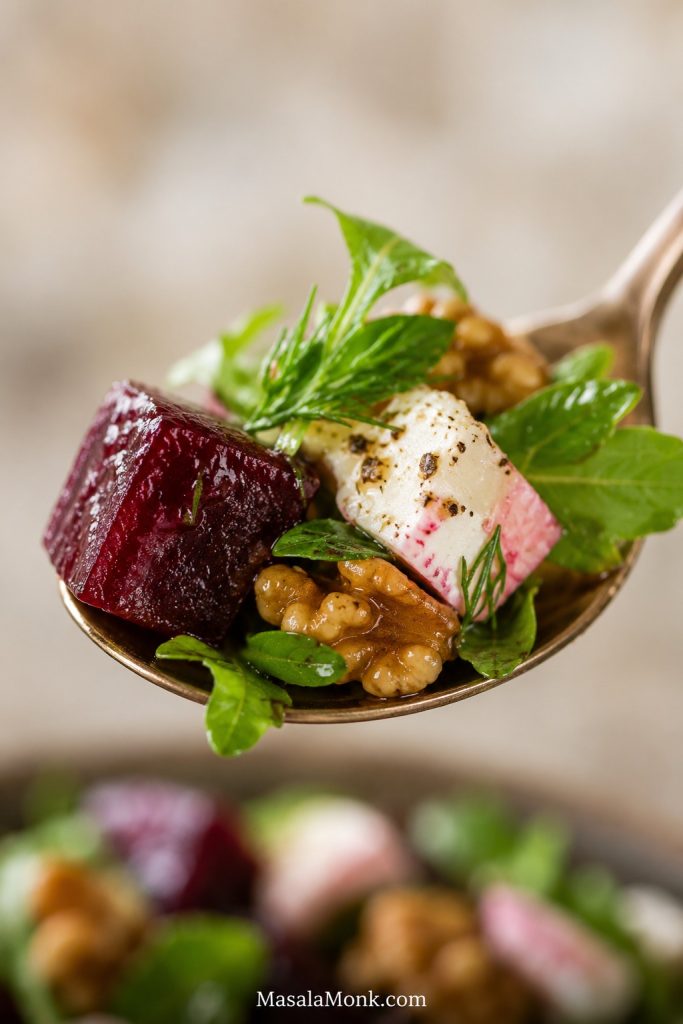
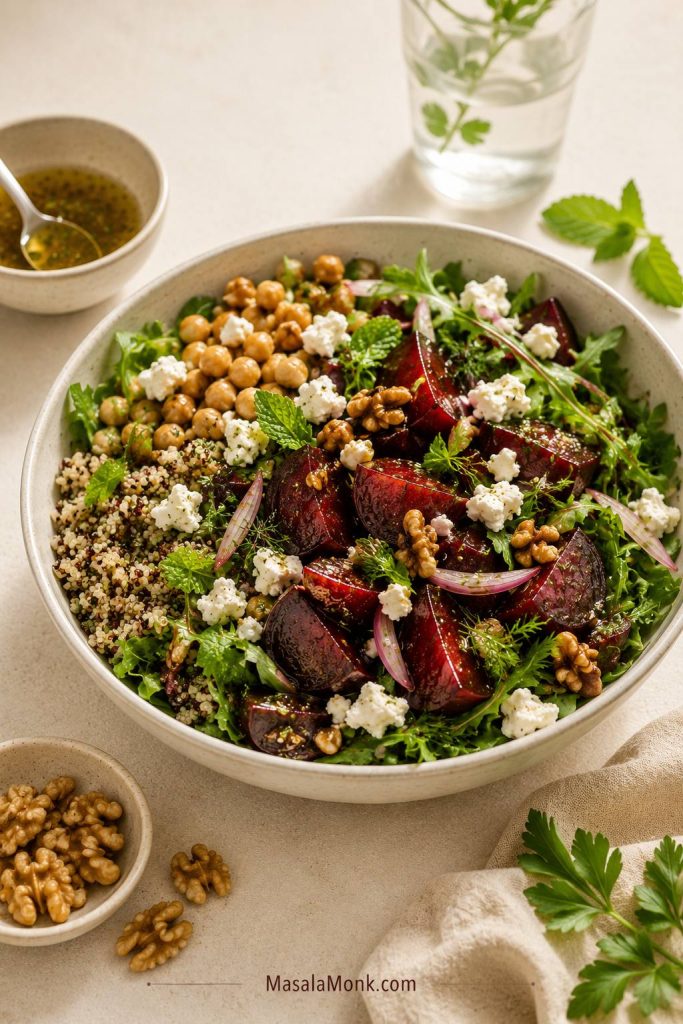
The image below shows the bite this salad is built around: beet, feta, walnut, greens, herbs, and just enough dressing to bring everything together.
The Beet Salad Balance Formula
Once you know the balance, you can change the salad without losing the point. Great beet salad needs five things: sweet beets, salty contrast, bright acid, crisp texture, and something fresh. Miss one, and the salad can taste flat, earthy, too soft, too sweet, or heavy.
- Sweet: roasted beets or beetroot
- Salty: feta, goat cheese, capers, olives, or salted seeds
- Acid: lemon, orange, balsamic, vinegar, or pickled beets
- Crunch: walnuts, pecans, pistachios, pumpkin seeds, apple, or cucumber
- Freshness: arugula, rocket, parsley, mint, dill, basil, spinach, or kale
The trick is not making beets less like beets. It is giving them enough contrast to make their sweetness work. When those pieces are in place, the salad tastes bright instead of muddy, crisp instead of soft, and fresh instead of heavy.
What the finished salad should taste like: sweet roasted beets, salty-creamy feta, crisp toasted nuts, fresh herbs, lightly dressed greens, and a clean lemony finish.
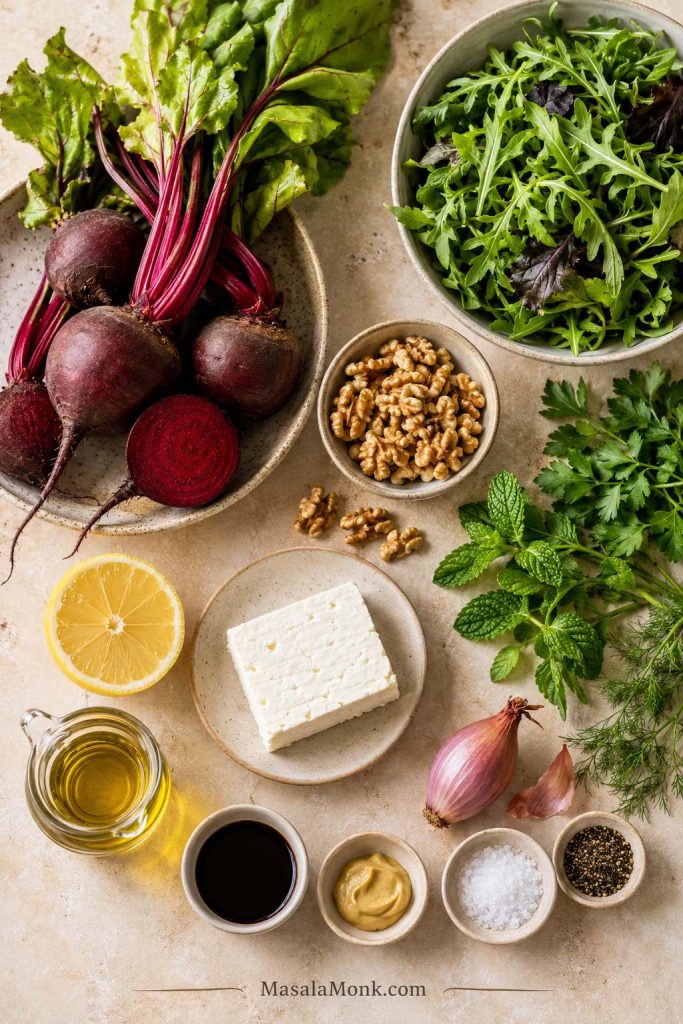
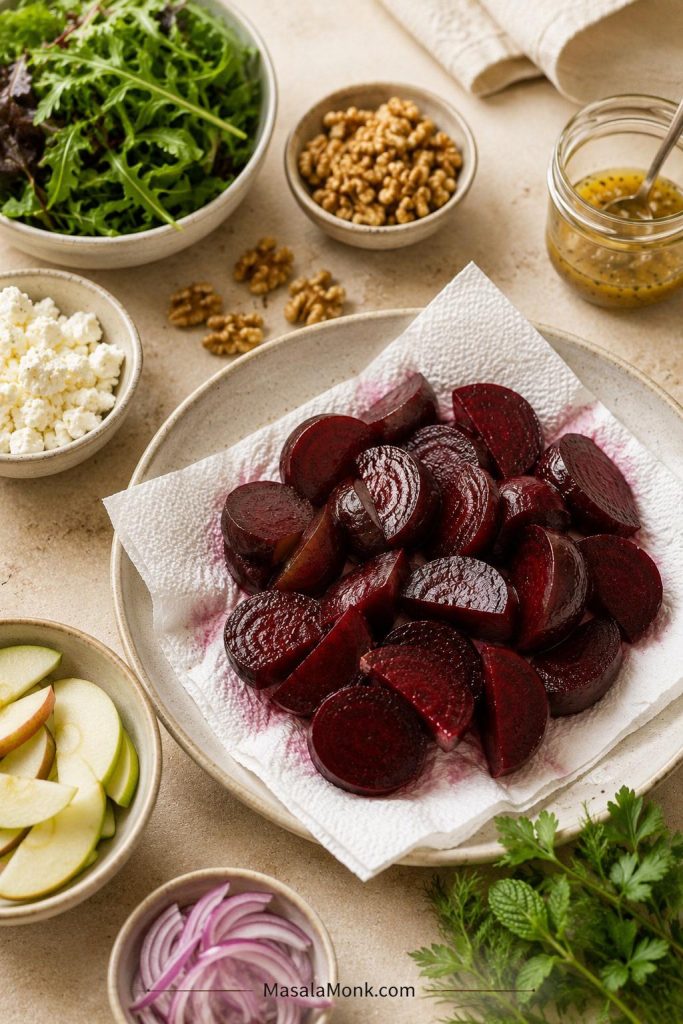
Ingredients You’ll Need
You do not need many ingredients, but quality and timing matter. Medium beets roast more evenly, block feta stays creamier than pre-crumbled feta, toasted walnuts taste far better than raw walnuts, and fresh herbs make the salad feel brighter.
Beets / Beetroot
Use 600–700 g / 1⅓–1½ lb raw beets, about 4 medium beets. Red beets are classic and easy to find. Golden beets are milder, stain less aggressively, and look beautiful mixed with red beets. Not starting with raw beets? The beet options section explains how to use cooked, canned, pickled, boiled, or raw beets.
Choose beets that feel firm and heavy for their size. Small to medium beets usually have the nicest texture for salad. Very large beets can take longer to roast and may be a little woody in the center.
Feta
Use 85–100 g / 3–3½ oz feta, crumbled into small pieces. Block feta is creamier and less dry than pre-crumbled feta, so it is the better choice when you have it. Goat cheese gives a softer, creamier salad; blue cheese is stronger and works best with pear, walnuts, and bitter greens. For a dairy-free version, skip the cheese and add avocado, toasted seeds, capers, olives, or tahini-lemon dressing.
Walnuts
Use 50–60 g / ½ cup walnuts, toasted. This is one place not to skip the pan: toasted walnuts taste deeper, crisper, and much better against sweet beets than raw walnuts. Pecans, pistachios, almonds, or pumpkin seeds also work.
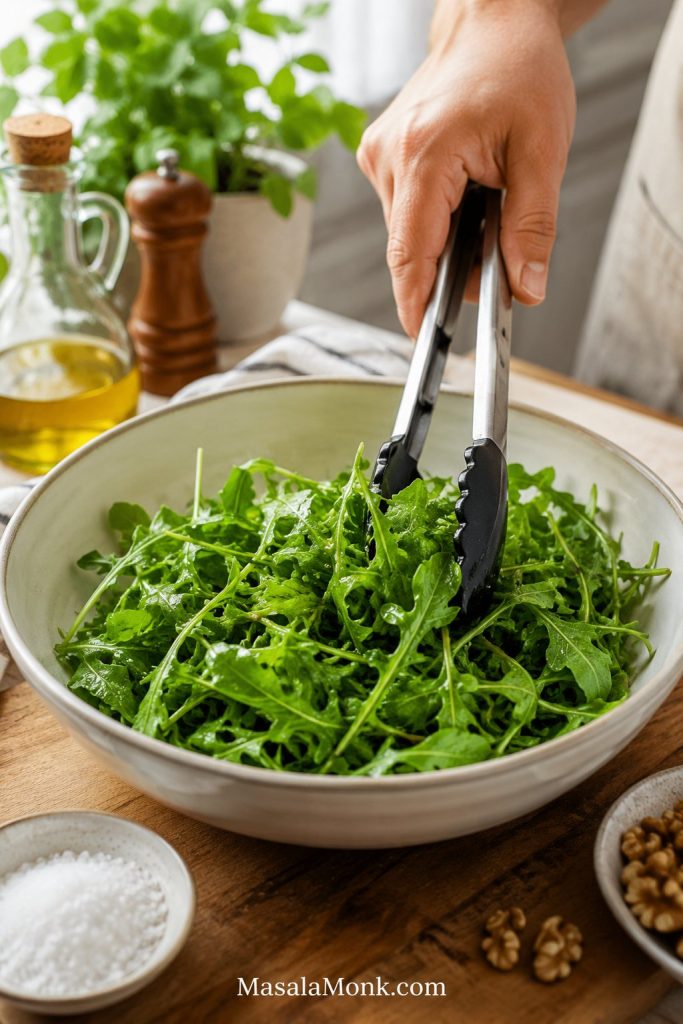
Greens, herbs, and shallot
Use 120–140 g / 4–5 oz arugula/rocket, baby spinach, or mixed greens. Arugula is best when you want peppery contrast; spinach is softer and milder; kale works better for lunch bowls with grains or chickpeas.
Use one or two fresh herbs, not every herb at once. Parsley keeps it clean, mint makes it brighter, dill is excellent with cucumber or pickled beets, and basil works well with orange or balsamic. A little shallot or red onion gives the salad bite; soak it in cold water for 10 minutes if it tastes too sharp.
How to Roast Beets for Salad
Roasting beets is mostly hands-off. I get the cleanest flavor from medium beets roasted whole, then peeled after cooling. Very large beets work, but they take longer and can taste less sweet in the center. Skipping the oven? Use the 15-minute shortcut with cooked, canned, or vacuum-packed beets.
Whole roasted beets
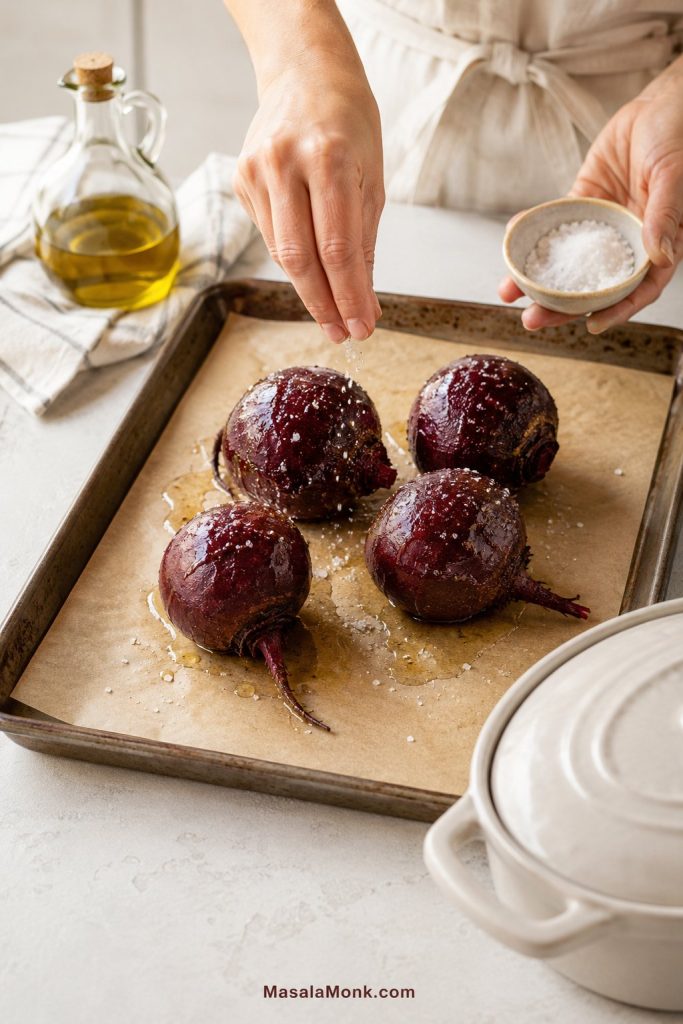
- Heat the oven to 400°F / 200°C.
- Scrub the beets well. Trim the greens, leaving about 1 inch of stem if attached. This helps reduce bleeding while roasting.
- Rub the beets with 1 tbsp / 15 ml olive oil and a pinch of salt.
- Wrap the beets in foil, or place them in a covered baking dish. Set foil packets on a rimmed baking sheet in case any juices leak.
- If using red and golden beets together, wrap or roast them separately so the red beets do not stain the golden ones.
- Roast until tender: 35–45 minutes for small beets, 45–60 minutes for medium beets, and 60–75 minutes for large beets.
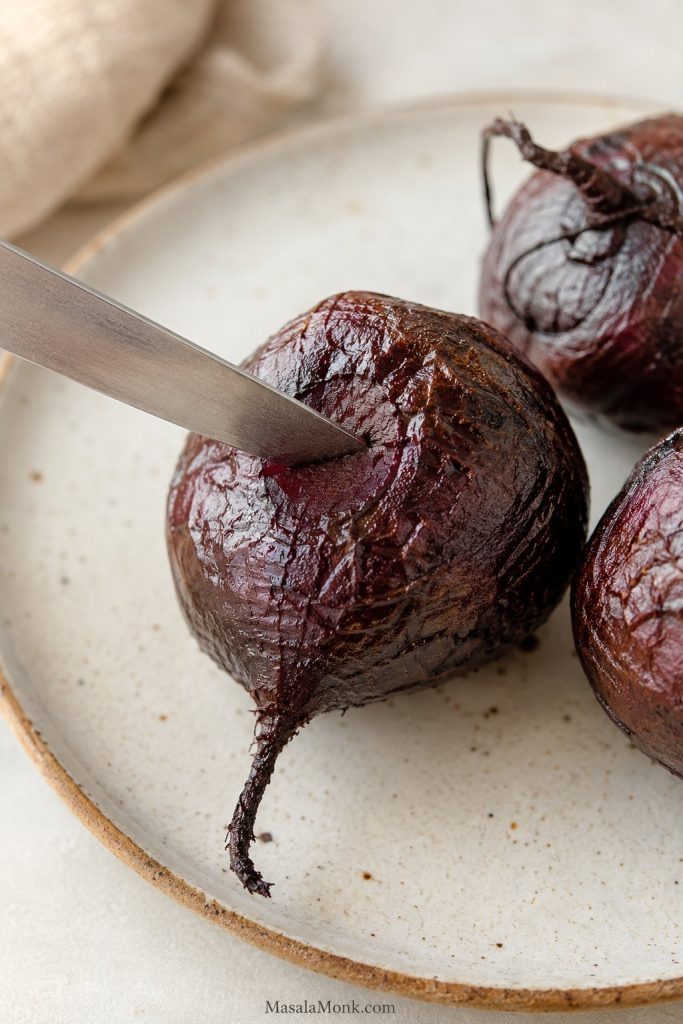
- The beets are done when a small knife slides into the center of the largest beet with little resistance.
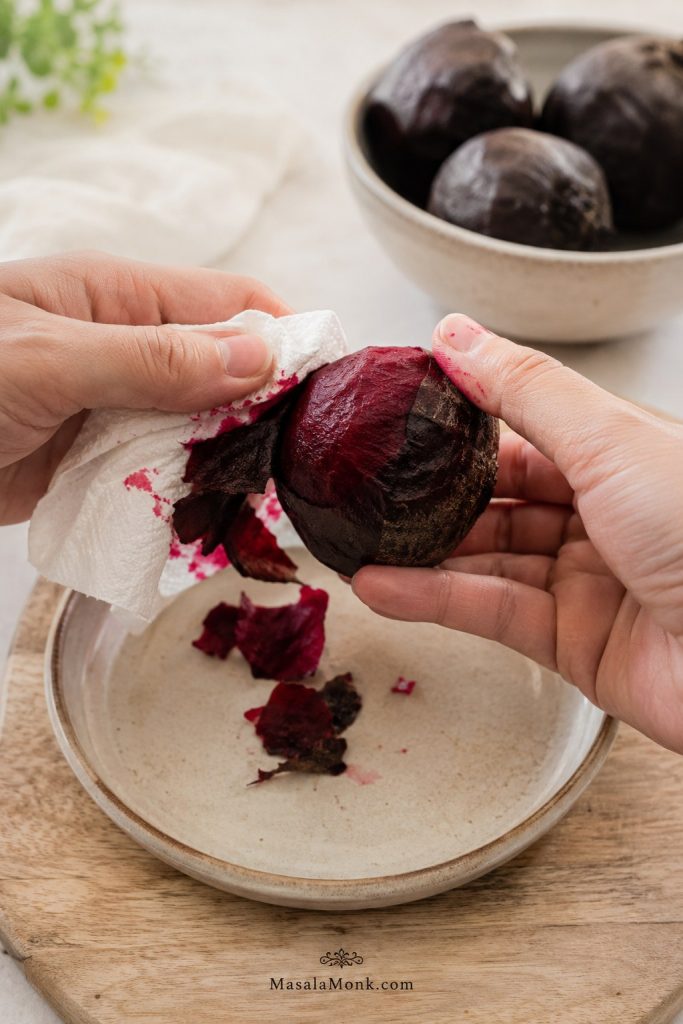
- Let the beets cool for 10–15 minutes, or until comfortable to handle.
- Rub off the skins with paper towels or gloved hands.
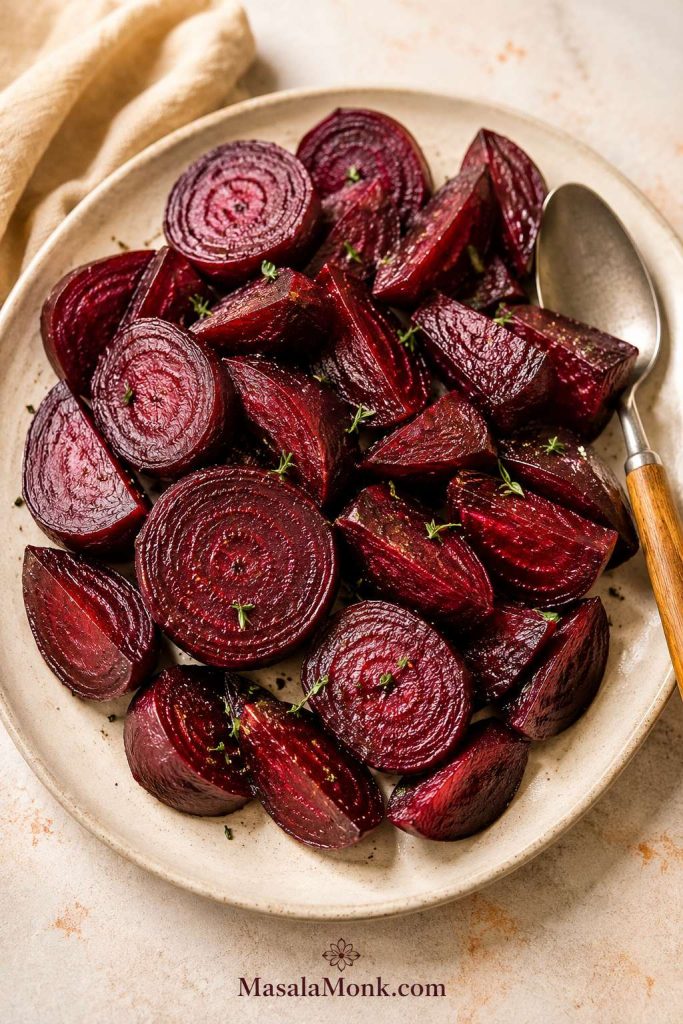
- Slice into wedges, half-moons, cubes, or ¼-inch rounds.
Check, peel, and slice
Use the knife test on the largest beet in the batch, because smaller beets may be tender before the biggest one is ready. This is the simplest way to avoid firm centers.
For whole roasted beets, peel after roasting. The skins slip off more easily, the beets stay juicier, and the prep is less messy. If the skins do not rub off easily, the beets may need a little more time in the oven.
After slicing, taste one beet. If it tastes flat, sprinkle the sliced beets lightly with salt or toss them with 1 teaspoon of the vinaigrette before adding them to the salad.
Sliced roasted beets
If you want more roasted edges and a shorter cooking time, peel the beets first and slice them into wedges or ¼-inch rounds. Toss with olive oil and salt, spread on a lined baking sheet, and roast at 425–450°F / 220–230°C for about 25–35 minutes, turning once.
This route is faster, but it is messier because you peel and cut the beets while raw. It is helpful when you want a stronger roasted flavor and do not mind a stained cutting board.
Foil vs no foil
Foil traps steam around whole beets, which helps them cook evenly and makes the skins easier to rub off. A covered baking dish works in a similar way and is the most reliable no-foil option. Uncovered roasting gives more caramelization, but it can dry out whole beets before the centers are tender. Use uncovered roasting mainly for sliced beets.
No-foil method: Place scrubbed beets in a small covered baking dish with a splash of water and a little olive oil. Cover tightly and roast until tender. The goal is to trap enough steam for easy peeling while still concentrating the beet flavor.
How to Make Beet Salad
Once the beets are roasted, the rest is assembly. Start with less vinaigrette than you think you need, then add more only after tasting. Beet salad should look glossy, not wet.
- Roast, cool, peel, and slice the beets. If using cooked or canned beets, drain and pat them dry.
- Toast the walnuts. Warm them in a dry skillet for 3–5 minutes, stirring often, until fragrant. Let them cool so they stay crisp.
- Make the vinaigrette. Shake or whisk together olive oil, balsamic vinegar, lemon or orange juice, Dijon, honey or maple syrup, salt, and pepper.
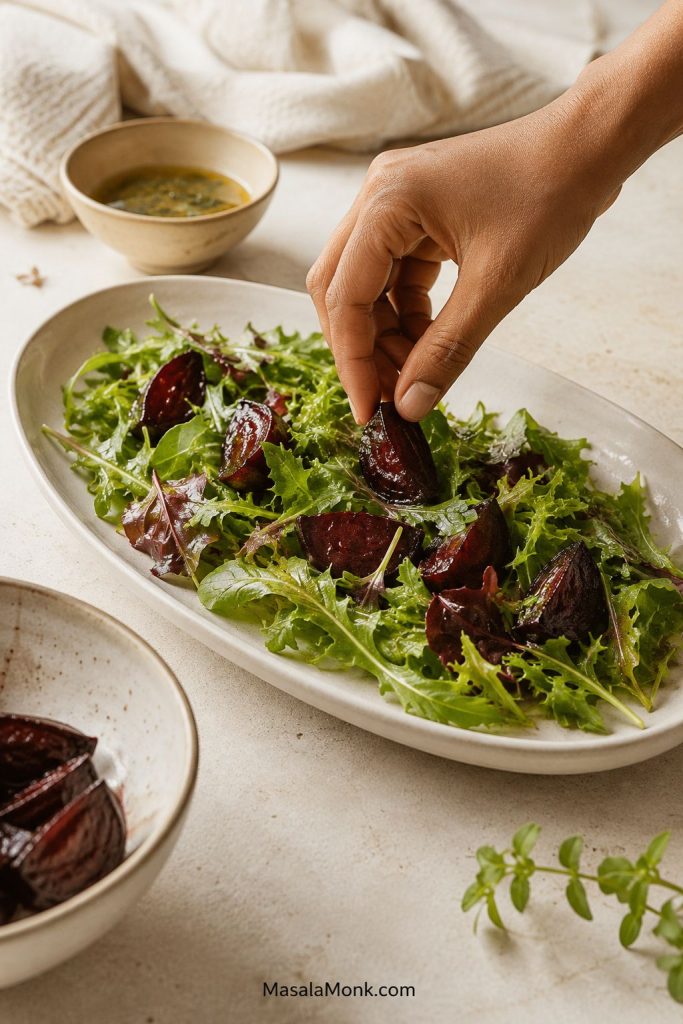
- Dress the greens lightly. Toss the greens with 1–2 tablespoons of vinaigrette before adding the beets.
- Add the beets gently. Arrange them over the greens, then drizzle with a little more if needed.
- Finish with feta, walnuts, herbs, and shallot. Add these at the end so the salad keeps its texture and color.
- Taste a complete bite. Try beet, feta, walnut, greens, and dressing together. Adjust with lemon, salt, pepper, or herbs before serving.
Dress the greens first and keep the beets out until the leaves are lightly coated. This gives the salad flavor from underneath without turning the greens heavy.
Platter vs Bowl
Use a platter when presentation matters. Dress the greens lightly, layer the beets, then finish with feta, walnuts, herbs, and a final drizzle. A wide platter keeps the feta white, the walnuts crisp, and the beets from staining every leaf before serving.
Once the beets are arranged, add the delicate toppings at the end. This is the easiest way to keep the salad bright instead of fully stained pink.
Use a bowl when you are adding quinoa, chickpeas, lentils, beans, eggs, chicken, or salmon. Cut the beets into cubes or half-moons so every forkful gets a little sweetness, salt, acid, and crunch.
Avoid these beet salad mistakes: Let the beets cool, dress lightly, add feta near the end, use enough salt and acid, and give soft canned beets something crisp.
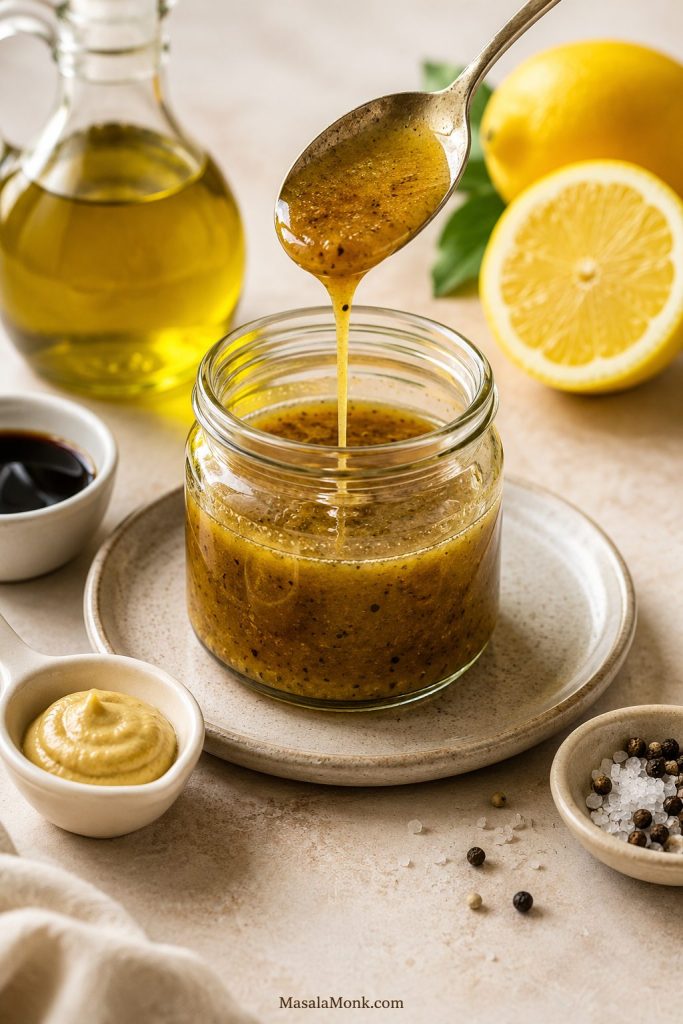
The Best Dressing for Beet Salad: Lemon-Balsamic Dijon
With beets, the vinaigrette is what keeps the salad from tasting heavy. Think of it as the no-muddy-beets dressing: balsamic for depth, lemon for lift, Dijon for body, and just enough sweetness to round the edges without making the salad sugary.
| Ingredient | Amount | Why it is there |
|---|---|---|
| Extra-virgin olive oil | 3 tbsp / 45 ml | Gives body and carries the flavor |
| Balsamic vinegar | 1 tbsp / 15 ml | Matches the sweetness of roasted beets |
| Lemon juice or orange juice | 1 tbsp / 15 ml | Lifts the salad and reduces earthiness |
| Dijon mustard | 1 tsp / 5 ml | Helps emulsify the dressing and adds bite |
| Honey or maple syrup | 1–2 tsp / 5–10 ml | Rounds the sharp edges without making the salad sweet |
| Fine salt | ¼ tsp, plus more to taste | Balances the beets without over-salting the feta |
| Black pepper | To taste | Adds warmth and contrast |
Use 1 teaspoon honey or maple for a sharper vinaigrette, or 2 teaspoons if your vinegar is harsh or your beets taste especially earthy. Skip the sweetener for very sweet roasted beets or pickled beets.
How Much Dressing to Use
Dressing rule: Start with 1–2 tablespoons on the greens, then add more only after the beets are on the salad. If the salad tastes flat, add salt first; if it tastes earthy, add lemon and herbs; if it tastes too sweet, add vinegar, lemon, or peppery greens.
The easiest visual cue is the surface of the salad. The beets and greens should shine lightly, but the plate should not have dressing pooling at the bottom.
How to Change the Vinaigrette
Use orange vinaigrette when fruit is involved, lemon-herb dressing when the salad has cucumber or chickpeas, and honey-Dijon when you switch from feta to goat cheese. For a deeper dinner-party version, add roasted garlic or finely chopped toasted walnuts to the vinaigrette.
Recipe Card: Roasted Beet Salad with Feta & Walnuts
Sweet roasted beets, briny feta, toasted walnuts, greens, herbs, and a lemon-balsamic dressing come together in a colorful salad that works as a side dish or a larger salad with lunch add-ins.
Timing note: Small beets may roast in 35–45 minutes. Large beets can take 60–75 minutes.
Shortcut time: 15 minutes if using cooked, canned, vacuum-packed, or leftover roasted beets.
Yield: 4 side servings, or 2 larger salad servings. For a fuller lunch, add quinoa, chickpeas, lentils, eggs, beans, or another protein.
Equipment: rimmed baking sheet or small covered baking dish, foil or lid, sharp knife, cutting board, small skillet, small jar or bowl for dressing, paper towels or gloves, salad bowl or platter.
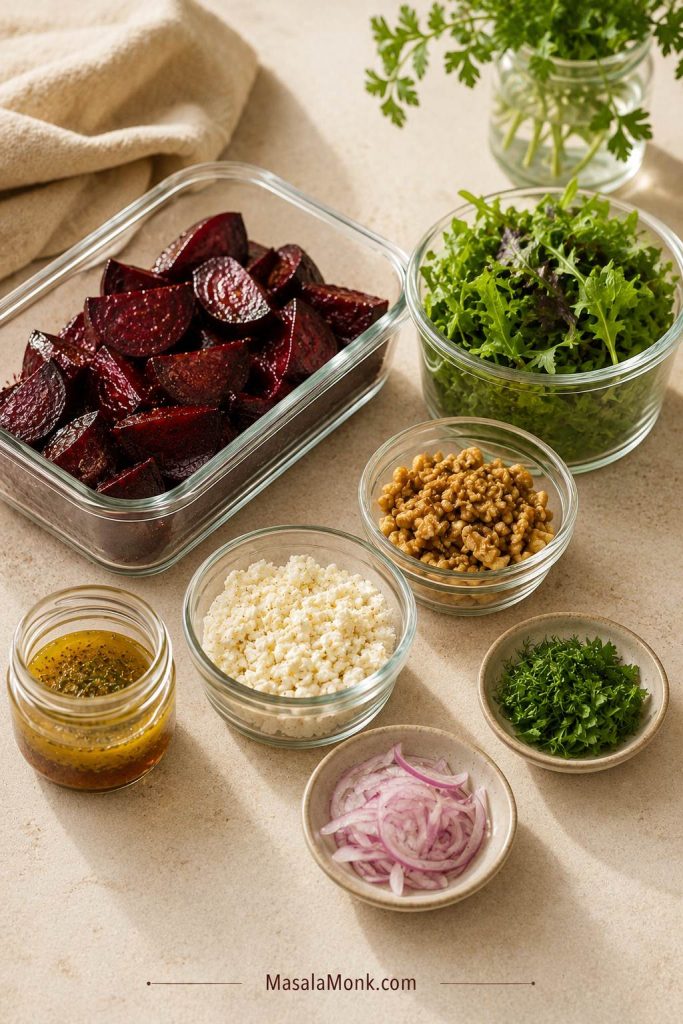
Ingredients
For the beets and salad
- 600–700 g / 1⅓–1½ lb raw beets, about 4 medium
- 1 tbsp / 15 ml olive oil, for roasting
- Pinch of salt, for roasting
- 120–140 g / 4–5 oz arugula/rocket, baby spinach, or mixed greens
- 85–100 g / 3–3½ oz feta, crumbled
- 50–60 g / ½ cup walnuts, toasted
- 1 small shallot or ¼ small red onion, thinly sliced or minced
- 2–3 tbsp chopped fresh parsley, mint, dill, or basil
- Optional: 1 orange, segmented; 1 crisp apple, sliced; or a mix of red and golden beets
For the lemon-balsamic Dijon dressing
- 3 tbsp / 45 ml extra-virgin olive oil
- 1 tbsp / 15 ml balsamic vinegar
- 1 tbsp / 15 ml lemon juice or orange juice
- 1 tsp / 5 ml Dijon mustard
- 1–2 tsp / 5–10 ml honey or maple syrup
- ¼ tsp fine salt, plus more to taste
- Freshly ground black pepper, to taste
Method
- Roast the beets. Heat the oven to 400°F / 200°C. Scrub the beets, rub with olive oil and a pinch of salt, then wrap in foil or place in a covered baking dish. Roast until a knife slides easily into the center: 35–45 minutes for small beets, 45–60 minutes for medium beets, or 60–75 minutes for large beets.
- Cool and peel. Let the beets cool for 10–15 minutes, or until comfortable to handle. Rub off the skins with paper towels or gloved hands. Slice into wedges, half-moons, cubes, or ¼-inch rounds.
- Toast the walnuts. Place walnuts in a dry skillet over medium-low heat for 3–5 minutes, stirring often, until fragrant. Cool before adding to the salad.
- Make the vinaigrette. In a jar or small bowl, combine olive oil, balsamic vinegar, lemon or orange juice, Dijon, honey or maple syrup, salt, and pepper. Shake or whisk until combined. Taste; it should be tangy and lightly salty before it goes on the salad.
- Dress the greens lightly. Toss the greens with 1–2 tablespoons of dressing before adding the beets. You may not need all of it.
- Add the beets. Arrange the sliced beets over the greens. Drizzle with another spoonful if needed.
- Finish the salad. Add feta, toasted walnuts, shallot or red onion, and herbs. Add orange or apple if using.
- Taste and serve. Taste a bite with beet, feta, walnut, greens, and dressing together. Adjust with lemon, salt, pepper, or herbs before serving.
Shortcut Version
Use about 3 cups cooked beets, or 500–600 g / 18–21 oz cooked, canned, vacuum-packed, or leftover roasted beets. Drain and pat dry, then slice and assemble the salad with the same dressing and remaining salad ingredients. Total time: about 15 minutes.
Notes
- Cool beets fully and add feta last for the cleanest presentation.
- Start with 1–2 tablespoons dressing; beet salad should be glossy, not wet.
- For canned beets, use two standard 14–15 oz / 400 g cans, drain, rinse if needed, and pat very dry.
- For pickled beets, reduce or skip the balsamic vinegar and use more lemon, dill, cucumber, and red onion.
- Store roasted beets and dressing separately for 3–4 days. Assemble close to serving.
Use the recipe card above for the main roasted beet version. The sections below help you adapt it if you are starting with canned, cooked, pickled, raw, or boiled beets, or if you want a lunch bowl, no-greens version, storage plan, or quick fix.
Roasted, Raw, Canned, Pickled, or Boiled Beets?
Roasted beets give the fullest flavor, but this salad does not fall apart if you start with cooked, canned, pickled, boiled, or raw beets. The key is knowing what each type needs before it goes into the bowl.
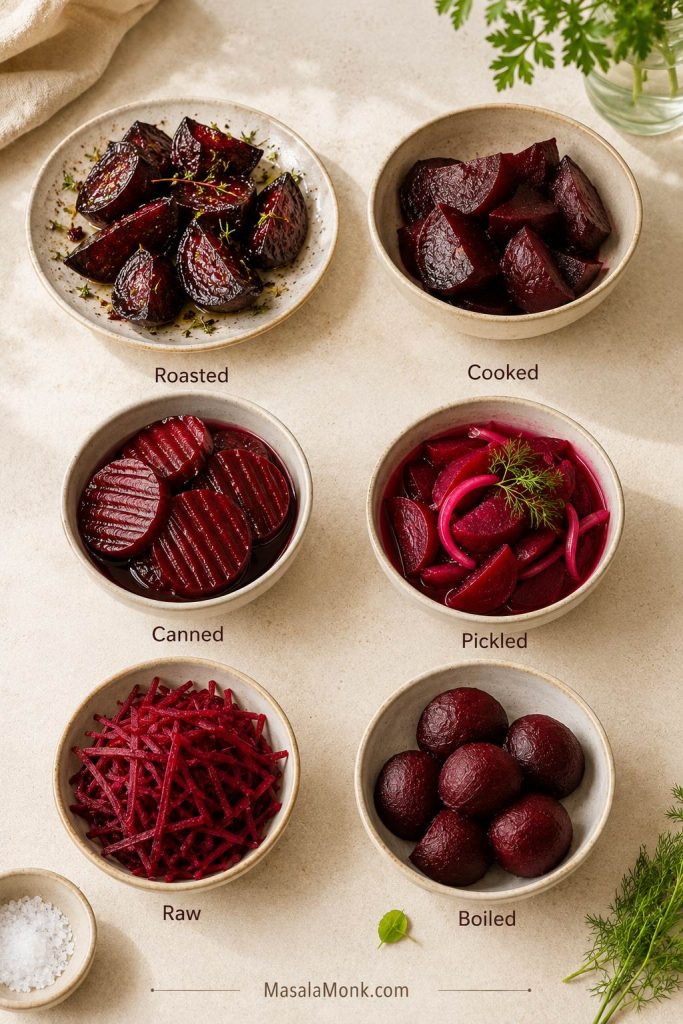
| Beet option | Best for | What to know |
|---|---|---|
| Roasted beets | Fullest flavor | Sweet, deep, tender, and less watery than boiled beets. |
| Vacuum-packed cooked beets | Fastest no-roast option | Closest shortcut to roasted texture. Pat dry before using. |
| Canned beets | Pantry shortcut | Drain, rinse if needed, and pat very dry. Add extra crunch because canned beets are soft. |
| Pickled beets | Tangy no-cook salad | Use less vinegar in the dressing because the beets already bring acidity. |
| Raw beets | Crunchy slaw-style salad | Peel, grate, julienne, or slice very thin. Thick raw beet pieces are too hard for this style. |
| Boiled beets | Already cooked beets | Softer and often wetter than roasted beets. Dry them well and use a punchy dressing. |
The shortcut versions are not second-best if you build them well. They just need more drying, more crunch, and a brighter finish.
If you are shopping specifically for this recipe, buy raw medium beets for the fullest flavor or vacuum-packed cooked beetroot for the easiest shortcut. Use canned or pickled beets when they are what you already have.
15-Minute Beet Salad with Cooked, Canned, or Vacuum-Packed Beets
For a fast beet salad, use about 3 cups cooked beets, or 500–600 g / 18–21 oz cooked, canned, vacuum-packed, or leftover roasted beets. Slice into wedges, half-moons, or cubes, then pat dry before adding dressing.
- Vacuum-packed cooked beets: The closest no-roast option to roasted beets. Drain, pat dry, slice, and build the salad the same way.
- Canned beets: Use two standard 14–15 oz / 400 g cans, drained, or about 3 cups sliced canned beets. Rinse if they taste metallic, salty, or too sweet, then pat very dry and add extra texture.
- Pickled beets: Use less balsamic or skip it. Pair with cucumber, red onion, dill, feta, walnuts or pistachios, olive oil, and lemon.
If I am using canned beets, I am more generous with walnuts, cucumber, or apple because canned beets are softer and need more crunch.
For pickled beets, a good quick combination is: 2 cups sliced pickled beets + 1 cucumber + ¼ red onion + ½ cup feta + ⅓ cup walnuts or pistachios + fresh dill + olive oil + lemon juice.
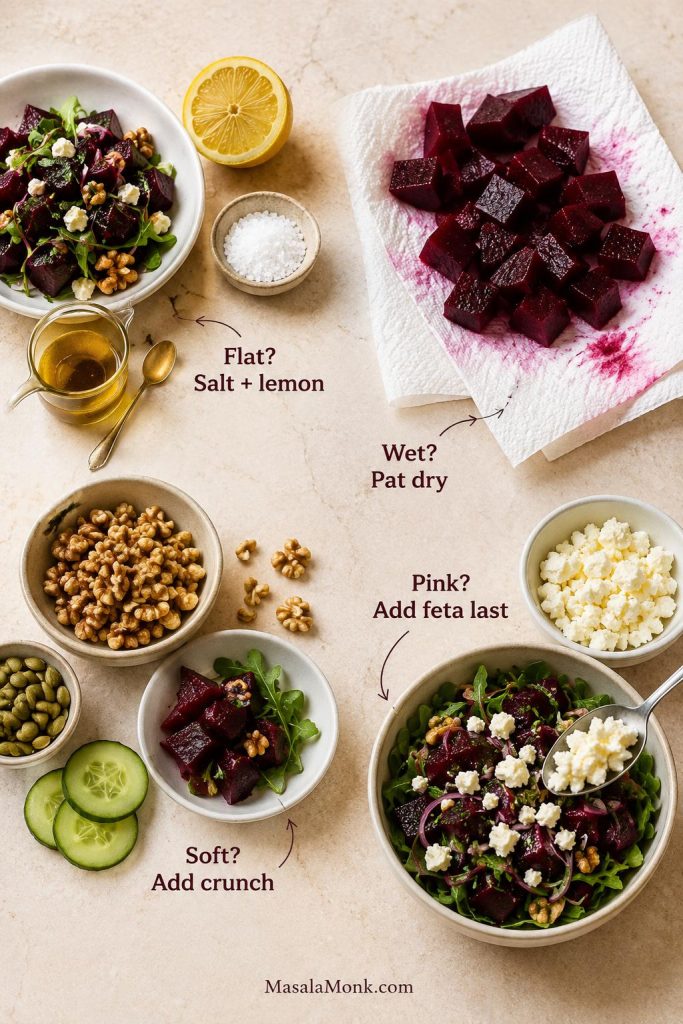
How to Keep Beet Salad from Turning Everything Pink
Beets will always share some color. The goal is not to stop the color completely; it is to keep the salad from becoming one flat pink bowl before it reaches the table.
- Cool the beets fully before adding them to greens or feta.
- Pat cooked, canned, or pickled beets dry before slicing or tossing.
- Dress the greens first instead of tossing everything together at once.
- Add the beets gently and avoid aggressive mixing.
- Add feta last so the white pieces stay visible.
- Use a platter instead of a deep bowl when presentation matters.
- Add walnuts right before serving so they stay crisp.
- Roast red and golden beets separately if you want clean color contrast.
If leftovers turn pink, they are still good. Beet, feta, walnut, and herb salad without delicate greens can taste even better after sitting; it simply becomes more of a marinated beet side.
Beet Salad Variations
Use the variations by need: grains or legumes when it has to be lunch, orange or apple when it needs brightness, cucumber or raw beet when you want crunch, and no greens when it needs to sit.
To make beet salad a meal: Add 1½ cups cooked quinoa, 1 can chickpeas, 1½ cups lentils, boiled eggs, white beans, salmon, chicken, or tofu. Use sturdier greens like kale, arugula, or spinach, and keep the walnuts separate until serving.
Turn it into lunch
Beet and quinoa salad: Fold in 1½ cups cooked and cooled quinoa and use a little extra dressing. Arugula, spinach, or finely chopped kale hold up best.
Beet and chickpea salad: Add 1 can chickpeas, drained and rinsed. Chickpeas make the salad more filling and work especially well with lemon, parsley, mint, cucumber, and feta. If you want another fresh, protein-friendly salad, this chickpea salad recipe is a useful next stop.
Beet and lentil salad: Add 1½ cups cooked green or brown lentils. Use extra lemon, vinegar, feta, and herbs so the salad stays bright instead of heavy.
Make it brighter
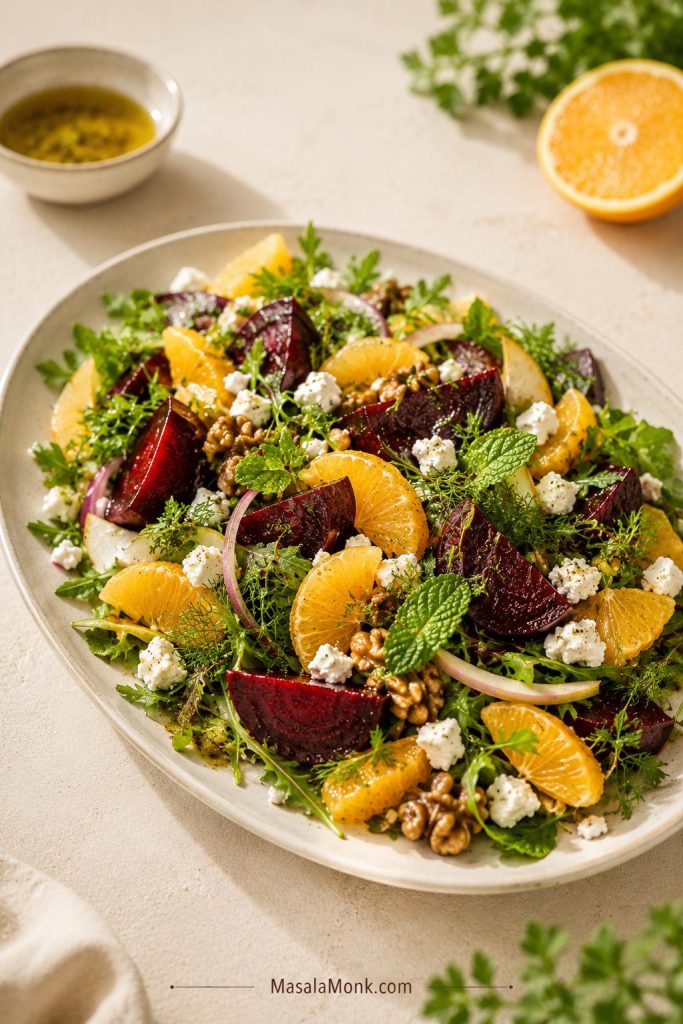
Beet and orange salad: Add 1–2 oranges, segmented or sliced. Use orange juice in the dressing and finish with mint or basil. Pistachios are especially good here.
Apple beet salad: Add 1 crisp apple, thinly sliced just before serving. It gives the salad a sweet-tart snap that works well with walnuts, feta, and lemon.
Pear and beet salad: Add 1 ripe but firm pear when you want a softer, dinner-party style salad. Goat cheese, walnuts, and honey-Dijon are the best match here.
Make it crunchier
Raw beet salad: Peel 1–2 raw beets, then grate, julienne, or slice very thin. Toss with lemon or orange juice and salt, rest for 10 minutes, then add apple, carrot, herbs, seeds, or feta. Use a mandoline guard if slicing thinly.

Beet and carrot salad: Grate 1 raw beet + 1 large carrot, then add lemon juice, olive oil, parsley or mint, salt, and toasted seeds. This eats more like a beet slaw than a roasted beet salad.
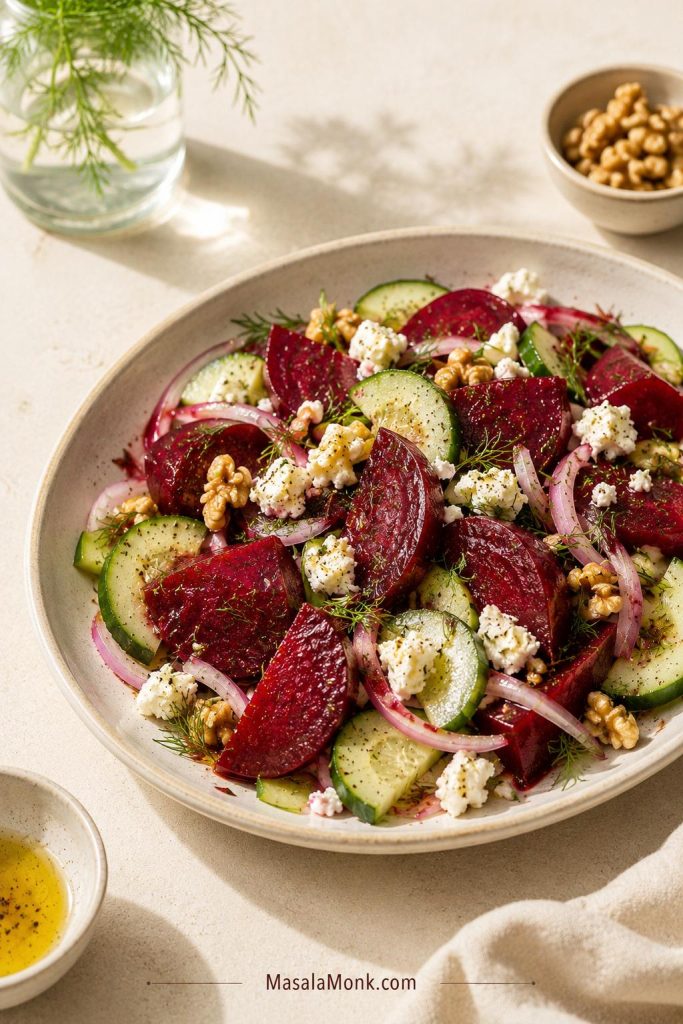
Beet and cucumber salad: Combine 2 cups cooked or pickled beets + 1 cucumber, sliced. Add dill, feta, red onion, lemon, olive oil, and walnuts or pistachios. If cucumber is the part you love most, this crisp cucumber salad recipe is a good companion.
Make it ahead
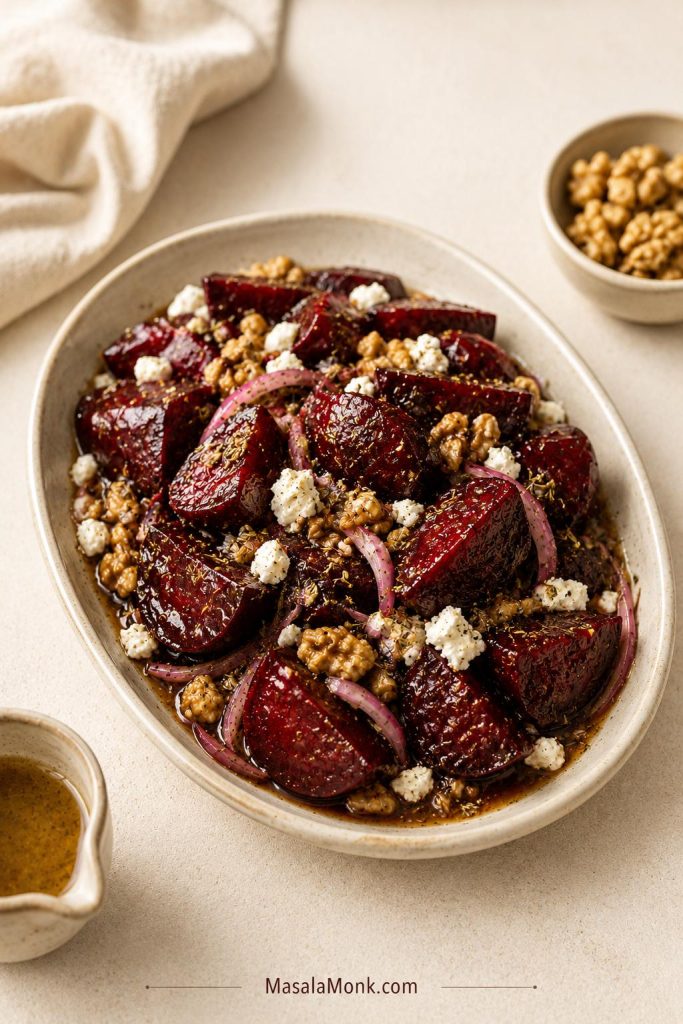
No-greens beet salad: Make it more like a marinated beet side with 3 cups cooked beets + ½ cup feta + ½ cup walnuts + 2–3 tbsp herbs + 1 small shallot + enough dressing to coat. It is less delicate, more make-ahead friendly, and good for holiday or picnic tables. It will turn pink as it sits, but the flavor holds well for 2–3 days.
Change the cheese
Goat cheese beet salad: Use soft goat cheese instead of feta when you want a creamier salad, especially with honey-Dijon, walnuts, arugula, and pear.
Blue cheese beet salad: Use less cheese because the flavor is stronger. Add pear, walnuts, and bitter greens for balance.
Dairy-free beet salad: Skip the cheese and add avocado, toasted seeds, capers, olives, or tahini-lemon dressing. Increase salt slightly because feta normally provides much of the seasoning.
What to Serve with Beet Salad
Use this salad when the rest of the meal is simple and you need one dish that brings color, freshness, and a little drama. It is especially good next to anything rich or beige: roast chicken, salmon, steak, lentils, grains, or creamy soups.
- With rich mains: serve it with roast chicken, steak, lamb, salmon, or trout. For a simple chicken plate, this baked chicken breast recipe keeps the protein easy and meal-prep friendly.
- With simple soups: pair it with lentil soup, bean soup, tomato soup, or vegetable soup for a colorful lunch.
- With grains: serve it over quinoa, farro, barley, rice, or couscous and add chickpeas or lentils.
- For holiday or summer meals: use a wide platter, red and golden beets, feta, walnuts, herbs, cucumber, dill, or pickled beets.
If you bought a big bag of beets and still have a few left, use the extras in this beet juice recipe with carrot, apple, lemon, and ginger.
Make-Ahead and Storage
Beet salad is make-ahead friendly if you store the parts separately. Delicate greens and walnuts are best added close to serving. For a version that holds better after assembly, use the no-greens beet salad variation above.
| Component | How long it keeps | How to store it |
|---|---|---|
| Roasted peeled beets | 3–4 days | Refrigerate in an airtight container |
| Dressing | 3–4 days | Refrigerate in a jar; shake before using |
| Toasted walnuts | Up to 1 week | Store airtight at room temperature once cool |
| Washed greens | 2–3 days | Keep dry in a lined container or bag |
| Fully assembled salad with greens | Best same day | Serve soon after dressing |
| Beet, feta, walnut, and herb salad without greens | 2–3 days | Refrigerate, but expect the color to bleed |
For entertaining, roast the beets the day before, make the dressing ahead, toast the walnuts, and wash the greens. Shortly before serving, slice the beets, dress the greens lightly, arrange everything on a platter, and finish with feta, walnuts, herbs, and a final drizzle.
For broader storage questions beyond this salad, the FoodSafety.gov cold food storage chart is a helpful reference for refrigerated prepared foods.
Troubleshooting Beet Salad
If the salad is not quite landing, do not start over. Beet salad is easy to correct once you know whether it needs salt, acid, texture, or gentler assembly.
Quick Fix Guide
Problem-by-Problem Fixes
| Problem | Fix now | Fix next time |
|---|---|---|
| Salad tastes earthy or muddy | Add lemon juice, salt, feta, herbs, or a little extra vinegar | Roast the beets longer and use smaller, fresher beets |
| Salad tastes bland | Add salt first, then acid and herbs | Taste the dressing before tossing and season the beets lightly |
| Salad is too sweet | Add lemon, vinegar, peppery greens, black pepper, or more feta | Use less honey/maple and avoid sweetened canned beets |
| Salad is too acidic | Add olive oil, feta, walnuts, or a few more beets | Balance the dressing before adding it to the salad |
| Salad is watery | Drain excess liquid and add more greens or walnuts | Pat cooked or canned beets dry and avoid overdressing |
| Greens are soggy | Add fresh greens if available | Dress close to serving and store components separately |
| Feta turned pink | It is still fine to eat | Add feta last and arrange the salad instead of tossing heavily |
| Beets are too firm | Roast or steam them longer until tender | Test the largest beet with a knife before cooling |
| Beets are too soft | Use them in a bowl-style salad with grains or beans | Roast whole beets and avoid overcooking sliced pieces |
| Walnuts taste bitter | Use fewer or swap with pecans, pistachios, or pumpkin seeds | Toast gently and avoid old walnuts |
| Raw beet salad is too hard | Let grated beets rest with lemon and salt for 10 minutes | Grate or julienne raw beets instead of cutting thick pieces |
Most of the time, the fix is small: a little more lemon, a pinch of salt, a handful of herbs, or something crisp on top. If the salad tastes flat, add salt and lemon before adding more oil. For cleaner color next time, use the layering method and add feta last.
FAQs About Beet Salad
What cheese goes best with beet salad?
Feta is the easiest choice because it is salty, tangy, and crumbly. Goat cheese is creamier and more restaurant-style. Blue cheese is stronger and works best with pear, walnuts, and bitter greens.
Are roasted beets better than boiled beets for salad?
Roasted beets usually taste better because they are sweeter, deeper, and less watery. Boiled beets can work, but they need extra drying, salt, lemon, and herbs.
Should I peel beets before or after roasting?
For whole roasted beets, peel after roasting because the skins slip off more easily and the beets stay juicier. For sliced roasted beets, peel before cutting.
Should beet salad be served warm or cold?
Beet salad is best cool or at room temperature. Warm beets can wilt greens and stain feta faster, so let them cool before assembling.
Why does my beet salad taste muddy?
It usually needs more acid, salt, herbs, or contrast. Add lemon juice, balsamic vinegar, feta, parsley, mint, peppery greens, or toasted nuts.
What dressing works best with beets and feta?
A lemon-balsamic Dijon vinaigrette works well because balsamic matches the sweetness of beets, lemon lifts the salad, and Dijon gives the dressing body.
What nuts go with beet salad?
Walnuts are classic. Pistachios are excellent with orange, pecans work well with goat cheese or pear, almonds add clean crunch, and pumpkin seeds are a good nut-free option.
What herbs go with beet salad?
Parsley, mint, dill, and basil all work. Use parsley for an everyday salad, mint with orange, dill with cucumber or pickled beets, and basil with summery versions.
Is it okay to use canned beets?
Yes. Drain, rinse if needed, and pat canned beets very dry. Since they are softer than roasted beets, add crunch with walnuts, cucumber, apple, red onion, or seeds.
How do raw beets work in salad?
Raw beets work best grated, julienned, or sliced very thin. Toss with lemon or orange juice and salt, rest for 10 minutes, then add apple, carrot, herbs, feta, nuts, or seeds.
Can I make beet salad the day before?
Yes, but store the parts separately. You can roast and peel beets 3–4 days ahead. Keep beets, dressing, greens, feta, and walnuts separate, then assemble close to serving.
Should I toss beet salad or layer it?
Layer it when you want the salad to look pretty. Toss the greens lightly with dressing first, then arrange the beets, feta, walnuts, herbs, and shallot on top.
You do not need to make beet salad the same way every time. Roast the beets when flavor matters, use cooked beets when speed matters, and taste one complete bite before serving. If the beets are sweet, the feta is salty, the walnuts are crisp, and the last bite still tastes lemony and fresh, the salad is doing exactly what it should.