Pregnancy is a season when you start reading the back of every food packet, Googling the strangest questions (“Can I eat…?”), and discovering new produce in your shopping basket. Cabbage—whether green, red, Savoy, or Napa—may not be the first vegetable you think of, but it’s more than just a crunchy slaw ingredient.
Here, we’ll take a science-backed deep dive into cabbage during pregnancy—covering safety, nutrition, preparation tips, and practical ways to enjoy it. You’ll also find links to related posts for expanding your pregnancy nutrition toolkit.
🌱 Why Consider Cabbage in Pregnancy?
Cabbage is low in calories but rich in nutrients, making it an easy win for your pregnancy plate.
One cup raw cabbage (~89 g) provides:
~22 kcal
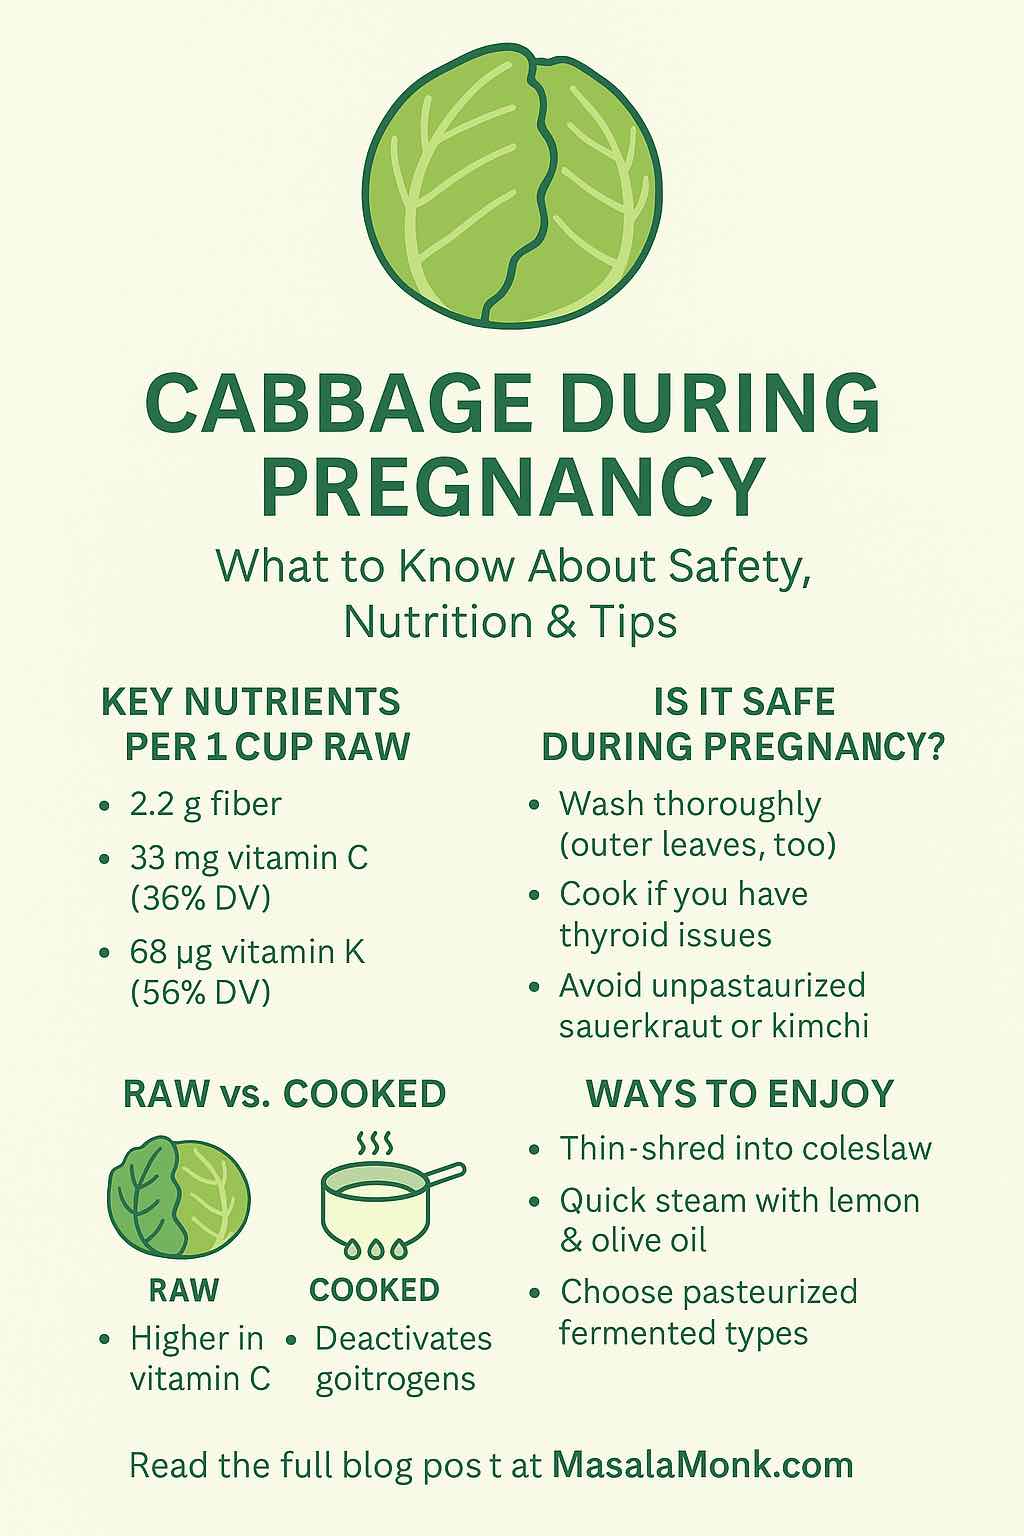
2.2 g fiber (supports digestion and satiety)
33 mg vitamin C (~36% of daily need) – aids immunity & helps your body absorb iron from plant foods
~68 µg vitamin K (~56% DV) – important for blood clotting and bone health
Small amounts of folate, vitamin B6, and potassium
Yes, cabbage is safe—as long as it’s handled properly.
Food safety checklist:
Wash thoroughly under running water; peel away outer leaves.
Dry well with a clean towel or salad spinner.
Cook when in doubt—heat kills harmful bacteria like Listeria, which is more dangerous during pregnancy.
Refrigerate promptly—Listeria can grow slowly even in the fridge.
For broader pregnancy-safe eating tips (and which foods to avoid), check our Safe Eating During Pregnancy guide.
🧪 Goitrogens & Thyroid Considerations
Cabbage is part of the cruciferous vegetable family, which also includes kale, broccoli, and Brussels sprouts. These vegetables contain glucosinolates, which can form compounds that interfere with iodine uptake in the thyroid (goitrogens).
If your iodine intake is adequate (about 220–250 µg/day in pregnancy), moderate cabbage consumption is not a concern.
If you have thyroid disease or low iodine intake, prefer cooked cabbage—heat inactivates most goitrogenic compounds.
Use iodized salt and include iodine-rich foods like eggs, dairy, and certain fish.
Slightly higher goitrogens; foodborne illness risk if not washed
Slaws, salads
Cooked
Safer; easier to digest; reduces goitrogens
Some vitamin C loss
Stir-fries, soups, steamed sides
Fermented (Sauerkraut, Kimchi)
Adds probiotics & flavor
Avoid unpasteurized; higher sodium
Pasteurized store-bought ferments
Tip: Steaming cabbage for 3–5 minutes preserves more vitamin C than boiling and still reduces goitrogens.
⚠️ When to Be Cautious
Unpasteurized ferments – Homemade sauerkraut/kimchi can carry bacteria harmful in pregnancy. Choose pasteurized versions.
Digestive sensitivities – Cabbage is moderate-to-high in FODMAPs. If you have IBS, smaller servings (½–¾ cup) are gentler.
Vitamin K & medications – Only relevant if you’re on warfarin, which is rarely used in pregnancy.
For pairing ideas that help balance digestion and nutrition, check out Chickpeas Through Pregnancy—legumes work beautifully with cabbage in soups, stews, and salads.
🍽 Practical Ways to Enjoy Cabbage in Pregnancy
Breakfast:
Savory omelet with shredded cabbage, carrots, and scallions
Side of steamed cabbage with olive oil and lemon
Lunch:
Warm red cabbage and quinoa salad with feta (pasteurized) and orange segments
Miso soup with Napa cabbage and tofu
Dinner:
Stir-fried green cabbage with garlic, ginger, and lean chicken strips
Roasted cabbage wedges with olive oil, iodized salt, and pepper
Snack/Side:
Pasteurized sauerkraut on wholegrain toast with avocado
Yogurt-based slaw with cabbage, apple, and mint (adds probiotics & calcium)
Rich in vitamin C, fiber, and vitamin K, with bonus folate and antioxidants.
Cook if thyroid concerns or to boost digestibility.
Avoid unpasteurized ferments in pregnancy.
Pair with protein & iodine-rich foods for a balanced meal.
Handled smartly, cabbage can be more than a filler—it can be a colorful, crunchy, and nourishing part of your pregnancy journey.
📝 FAQs: Cabbage During Pregnancy
1. Is cabbage safe to eat during pregnancy? Yes, cabbage is safe when washed thoroughly or cooked. Avoid unpasteurized fermented cabbage to reduce the risk of foodborne illness.
2. Can I eat raw cabbage while pregnant? Yes, if you wash it thoroughly under running water and remove outer leaves. Cooking is safer if you’re concerned about Listeria.
3. Does cabbage cause gas during pregnancy? Cabbage contains FODMAPs, which can cause bloating or gas in some people. Smaller servings and cooked cabbage may be easier on digestion.
4. How does cabbage affect thyroid health in pregnancy? Raw cabbage contains goitrogens, which may interfere with iodine uptake. If you have thyroid disease or low iodine intake, limit raw cabbage and prefer cooked forms.
5. Can I eat sauerkraut or kimchi during pregnancy? Yes—if it’s pasteurized. Avoid homemade or unpasteurized ferments to prevent harmful bacteria exposure.
6. How much cabbage can I eat when pregnant? 1–2 cups raw or cooked a few times per week is a reasonable amount, alongside other vegetables for variety.
7. Does cooking cabbage destroy its nutrients? Cooking reduces vitamin C but also lowers goitrogens and improves digestibility. Steaming for 3–5 minutes preserves more nutrients than boiling.
8. Is cabbage a good source of folate for pregnancy? Cabbage contains some folate, but it’s not as high as leafy greens like spinach or legumes. Pair it with folate-rich foods such as lentils or chickpeas.
9. Can cabbage help with constipation during pregnancy? Yes, its fiber content supports regular bowel movements, especially when combined with adequate fluids and other fiber-rich foods.
10. Which type of cabbage is best for pregnancy? All varieties (green, red, Savoy, Napa) are nutritious. Red cabbage offers extra antioxidants (anthocyanins), while green varieties are milder in flavor.
Pregnancy changes everything — your schedule, your priorities, and definitely your relationship with food. Suddenly, you’re not just eating for yourself, but for a tiny human whose bones, brain, and heartbeat are developing inside you. Every sip feels important.
If you’ve been eyeing that carton of almond milk at the store and wondering, “Is this okay for me and my baby?” — you’re not alone. Plant-based milks have gone from niche to mainstream, and almond milk, with its creamy texture and nutty aroma, is one of the most popular choices.
Let’s take a deep, reassuring dive into almond milk during pregnancy — what it offers, where it falls short, and how to make it work beautifully in your diet.
1. What Exactly Is Almond Milk?
Almond milk starts simple: almonds + water, blended and strained. The commercial versions you see in stores are often:
Pasteurized or UHT-treated (for safety)
Fortified with calcium, vitamin D, and sometimes B12 or iodine
Available in unsweetened and sweetened forms
Nutrition in a cup (240 ml) of unsweetened almond milk:
Calories: ~39 kcal
Protein: ~1 g
Fat: ~2.5 g (mostly healthy fats)
Carbs: ~3–4 g
Calcium: ~300–480 mg (if fortified)
Vitamin D: 2–5 µg (if fortified)
Vitamin E: 6–8 mg (naturally from almonds)
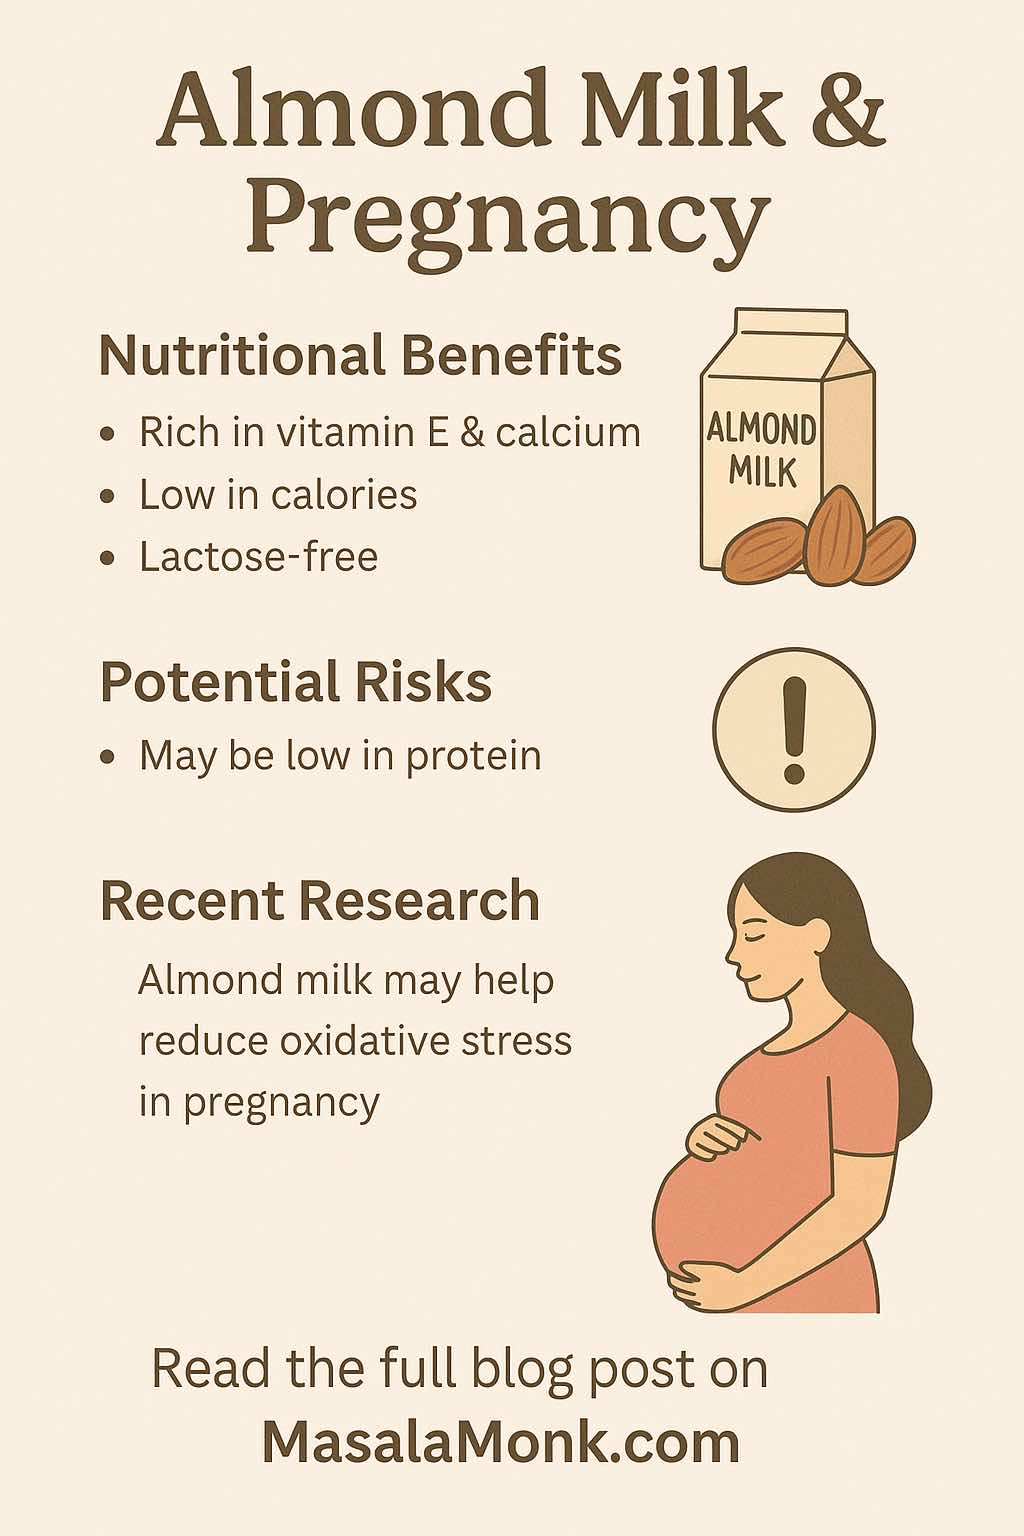
Translation: Almond milk is light and rich in vitamin E and calcium (if fortified), but it’s not a protein powerhouse.
2. Is Almond Milk Safe in Pregnancy?
For most healthy pregnant women without a nut allergy, yes — it’s safe when you choose the right type.
Look for:
Unsweetened (avoids unnecessary sugar spikes)
Fortified (for extra calcium, vitamin D, maybe iodine)
Pasteurized/UHT (prevents harmful bacteria)
Why pasteurization matters: Pregnancy lowers your immune defense, making you more vulnerable to foodborne illnesses. Pasteurized plant milks — including almond — are safer than homemade or “fresh pressed” versions.
3. The Perks: Benefits of Almond Milk During Pregnancy
a) Friendly to sensitive stomachs
No lactose, no bloating — a relief for those with lactose intolerance.
b) Blood sugar steady
Unsweetened almond milk has a low glycemic load, making it a gentle option for women managing gestational diabetes.
c) Bone health boost
Fortified almond milk adds calcium and vitamin D, helping your baby’s bones and teeth form — and protecting yours too.
d) Skin-loving vitamin E
Naturally present in almonds, vitamin E helps fight oxidative stress, supports skin elasticity, and contributes to immune function.
4. The Gaps You Need to Cover
Here’s the reality: almond milk doesn’t do everything.
Protein: Only ~1 g per cup — far below dairy milk’s ~8 g.
Iodine: Unless specifically fortified, it’s nearly absent — but iodine is crucial for fetal brain development.
Vitamin B12: Present only in fortified varieties; essential for nerve and blood health.
Tip: Pair almond milk with protein-rich foods like tofu, paneer, legumes, eggs, or soy yogurt. And use iodised salt at home or a prenatal supplement with iodine (if recommended by your doctor).
5. Choosing the Best Almond Milk for You
When scanning the shelves, be a label detective. The best pregnancy-friendly almond milk is:
Unsweetened — prevents sugar overload
Fortified — with calcium (~300–480 mg per cup), vitamin D (~2–5 µg per cup), and ideally iodine
Pasteurized or UHT-treated — safety first
Clean label — minimal additives, no artificial flavors, no carrageenan if you’re sensitive
6. Tasty, Practical Ways to Use Almond Milk
Pregnancy cravings are real, and almond milk can slide right into your comfort foods.
Nut allergy? Skip almond milk entirely — there are other plant-based options like oat or soy milk.
Vegan? Double-check B12 and iodine intake.
Homemade almond milk? Delicious, but unfortified and not pasteurized. Keep it an occasional treat, not your main milk source.
8. What the Latest Research Says (2024–2025)
The almond milk conversation has moved beyond taste — researchers are looking at its nutritional role in diets like yours.
Nutrient gaps are real: 2025 Australian modeling found that swapping dairy milk for almond or other plant milks often lowers intake of iodine, protein, riboflavin, and B12 — all critical in pregnancy.
Iodine remains the weak link: Large UK/Europe surveys confirm most almond milks have little to no iodine unless fortified — and fortification levels are inconsistent.
Guidelines are adapting: 2025 public health advice is clear: No plant drink is nutritionally equivalent to dairy unless fortified with multiple nutrients (calcium, D, iodine, B12). Pregnant women using plant milks should read labels and, if needed, use a prenatal with iodine and B12.
Blood sugar friendliness: A 2025 trial in people with type 2 diabetes found unsweetened almond milk had a gentler post-meal effect on blood sugar than carb-matched dairy milk — promising news for gestational diabetes management.
Almond milk can be a safe, healthy, and satisfying part of your pregnancy diet — but only if you choose wisely and balance it with other nutrient-rich foods. Go for unsweetened, fortified, pasteurized options, keep an eye on protein and iodine, and let almond milk be a supporting star, not the whole show.
Your pregnancy diet should be as rich, colorful, and joyful as the journey you’re on. With the right choices, almond milk can be one delicious way to nourish both you and your baby.
FAQs: Almond Milk During Pregnancy
1. Is almond milk safe to drink during pregnancy? Yes, for most women without nut allergies. Choose unsweetened, fortified, pasteurized or UHT almond milk for safety and nutrition.
2. What nutrients does almond milk provide for pregnant women? It can provide calcium, vitamin D, and vitamin E (if fortified), but is naturally low in protein, iodine, and vitamin B12.
3. Can almond milk replace dairy milk completely during pregnancy? Not entirely. Dairy milk offers more protein and usually more iodine. If you switch, make sure you’re getting protein, iodine, and B12 from other foods or supplements.
4. Is homemade almond milk okay during pregnancy? It’s safe if prepared hygienically, but it’s not fortified and may lack calcium, vitamin D, iodine, and B12 — so it shouldn’t be your only milk source.
5. Which type of almond milk is best for pregnancy? Look for unsweetened varieties fortified with calcium (~300–480 mg), vitamin D (~2–5 µg), and iodine, and ensure they are pasteurized.
6. Can I drink almond milk if I have gestational diabetes? Yes, unsweetened almond milk has a low glycemic load and is a good choice for managing blood sugar, but the overall meal pattern matters more.
7. How much almond milk can I drink during pregnancy? 1–2 cups a day is fine as part of a balanced diet. Don’t rely on it as your main protein or iodine source.
8. Does almond milk cause allergies in pregnancy? If you have a nut allergy, avoid almond milk entirely. If you’ve never had almonds before, try in small amounts and watch for reactions.
9. Can almond milk help with pregnancy constipation? It’s not a fiber-rich drink, but it can be part of a high-fiber diet when combined with fruits, vegetables, whole grains, and adequate water.
10. Is almond milk safe in the first trimester? Yes, as long as it’s pasteurized, unsweetened, and fortified. Early pregnancy is a key time for nutrient intake, so cover gaps in protein, iodine, and B12 from other sources.
Earl Grey tea—imbued with the distinct citrusy and floral essence of bergamot—has long been associated with refinement. But this beloved tea is not just for quiet mornings; it’s also a wonderful base for cocktails that are both aromatic and complex. Whether you’re looking for a refreshing drink for a warm day or an elegant sip for evening relaxation, these Earl Grey and Bergamot-spiced iced tea cocktails will infuse your routine with sophistication and charm.
Here are five sophisticated cocktail recipes that use Earl Grey and bergamot tea as their foundation. With spirits ranging from gin and bourbon to tequila, these cocktails offer variety while maintaining the elegance of their tea base. Each recipe is carefully crafted to ensure the balance of flavors is perfect.
1. Earl Grey & Gin Fizz: A Sparkling, Citrus-Infused Elegance
Ingredients:
60 ml gin (choose a floral or herbal gin for added depth)
30 ml freshly brewed Earl Grey tea, cooled
22.5 ml simple syrup (adjust to taste)
15 ml fresh lemon juice
90 ml sparkling water (or club soda)
Garnish: Lemon wheel, fresh mint sprig
Preparation:
Brew a strong batch of Earl Grey tea and allow it to cool completely.
In a cocktail shaker, combine the gin, Earl Grey tea, simple syrup, and lemon juice.
Add ice and shake vigorously until well-chilled.
Strain into a highball glass filled with ice.
Top with sparkling water and stir gently to combine.
Garnish with a lemon wheel and a fresh mint sprig.
“Bright, bubbly, and full of personality, the Earl Grey & Gin Fizz brings together the delicate flavors of Earl Grey with the effervescence of gin and sparkling water. A refreshing sip for any occasion, crowned with a lemon wheel and a sprig of mint to keep things light and vibrant.”
Why It Works:
The Earl Grey & Gin Fizz combines the floral gin with the refreshing citrusy notes of bergamot and lemon, all elevated by the effervescence of sparkling water. It’s a light, bubbly drink that’s perfect for a sophisticated afternoon.
2. Bergamot Bourbon Iced Tea: Bold and Full of Character
Ingredients:
60 ml bourbon (or rye whiskey for a spicier twist)
30 ml Earl Grey tea, brewed and cooled
15 ml simple syrup
15 ml fresh lemon juice
Ice cubes (preferably large)
Garnish: Lemon twist, sprig of thyme
Preparation:
Brew Earl Grey tea and let it cool to room temperature.
In a cocktail shaker, combine the bourbon, Earl Grey tea, simple syrup, and fresh lemon juice.
Fill a rocks glass with large ice cubes.
Shake the ingredients with ice and strain into the glass over the ice.
Garnish with a lemon twist and a sprig of thyme.
“Rich, smooth, and sophisticated, the Bergamot Bourbon Iced Tea combines the boldness of bourbon with the citrusy charm of Earl Grey tea. A twist of lemon and fresh thyme elevate this iced tea cocktail to an irresistible new level of elegance.”
Why It Works:
The Bergamot Bourbon Iced Tea delivers a robust, yet refreshing experience. The smoky notes of bourbon are perfectly complemented by the herbal qualities of the tea, while the lemon adds a burst of citrusy freshness. The thyme garnish enhances the aromatic appeal, making this drink perfect for any sophisticated occasion.
3. Earl Grey Negroni: A Refined Take on a Classic Cocktail
Ingredients:
30 ml gin
30 ml sweet vermouth
30 ml Earl Grey tea, brewed and cooled
15 ml Campari
Ice cubes
Garnish: Orange peel
Preparation:
Brew a strong batch of Earl Grey tea and let it cool.
In a mixing glass, combine the gin, sweet vermouth, Earl Grey tea, and Campari.
Add ice and stir for 30 seconds until the mixture is well-chilled and diluted.
Strain into a lowball glass filled with ice.
Express an orange peel over the glass and drop it in as a garnish.
“Introducing a classic with a twist—the Earl Grey Negroni combines the boldness of gin, sweet vermouth, and Campari with the fragrant touch of Earl Grey tea. A perfect balance of bitter, herbal, and citrus notes, finished with a zesty orange peel garnish.”
Why It Works:
The Earl Grey Negroni enhances the classic cocktail with the citrus and floral notes of bergamot. The bitterness of Campari and the rich, herbal vermouth meld beautifully with the tea, offering a drink that’s bold and aromatic. The orange peel garnish brings out the complexity, making this a drink to savor.
Brew a strong batch of Earl Grey tea and allow it to cool.
In a cocktail shaker, add the gin, Earl Grey tea, fresh lemon juice, honey syrup, and basil leaves.
Muddle the basil lightly to release its oils.
Add ice and shake until well-chilled.
Strain into a rocks glass filled with ice.
Garnish with a sprig of basil and a lemon wheel.
“Fresh, herbaceous, and bursting with citrus, the Bergamot Smash combines the crispness of gin with the vibrant flavors of Earl Grey and lemon. A basil garnish adds an aromatic finish, making this cocktail the ultimate refreshing choice for a summer sip.”
Why It Works:
The Bergamot Smash brings together the freshness of basil and the citrusy notes of bergamot. With the richness of gin (or vodka) and honey, the result is a well-rounded, refreshing cocktail. The herbal aroma of the basil and the bright citrus from the lemon make it a perfect drink for those who enjoy herbaceous flavors.
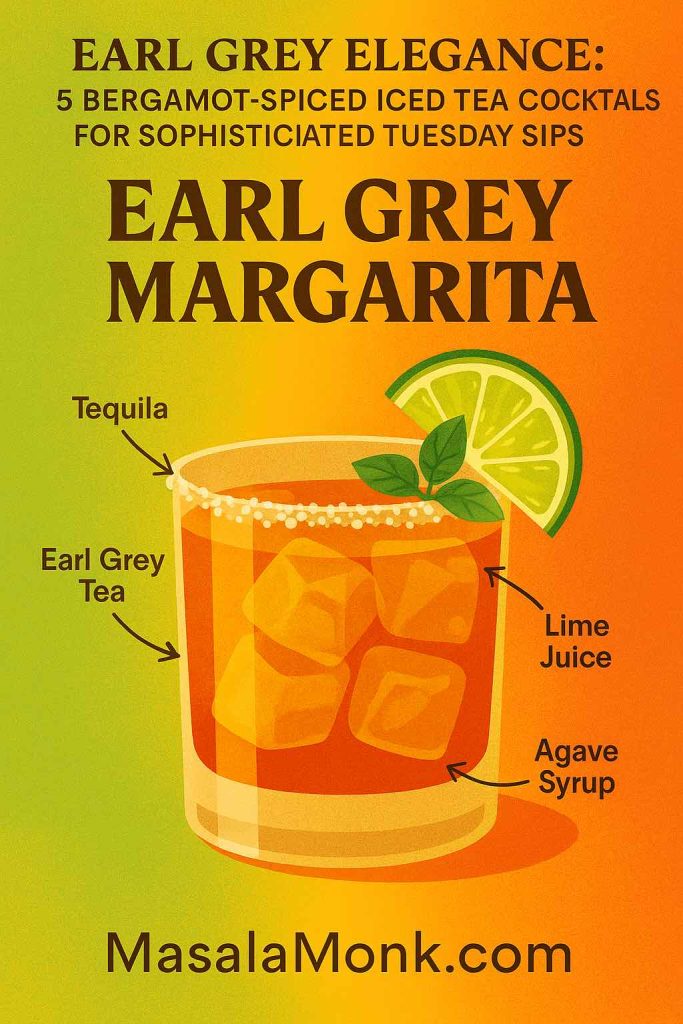
60 ml tequila (blanco for a clean taste or reposado for a deeper profile)
30 ml Earl Grey tea, brewed and cooled
22.5 ml lime juice (freshly squeezed)
15 ml triple sec
15 ml agave syrup (adjust sweetness as desired)
Salt (for rim)
Garnish: Lime wedge
Preparation:
Brew Earl Grey tea and allow it to cool.
Rim the glass with salt by rubbing a lime wedge along the rim and dipping it in salt.
In a shaker, combine tequila, Earl Grey tea, lime juice, triple sec, and agave syrup.
Add ice and shake vigorously until well-chilled.
Strain into a rocks glass rimmed with salt, filled with ice.
Garnish with a lime wedge.
“Spicy, zesty, and delightfully refreshing, the Earl Grey Margarita takes the beloved margarita to a whole new level with a splash of Earl Grey tea. The balance of tequila, lime, and agave syrup creates a cocktail that’s both bold and sophisticated, with a salted rim to elevate the experience.”
Why It Works:
The Earl Grey Margarita is an adventurous and bold twist on the classic margarita. The earthy flavor of tequila blends seamlessly with the floral and citrus notes of bergamot, while the lime juice and triple sec amplify the drink’s refreshing qualities. The salt rim enhances the margarita experience, giving this cocktail an exciting edge.
These Earl Grey and Bergamot-spiced iced tea cocktails bring together the elegance of classic cocktails with the unique floral flavors of Earl Grey. Whether you’re craving the effervescence of the Earl Grey & Gin Fizz, the bold complexity of the Bergamot Bourbon Iced Tea, or the herbal freshness of the Bergamot Smash, these cocktails will turn any Tuesday into an elegant occasion.
Each recipe is designed to let the bergamot shine while adding a modern twist, ensuring that each sip is both refreshing and sophisticated. So, why not elevate your next cocktail hour and enjoy the refined charm of Earl Grey in a whole new way?
Cheers to sophistication in every sip!
Pro Tip: For the best results, always use high-quality loose-leaf Earl Grey tea. It’s the key to making your cocktails truly exceptional, with a deeper, more complex flavor that complements the spirits beautifully.
FAQs
1. Can I make these cocktails without alcohol?
Yes, absolutely! Each of these Earl Grey-inspired cocktails can be made into mocktails by simply omitting the alcohol and adjusting the sweetness and flavors as needed. For example, you can leave out the gin in the Earl Grey & Gin Fizz or replace the bourbon with a non-alcoholic whiskey alternative in the Bergamot Bourbon Iced Tea.
2. Can I use regular tea instead of Earl Grey?
While Earl Grey has a unique flavor due to its bergamot infusion, you can substitute it with other black teas if needed. However, the signature citrusy note of bergamot in Earl Grey is what makes these cocktails distinctive, so we recommend using Earl Grey for the best results.
3. What can I use as a garnish if I don’t have mint or basil?
If you don’t have mint or basil, you can experiment with other fresh herbs like thyme, rosemary, or even lavender for a floral touch. Fresh citrus slices, such as lemon, lime, or orange, also make great garnishes for these cocktails.
4. How can I make Earl Grey tea concentrate?
To make an Earl Grey concentrate, simply brew the tea at double strength. Use 2 teaspoons of loose-leaf tea (or 2 bags) for every cup of water, and let it steep for 5-7 minutes before straining. This concentrated tea will add more robust flavor to your cocktails.
5. Can I make these cocktails in advance?
Yes, some of these cocktails can be pre-made in advance. For drinks like the Bergamot Bourbon Iced Tea, you can batch the ingredients (except for sparkling water and garnishes) and store them in the fridge until ready to serve. For fizzy drinks like the Earl Grey & Gin Fizz, it’s best to add the sparkling water just before serving to preserve its effervescence.
6. What’s the best gin to use in these cocktails?
A floral or herbal gin, such as Hendrick’s, Beefeater, or Tanqueray, works particularly well with Earl Grey due to the botanical flavors that complement the tea’s fragrance. However, you can use any gin that suits your taste!
7. Can I substitute the simple syrup with something else?
Yes, you can substitute simple syrup with honey syrup (1:1 honey and water) for a more natural sweetness, agave syrup for a vegan option, or maple syrup for a deeper flavor. Adjust the amount depending on how sweet you like your cocktails.
8. Is it necessary to use fresh citrus juice, or can I use bottled?
Fresh citrus juice is always recommended for the best flavor, as it provides a natural, bright acidity. Bottled juice can work in a pinch, but it may not have the same fresh taste and could contain preservatives or added sugars.
9. What kind of glasses should I use for these cocktails?
For a chic, sophisticated look, use highball glasses for fizz cocktails, rocks glasses for stirred drinks like the Bergamot Bourbon Iced Tea and Earl Grey Negroni, and coupe glasses for drinks like the Earl Grey Margarita to add an elegant touch.
10. Can I adjust the strength of the tea in these cocktails?
Yes, you can adjust the strength of the Earl Grey tea to your preference. If you prefer a stronger tea flavor, brew the tea for a longer period or use a higher tea-to-water ratio. For a milder flavor, steep the tea for a shorter time.
Delicious, filling, and built for busy lives — with real protein numbers
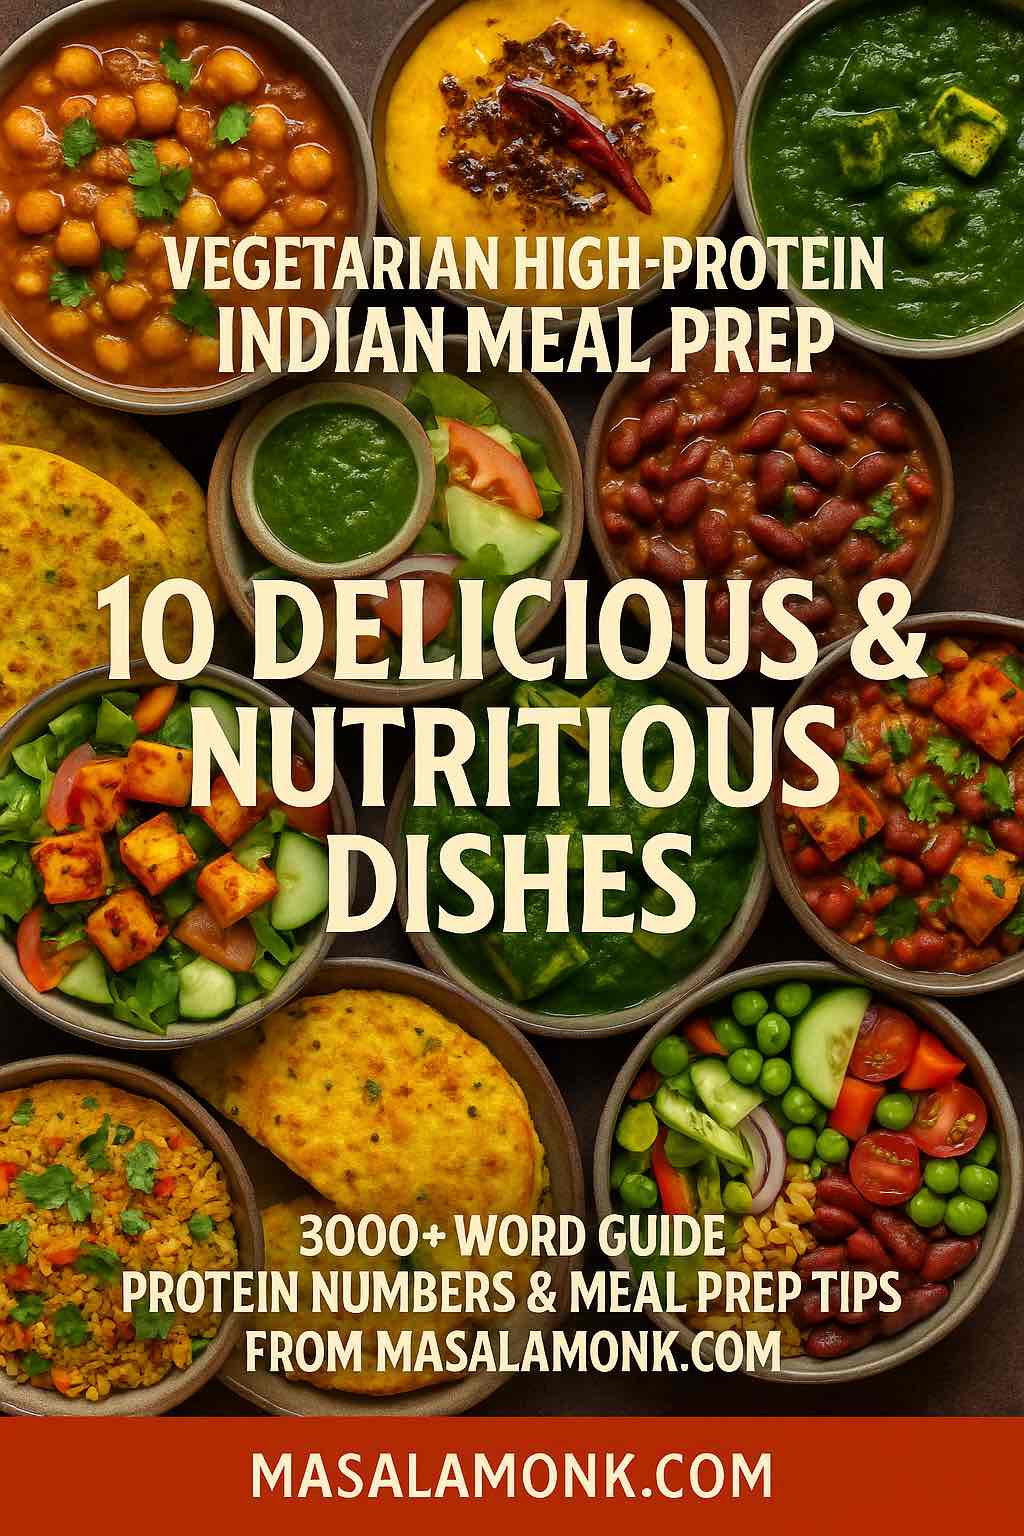
Why Indian Vegetarian Meal Prep is a Protein Goldmine
When most people think “high protein,” they picture grilled chicken, tuna, or protein shakes. But Indian vegetarian cooking has been quietly delivering balanced, protein-rich meals for centuries.
Between lentils, chickpeas, beans, soy, paneer, quinoa, and dairy, you can hit your daily protein needs while still eating the food you grew up loving — or the flavors you’re just discovering.
According to What Is Protein?, most adults need 1.2–2.0g of protein per kilogram of body weight per day for muscle repair, satiety, and steady energy. With a bit of planning, you can reach that comfortably with plant-based and dairy proteins — and without getting bored.
The beauty of Indian meal prep is that flavors deepen over time. A curry cooked on Sunday often tastes better on Tuesday because the spices have had time to mingle. That makes it perfect for prepping in batches and eating through the week.
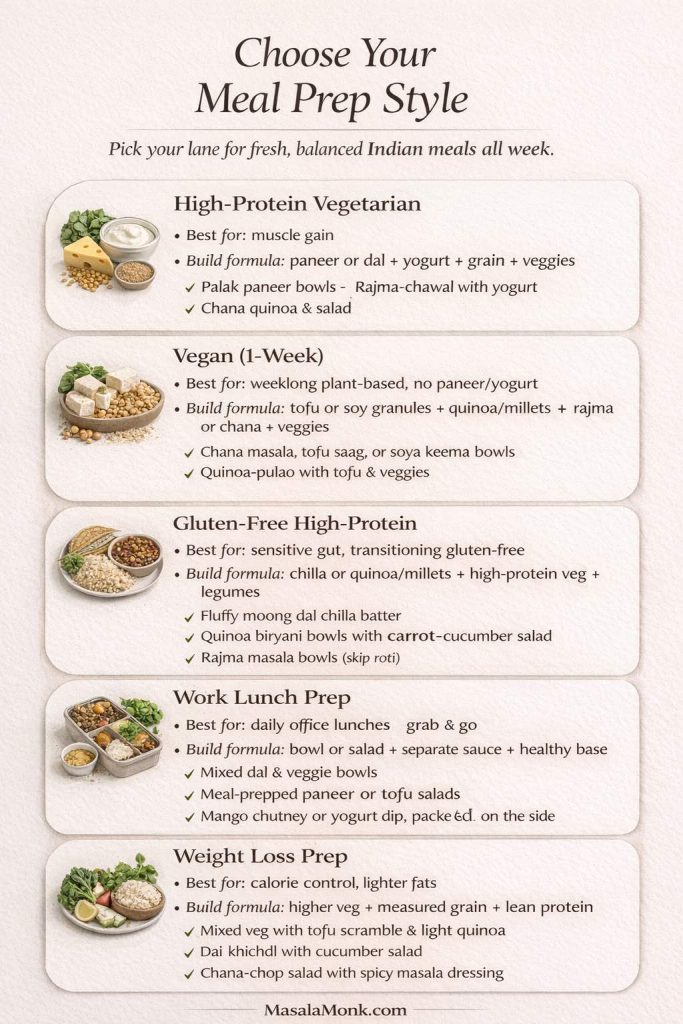
Choose Your Meal Prep Style (Vegetarian, Vegan, Gluten-Free + High Protein)
Pick the lane that matches your week. Everything in this guide works for vegetarian meal prep, and many dishes are vegan by default — you just adjust the protein and the base.
Work lunch meal prep: bowls + salads with sauces packed separately
Weight loss meal prep: higher veg, measured grains, lighter fats
Not sure which direction to take this week? Use this “Choose Your Meal Prep Style” guide to pick a lane fast—high-protein vegetarian, vegan, gluten-free, work-lunch friendly, or weight-loss focused—and then build meals with the same simple formula: protein + base + veggies + a flavor boost. It’s designed to stop decision fatigue, keep meals interesting, and make the rest of this post easier to follow—because once you choose the style, you’ll know exactly which recipes, portions, and prep steps to prioritize.
Protein Sources used in this Guide
Legumes like chickpeas, kidney beans, and lentils give 12–20g protein per cup.
Dairy like paneer and yogurt offer complete proteins and calcium.
Soy products like tofu and soy granules are extremely high in protein.
Quinoa is a complete protein and works beautifully with Indian spices.
Unlike some Western high-protein meal plans, these dishes are naturally fiber-rich, micronutrient-dense, and flavor-packed — which means you’ll actually look forward to eating them.
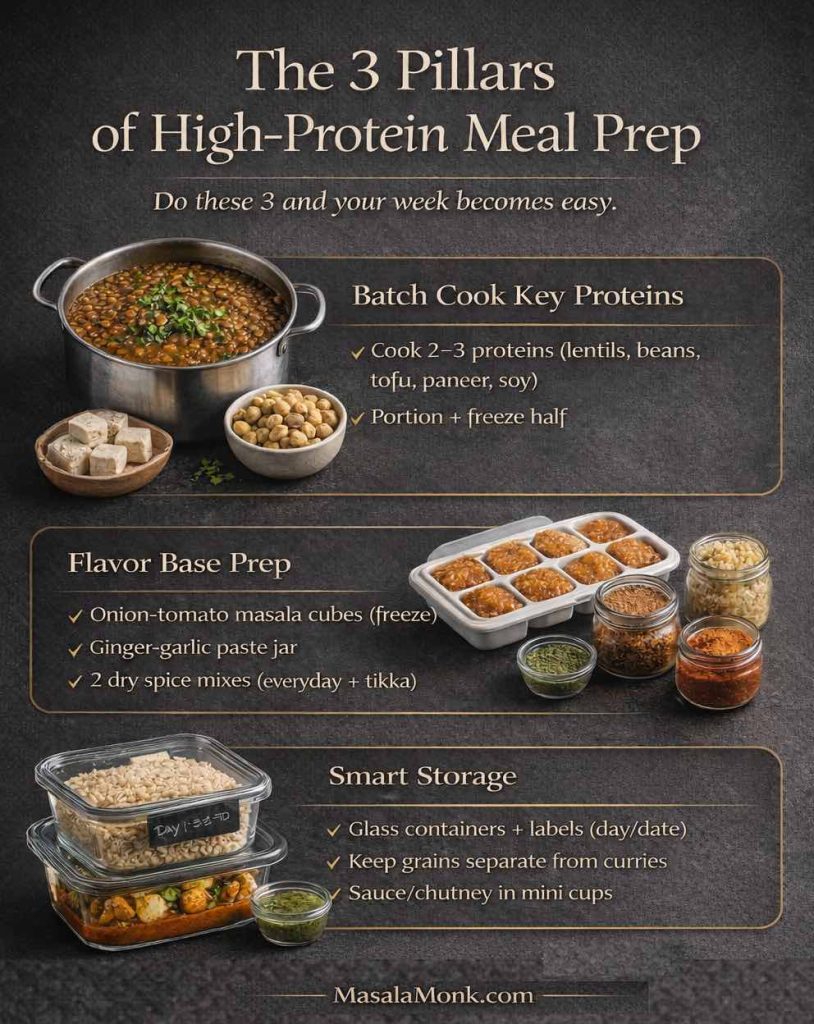
The 3 Pillars of Successful High-Protein Meal Prep
Before diving into recipes, here’s what makes meal prep work for real life:
Batch Cooking Key Proteins Cook legumes, tofu, and paneer in bulk once or twice a week.
Flavor Base Prep Store ready-to-use onion-tomato masala, ginger-garlic paste, and dry spice mixes.
Smart Storage Use airtight glass containers, label with date, and separate grains from curries to keep textures perfect.
Meal prep only feels “hard” until you lock in these 3 pillars. First, batch cook proteins (lentils/beans/tofu/paneer/soy) so your meals start with real protein—not just carbs. Next, prep a flavor base (onion-tomato masala + ginger-garlic + 2 spice blends) so weekday cooking is basically assemble-and-heat. Finally, store smart: grains separate from curries, sauces in mini cups, and label containers so nothing gets wasted. Save this checklist and build a full week of high-protein Indian bowls, curries, and lunches faster.
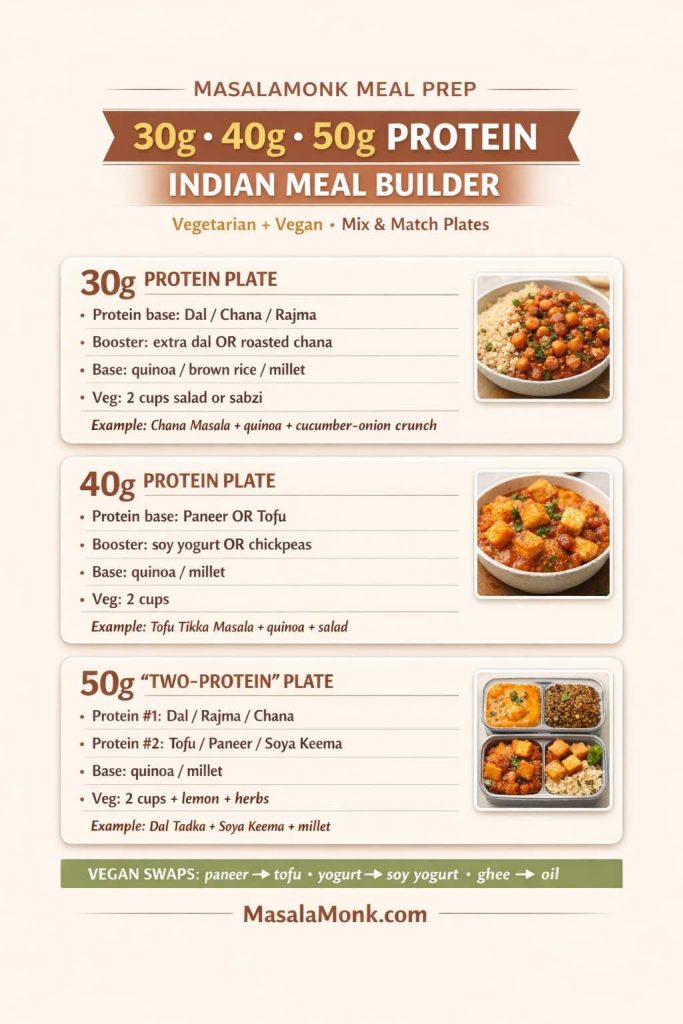
How to Hit 30g, 40g, or 50g Protein Per Meal (Vegetarian + Vegan)
A simple way to build high-protein Indian meal prep is:
Protein base + Protein booster + Grain/base + Vegetables
Use these targets depending on your goals:
About 30g protein: Rajma Masala + brown rice, or Chana Masala + quinoa, or Dal Tadka + roti (bigger dal portion).
About 40g protein: Paneer Tikka Salad + roasted chana, or Palak Paneer + millet + extra paneer, or Tofu Tikka Masala + quinoa + extra tofu.
About 50g protein: Make a “two-protein plate” — Dal Tadka + Tofu Tikka Masala with quinoa/millet, or Rajma + tofu bowl with a generous tofu portion.
Use this quick “Protein Plate Builder” to hit 30g, 40g, or 50g protein per meal with Indian vegetarian and vegan combinations—no guessing, just mix-and-match: protein base + booster + grain + veggies. It’s the fastest way to portion meal prep bowls for work lunches, fat loss, or muscle gain, while keeping flavors Indian and prep-friendly. (MasalaMonk.com)
Easy vegan swaps: paneer → tofu, yogurt → soy yogurt, ghee → neutral oil (or small amount of coconut milk for creaminess).
10 High-Protein Vegetarian Indian Dishes for Meal Prep
Below, each dish includes protein per serving, storage tips, cooking advice, and serving ideas, plus internal links to related deep dives.
Meal Prep for Work Lunch: Pack It So It Still Tastes Fresh
If you’re packing these for work, a few small rules keep everything tasting fresh:
Store grains and curries separately so rice/quinoa stays fluffy.
Keep salad dressing and chutneys in a mini container; mix only at lunch.
Reheat dal/rajma with a splash of water so the gravy loosens and tastes freshly cooked.
Label containers with the day so you rotate the most perishable meals first.
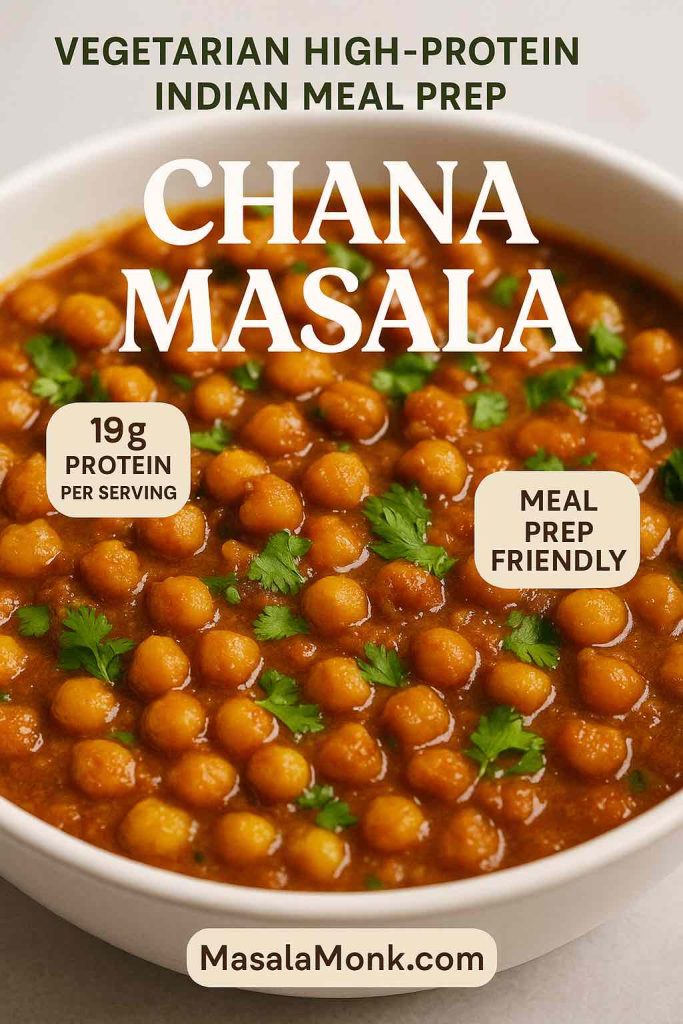
1) Chana Masala — The Chickpea Classic
If there’s one vegetarian Indian dish that nails flavor, nutrition, and convenience, it’s Chana Masala. This humble chickpea curry is a global favorite for a reason — it’s hearty, naturally high in protein, and tastes even better the next day. Perfect for meal prep.
💪 Chana Masala — Spiced chickpeas simmered in a tangy tomato gravy, packing 19g of plant protein per serving. Perfect for meal prep and bursting with flavor. #VegetarianProtein #IndianMealPrep
Why Chana Masala is a High-Protein Vegetarian Staple
Chickpeas (also called garbanzo beans) are one of the richest plant-based protein sources you can find. A single cooked cup has around 15g of protein — and when you add an extra scoop to your bowl, you’re hitting 18–20g per meal without breaking a sweat.
Protein aside, chickpeas are also rich in fiber, iron, magnesium, and B vitamins — making this dish not just filling, but nourishing for muscle recovery, energy, and digestion.
Batch Cooking: Soak and cook a large pot of dried chickpeas on prep day, or use canned chickpeas for speed.
Flavor Base: Make extra onion-tomato masala (onions, tomatoes, ginger, garlic, and spices) and freeze in portions.
Portioning: Store curry in glass containers; freeze half for midweek freshness.
Storage & Reheating
Fridge: 3–4 days.
Freezer: Up to 1 month.
Reheat: Stovetop on medium heat, adding a splash of water to revive the gravy.
Serving Ideas
With brown rice or jeera rice for classic comfort.
Pair with bajra (pearl millet) roti for a gluten-free, fiber-rich option.
Stuffed into whole-wheat wraps with salad greens for a portable, protein-packed lunch.
Pro Tips for Next-Level Chana Masala
Add a handful of fresh spinach or kale while reheating for extra micronutrients.
Sprinkle roasted cumin powder just before serving for a burst of earthy aroma.
Use black chickpeas (kala chana) once in a while for variety and a slightly higher protein content.
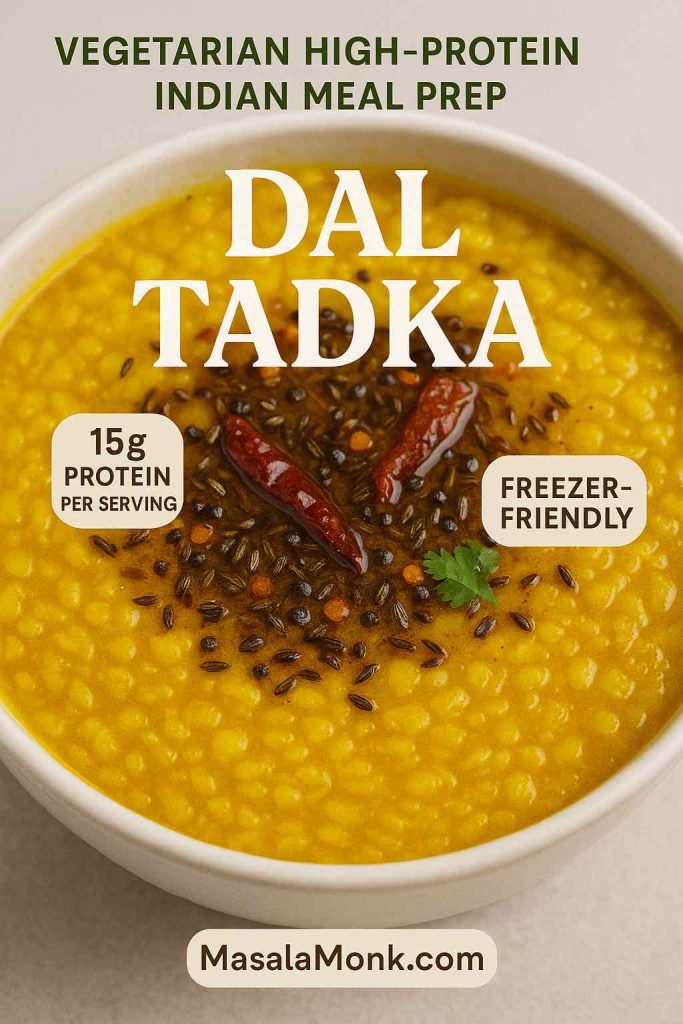
2) Dal Tadka — Comfort Food, Protein Edition
If there’s one dish that can be called the heartbeat of Indian kitchens, it’s Dal Tadka. This simple yet deeply satisfying lentil curry is more than comfort food — it’s an affordable, nutrient-packed high-protein vegetarian meal that works perfectly for meal prep.
🌟 Dal Tadka — Comfort in a bowl! Golden yellow lentils tempered with ghee, cumin, and chilies for a hearty, 15g protein boost. Freezer-friendly and easy to batch cook. #HighProteinIndian #DalTadka
Why Dal Tadka is a Protein Powerhouse
Lentils are one of the most versatile plant-based proteins you can cook. Depending on the type you use — toor dal (pigeon peas), masoor dal (red lentils), or moong dal (yellow lentils) — you’re looking at 12–18g of protein per cooked cup.
They’re also rich in dietary fiber, folate, magnesium, and antioxidants, which help with muscle recovery, digestion, and overall energy levels. Unlike some plant proteins, lentils are quick to cook, making them a weeknight hero.
Batch Cooking: Make a large pot of plain cooked dal (just lentils, water, turmeric, and salt) on Sunday.
Fresh Tadka: Prepare the tempering — cumin seeds, garlic, onions, tomatoes, and spices — fresh each day when reheating for maximum flavor.
Mix and Match: Rotate lentil varieties through the week to keep things interesting.
Storage & Reheating
Fridge: Keeps for 3–4 days without losing texture.
Freezer: Up to 1 month; store in individual portions.
Reheat: Stovetop on low heat, adding hot water if it’s too thick.
Serving Ideas
Pair with whole-wheat roti for a balanced meal.
Serve over foxtail millet or red rice for a low-GI carb option.
With jowar (sorghum) rotis to add extra minerals and fiber.
Pro Tips for Next-Level Dal Tadka
Use ghee for the tadka if you want richness and better nutrient absorption.
Add spinach, methi leaves, or drumstick leaves for added vitamins and minerals.
Sprinkle a dash of garam masala just before serving to intensify aroma.
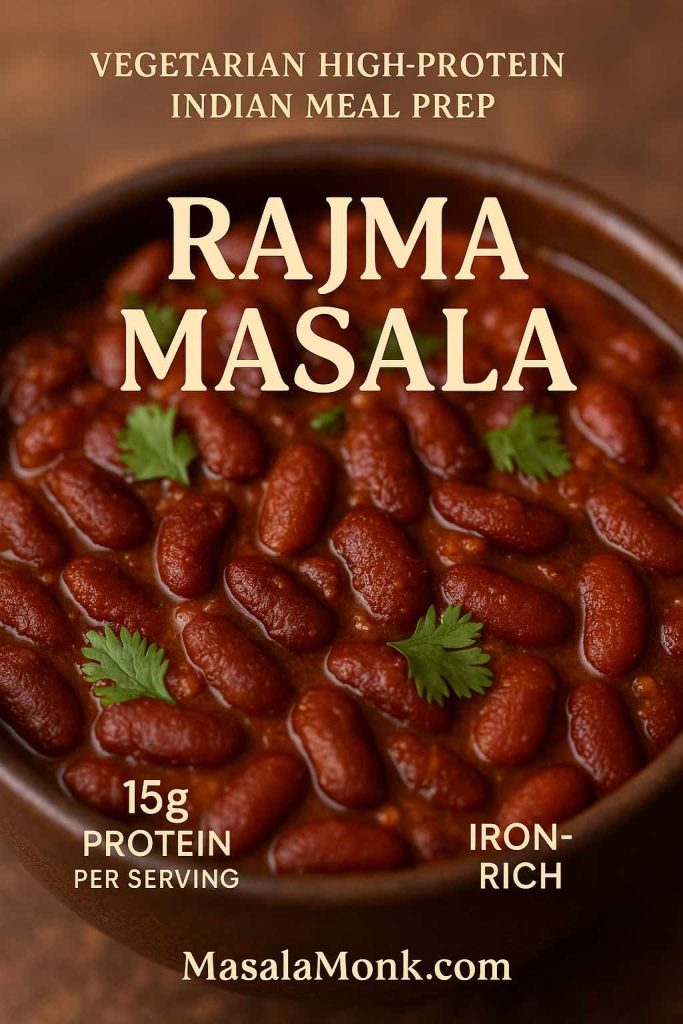
3) Rajma Masala — The North Indian Hearty Bowl
When you think of North Indian comfort food, one dish almost always comes to mind: Rajma Masala. This rich, slow-cooked kidney bean curry has everything you want — a creamy tomato gravy, warming spices, and enough protein to keep you full for hours.
It’s a classic weekend lunch in many Punjabi households, but it also makes a fantastic high-protein meal prep option that stores beautifully.
❤️ Rajma Masala — Kidney beans in a rich, spiced tomato gravy, offering 15g protein plus a healthy dose of iron. Perfect with rice or millet. #RajmaMasala #VegetarianMealPrep
Why Rajma Masala is a Protein Superstar
Kidney beans are protein-dense legumes — one cooked cup contains around 13–15g of protein along with a hearty dose of fiber, potassium, iron, and folate. When paired with a grain like rice or quinoa, they create a complete protein profile with all essential amino acids.
This makes Rajma Masala not just tasty, but also nutritionally powerful, supporting muscle recovery, steady energy, and digestive health.
Soak & Batch Cook: Soak dried kidney beans overnight and pressure cook a large batch. Freeze half for later.
Flavor Base: Prepare a rich onion-tomato masala in bulk and portion for quick cooking.
Consistency Trick: Keep the gravy slightly thinner when storing — it thickens in the fridge.
Storage & Reheating
Fridge: Keeps for 3–4 days with flavor improving over time.
Freezer: Up to 1 month; thaw overnight in the fridge before reheating.
Reheat: Simmer gently and add a splash of water if needed to loosen the gravy.
Serving Ideas
The classic: Rajma with jeera rice — ultimate comfort.
Swap rice for amaranth (rajgira) to boost protein and micronutrients.
Use as a wrap filling with chopped onions and chutney for a portable lunch.
Pro Tips for Next-Level Rajma
Mash a small portion of beans into the gravy before serving — this thickens and enriches the texture naturally.
Add a pinch of kasuri methi at the end for a restaurant-style aroma.
Cook low and slow after adding the beans to allow flavors to deepen.
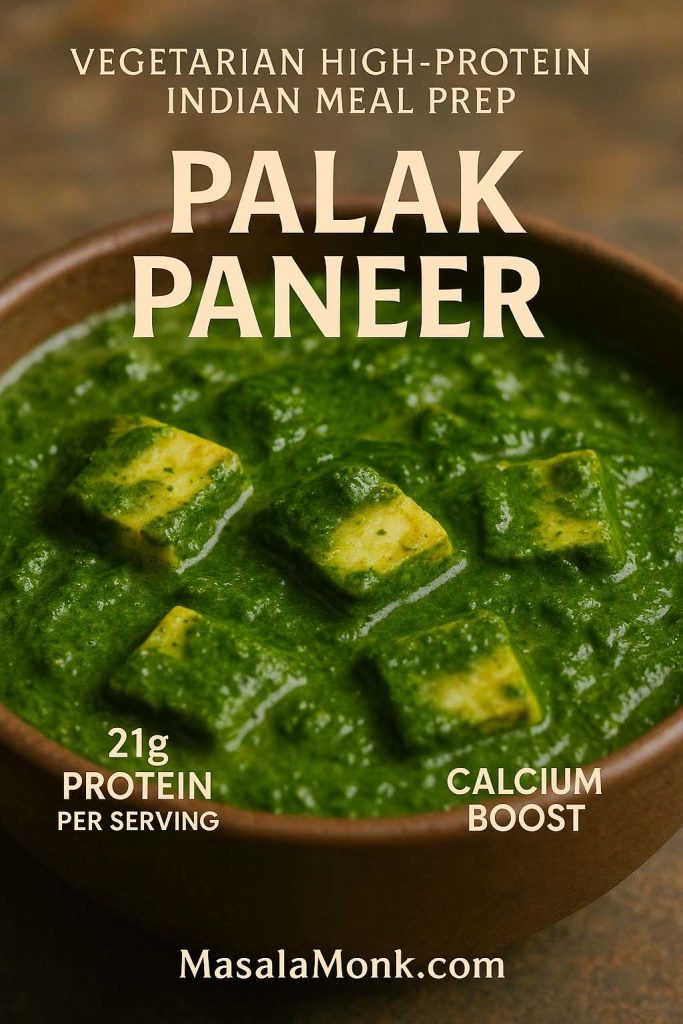
4) Palak Paneer — Greens + Dairy Power
Few dishes manage to be as nutritious and indulgent at the same time as Palak Paneer. Soft cubes of paneer (Indian cottage cheese) are nestled in a silky spinach puree, creating a meal that’s rich in protein, calcium, and iron.
Whether you’re aiming for muscle recovery, weight management, or simply eating healthier, Palak Paneer delivers both taste and nutrition in every bite — and it’s ideal for meal prep.
🥬 Palak Paneer — Creamy spinach gravy with soft paneer cubes, delivering 21g of complete protein and a calcium boost in every serving. #PalakPaneer #ProteinRichIndian
Why Palak Paneer is a Protein & Nutrient Giant
Paneer is a complete protein — meaning it contains all essential amino acids your body needs for muscle repair and overall health. A 150g serving delivers a whopping 27–31g of protein, plus calcium for bone health.
Spinach adds iron, folate, vitamin K, and antioxidants, making this dish a nutrient-dense powerhouse that supports energy levels and recovery.
As a side with grilled vegetables for a low-carb meal.
Pro Tips for Next-Level Palak Paneer
Add cashew cream to the spinach gravy for richness without heavy cream.
Finish with a squeeze of fresh lemon juice before serving to brighten flavors.
If using frozen spinach, drain well before blending to avoid a watery gravy.
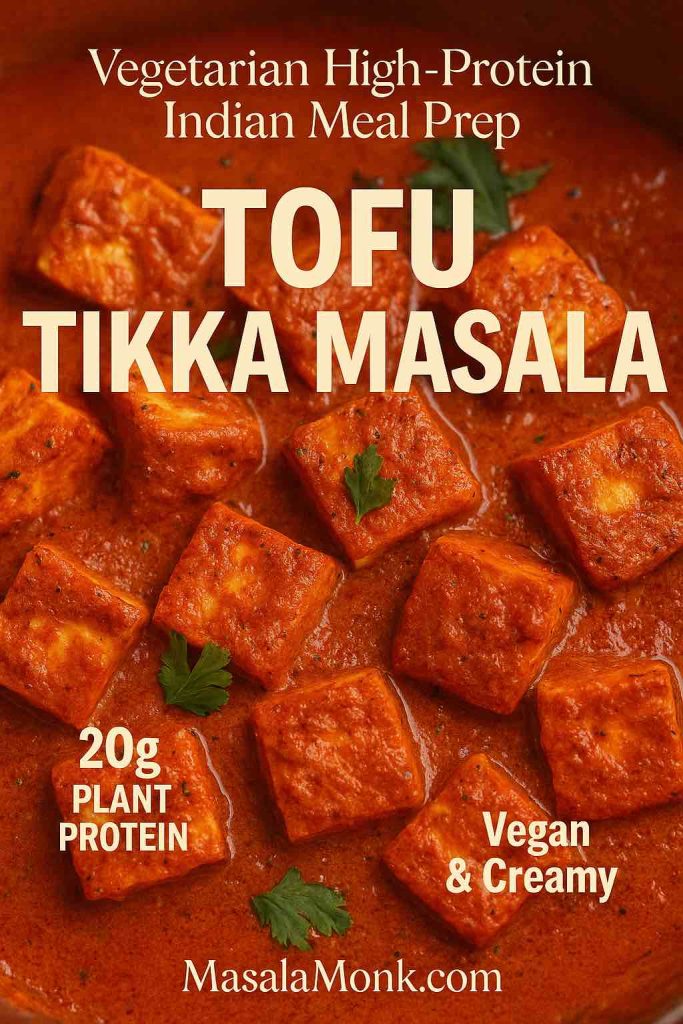
5) Tofu Tikka Masala — Vegan, Creamy, Protein-Rich
If you love the creamy, spiced comfort of Tikka Masala but want a vegan, dairy-free, high-protein option, Tofu Tikka Masala is your answer. Firm tofu soaks up bold tikka spices, is baked for a chewy bite, and then bathed in a rich tomato-based curry.
It’s indulgent enough for a weekend dinner and practical enough for weekday meal prep — plus it delivers serious plant protein without compromising on flavor.
🌱 Tofu Tikka Masala — Grilled tofu in a creamy tikka masala sauce. 20g of vegan protein and a flavor punch in every bite. #VeganIndianRecipes #HighProteinVegan
Why Tofu Tikka Masala is a Plant-Protein Winner
Tofu, made from soybeans, is a complete plant protein, meaning it has all essential amino acids. A 200g portion provides around 17–20g of protein with very little saturated fat.
It’s also rich in iron, calcium (if calcium-set), and isoflavones — compounds linked to heart health and improved recovery from exercise.
Bake Instead of Fry: Baking marinated tofu at high heat gives a chewy, meaty texture that holds up in storage.
Make Extra Marinade: Use the leftover marinade as a spice base for the curry sauce.
Multi-Dish Use: Pre-baked tikka tofu can be tossed into salads, wraps, or stir-fries through the week.
Storage & Reheating
Fridge: 3–4 days without texture loss.
Freezer: Up to 1 month; store tofu and curry separately for best results.
Reheat: Simmer curry gently and add tofu just before serving to keep it firm.
Serving Ideas
With brown rice or jeera rice for a comforting meal.
Rolled into whole-wheat wraps with lettuce and onion slices for a portable lunch.
Served alongside moong dal khichdi for a complete plant-protein combination.
Pro Tips for Next-Level Tofu Tikka Masala
Press tofu for at least 20 minutes before marinating to remove excess moisture.
For a creamier vegan sauce, blend cashews into the curry base.
Add a pinch of smoked paprika to mimic the flavor of a traditional tandoor.
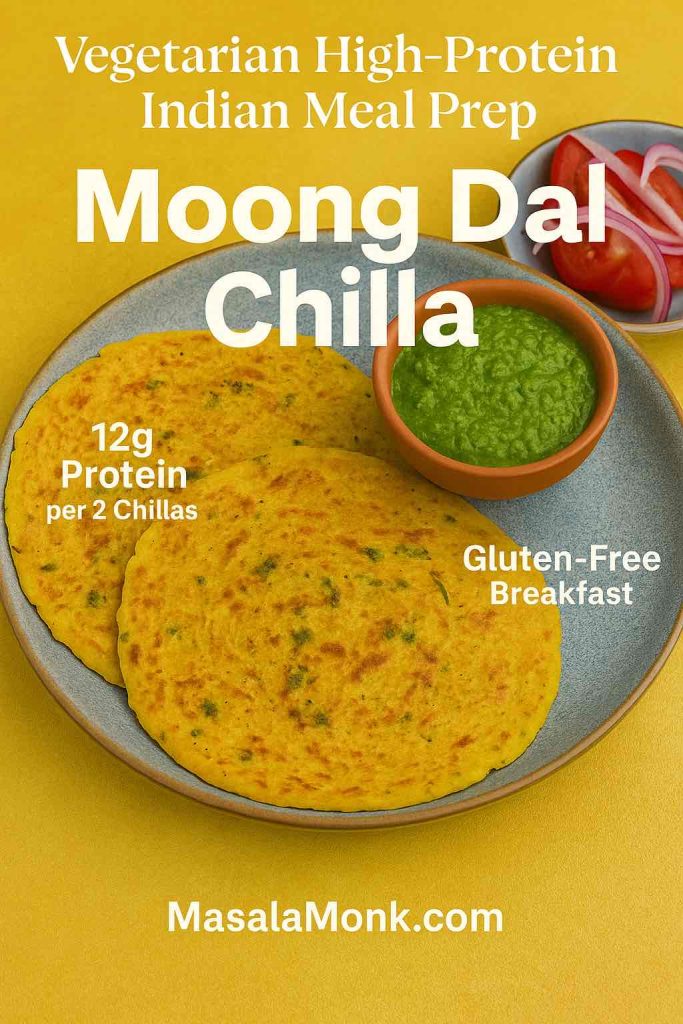
6) Moong Dal Chilla — The Savory Protein Pancake
If you’re looking for a quick, high-protein vegetarian breakfast or snack that also works beautifully for meal prep, Moong Dal Chilla is your best friend. These golden, savory pancakes are made from ground moong dal (split yellow or green gram) and spiced just right for a satisfying, healthy bite.
They’re naturally gluten-free, rich in protein, and versatile enough to work as breakfast, a tiffin box addition, or even a light dinner.
🥞 Moong Dal Chilla — Golden, gluten-free savory pancakes made with moong dal, serving up 12g protein per 2 chillas. Perfect for a protein-packed breakfast. #HealthyIndianBreakfast #ProteinPancakes
Why Moong Dal Chilla is a Meal Prep Star
Moong dal is one of the most easily digestible legumes and still packs an impressive 12–16g protein per two chillas. It’s also low in fat and high in potassium, magnesium, and folate — making it great for heart health and sustained energy.
Because the batter is stored raw, you can cook chillas fresh in minutes all week long, avoiding the sogginess that comes with reheating pancakes.
Soak & Grind: Soak moong dal overnight, grind with ginger, green chilies, and a little water for a smooth batter.
Storage: Keep batter in the fridge for up to 3 days; stir before using.
Pre-Mixed Spices: Add salt and dry spices only when cooking to keep batter fresh longer.
Storage & Reheating
Batter: Refrigerated up to 72 hours.
Cooked Chillas: Best eaten fresh; if stored, wrap in foil and refrigerate for 1 day only.
Reheat: Quick toast on a hot tawa or skillet to restore crispness.
Serving Ideas
With green chutney and fresh salad for breakfast.
Stuff with paneer bhurji or sautéed tofu for extra protein.
Serve alongside barnyard millet upma for a double hit of plant protein.
Pro Tips for Next-Level Moong Dal Chilla
Add grated carrots, spinach, or beetroot to boost fiber and micronutrients.
Sprinkle sesame seeds on top before cooking for a nutty crunch.
For crisp edges, use a little ghee instead of oil.
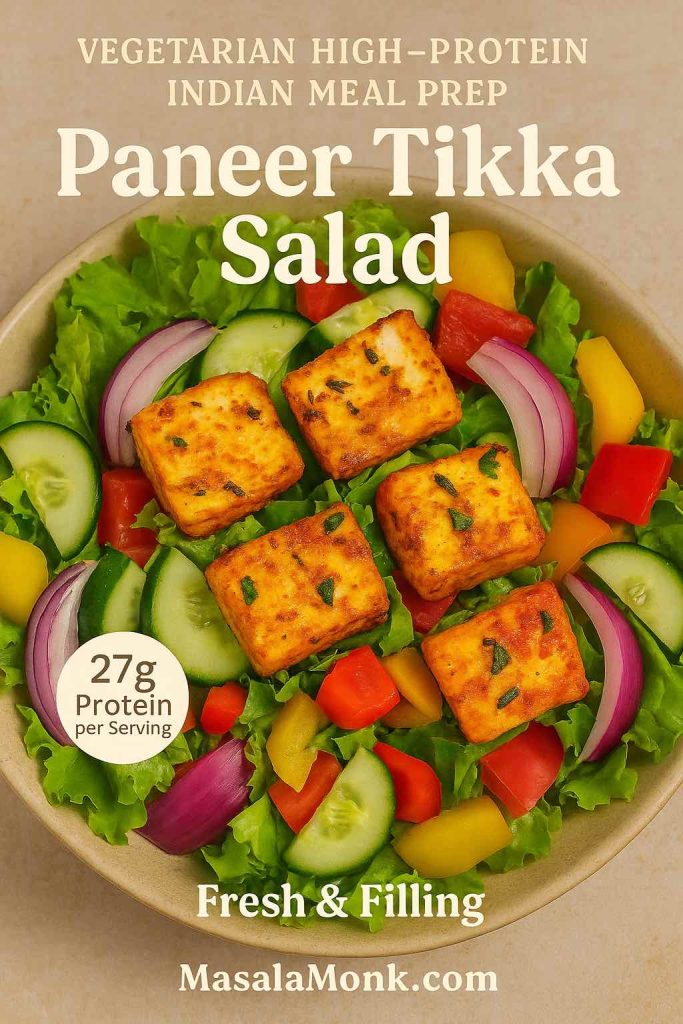
7) Paneer Tikka Salad — Fresh & Portable
If you think salads are boring, Paneer Tikka Salad will change your mind. This is where the smoky, spiced magic of grilled paneer meets the crisp freshness of raw vegetables — creating a high-protein vegetarian meal that’s as colorful as it is satisfying.
Perfect for hot days, office lunches, or post-workout recovery, this salad is meal-prep friendly and keeps you feeling full for hours.
🥗 Paneer Tikka Salad — Fresh salad greens topped with grilled paneer for 27g of satiating protein. Ideal for low-carb, high-protein eating. #PaneerTikkaSalad #ProteinSalad
Why Paneer Tikka Salad is a Protein Hero
Paneer is one of the richest vegetarian protein sources, with 27–31g of protein per 150g serving. The tikka marinade (yogurt + spices) adds probiotics, which can support digestion, and the fresh vegetables bring fiber, antioxidants, and crunch.
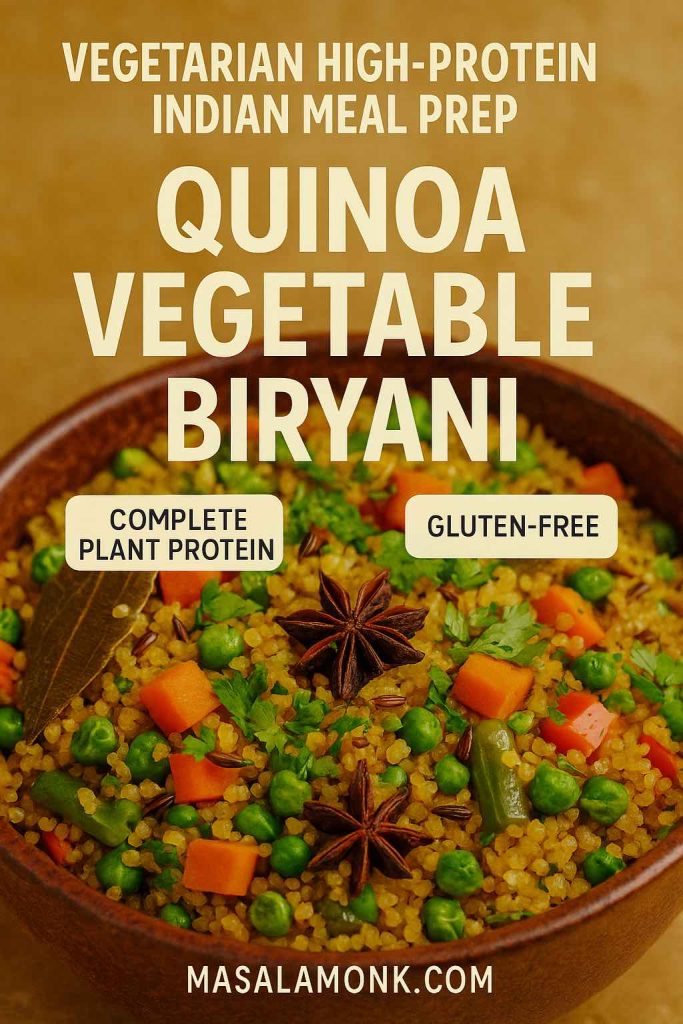
If you love biryani but want a lighter, high-protein, gluten-free twist, Quinoa Vegetable Biryani is the way to go. It delivers all the aroma and spice of a traditional biryani while packing in complete plant protein thanks to quinoa.
This one-pot dish is perfect for meal prep — it’s quick to make, easy to portion, and tastes just as good reheated.
🍛 Quinoa Vegetable Biryani — Complete plant protein meets biryani spices for a gluten-free, high-protein twist on a classic favorite. #QuinoaBiryani #VegetarianProtein
Why Quinoa Biryani is a Protein All-Rounder
Quinoa is one of the few plant foods that is a complete protein, offering all nine essential amino acids. One cup of cooked quinoa provides 8g of protein, and when combined with vegetables, nuts, or paneer/tofu, it can reach 15–25g per serving.
It’s also rich in magnesium, iron, and fiber, helping with energy production, digestion, and muscle recovery.
Toast First: Toast quinoa in a little ghee with whole spices before adding water — it enhances the nutty flavor.
Veggie Choices: Use a mix of carrots, beans, peas, and capsicum for color and nutrition.
Protein Boost: Stir in paneer cubes, baked tofu, or chickpeas after cooking.
Storage & Reheating
Fridge: Stays fresh for 3–4 days.
Freezer: Up to 1 month in airtight containers.
Reheat: Sprinkle with water, cover, and steam gently for fluffy grains.
Serving Ideas
With raita (yogurt + cucumber + mint) for a cooling contrast.
Paired with a side of dal tadka for extra protein.
As a lunchbox meal with roasted papad and pickle.
Pro Tips for Next-Level Quinoa Biryani
Use vegetable stock instead of plain water for richer flavor.
Add a handful of cashews or almonds for healthy fats and crunch.
Finish with fresh coriander and mint just before serving.
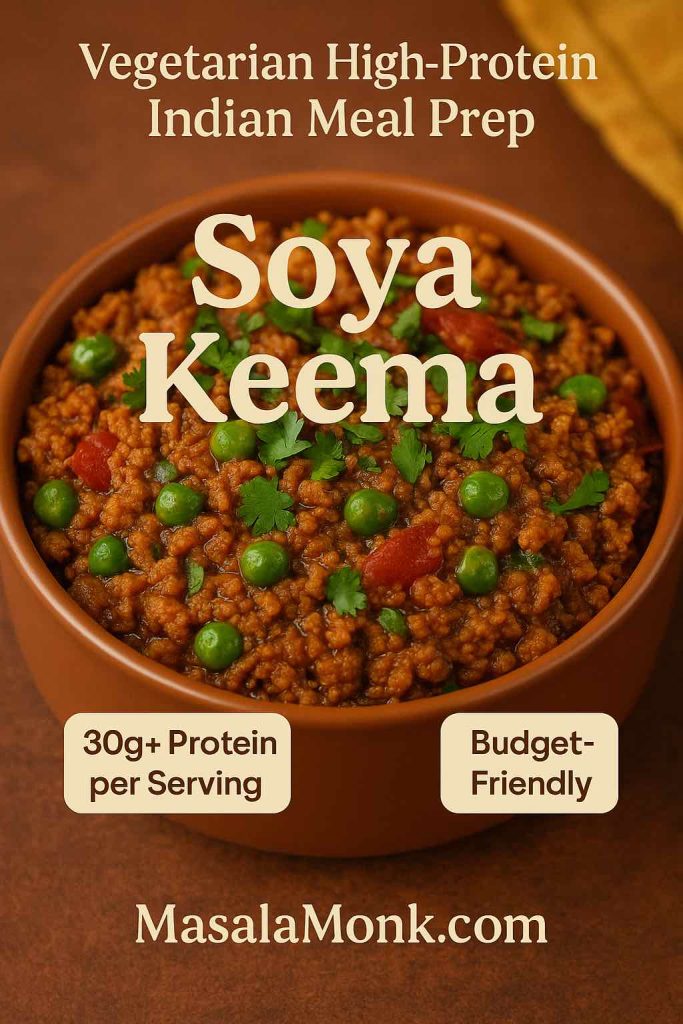
9) Soya “Keema” — Budget-Friendly Protein Boost
If you’re looking for maximum protein on a budget, Soya Keema is hard to beat. Made from textured vegetable protein (TVP) granules, this dish mimics the texture of minced meat while being entirely vegetarian — and it soaks up Indian spices beautifully.
It’s quick to cook, freezer-friendly, and perfect for adding variety to your weekly high-protein meal prep.
🥘 Soya Keema — Textured soy protein cooked with Indian spices and peas, offering 30g+ protein per serving for budget-friendly gains. #SoyaKeema #HighProteinVegetarian
Why Soya Keema is a Protein Heavyweight
Textured soy protein is one of the most concentrated plant protein sources. A single cooked cup of soya granules contains 30–35g of protein while being low in fat and cholesterol-free.
It’s also rich in iron and contains all essential amino acids, making it a great meat substitute for vegetarians and vegans.
Hydrate First: Soak soya granules in hot spiced water or vegetable stock for 10 minutes before cooking — this removes the raw soy taste.
Bulk Cooking: Make a large batch and freeze in portioned containers.
Multi-Use: Use soya keema in wraps, stuffed parathas, pasta sauces, or over rice.
Storage & Reheating
Fridge: Lasts 3–4 days in an airtight container.
Freezer: Keeps for 1–2 months without losing texture.
Reheat: Warm gently in a pan; add a splash of water to prevent drying.
Serving Ideas
With whole-wheat pav for a vegetarian take on Keema Pav.
Stuffed inside multigrain parathas for a high-protein breakfast.
Served over foxtail millet pulao for a complete, balanced meal.
Pro Tips for Next-Level Soya Keema
Add peas and carrots for sweetness and extra micronutrients.
Finish with fresh coriander and a squeeze of lemon to brighten flavors.
For a spicier version, stir in chopped green chilies while sautéing onions.
10) Tofu–Rajma Power Bowl — Double the Protein
When it comes to vegetarian high-protein meals, why settle for just one source? The Tofu–Rajma Power Bowl brings together two protein all-stars — kidney beans (rajma) and tofu — for a nutrient-packed, muscle-friendly dish that’s perfect for meal prep.
It’s colorful, filling, and endlessly adaptable, making it a go-to option for anyone who wants balanced vegetarian protein in every bite.
🍲 Tofu–Rajma Power Bowl — Kidney beans and tofu combine for 35g of complete protein in a colorful, balanced bowl. #ProteinBowl #VegetarianMealPrep
Why This Bowl is a Protein Beast
Tofu: 200g firm tofu provides 17–20g protein.
Rajma: 1 cup cooked kidney beans adds 13–15g protein. Together, that’s 30–35g of complete protein in a single meal — with plenty of fiber, iron, calcium, and antioxidants.
Batch Cook: Make a big pot of rajma masala and bake or pan-fry marinated tofu cubes in bulk.
Separate Components: Store beans, tofu, and veggies separately to mix fresh when serving.
Flexible Flavors: Change the spices — go classic Indian masala one day, Mediterranean herbs the next.
Storage & Reheating
Fridge: Keeps for 3–4 days in separate containers.
Freezer: Rajma freezes well for 1 month; tofu is best stored chilled and fresh.
Reheat: Warm rajma gently; tofu can be lightly grilled or air-fried to restore texture.
Serving Ideas
Over brown rice for a classic bowl meal.
With barnyard millet for a light, gluten-free base.
As a salad-style bowl with raw veggies, tahini dressing, and pickled onions.
Pro Tips for Next-Level Bowls
Add roasted sweet potato chunks for natural sweetness and extra carbs.
Sprinkle toasted sesame seeds or pumpkin seeds for crunch and healthy fats.
Keep a jar of quick pickled onions ready — they lift the flavor instantly.
Vegan Meal Prep Plan (1 Week): Indian-Style, High Protein
If you want a fully plant-based week, use the same dishes above with a few swaps. The simplest approach is to keep two mains + one grain + fresh crunch ready, then mix and match all week.
Vegan 7-day menu idea
Mon: Chana Masala + quinoa (lunch) | Tofu Tikka Masala + brown rice (dinner)
Tue: Rajma Masala bowl + veggies | Dal Tadka + millet + stir-fry veg
Thu: Tofu–Rajma Power Bowl | Chana Masala + roasted vegetables
Fri: Dal Tadka + rice + extra tofu on top | Soya Keema + millet
Sat: Moong Dal Chilla + chutney | Tofu Tikka Masala + quinoa
Sun: Quinoa Biryani leftovers | Rajma Masala + salad
Vegan upgrade tip: keep a jar of roasted seeds (pumpkin/sesame) and add 1–2 tbsp to bowls for protein + crunch.
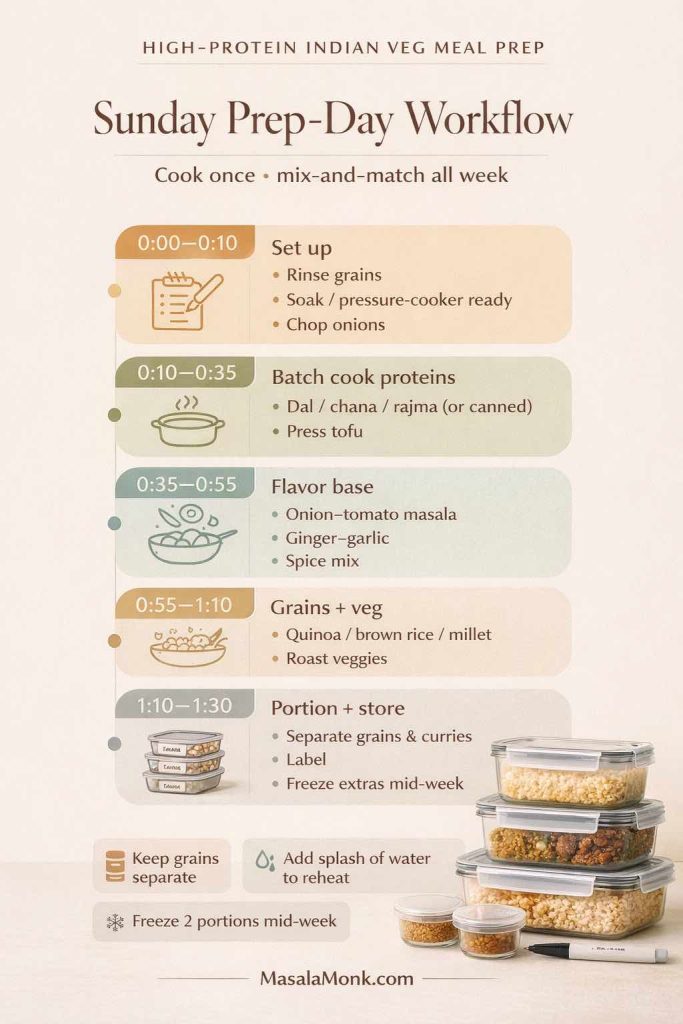
Meal Prep Workflow for the Week
Batch cook your proteins on Sunday — chickpeas, kidney beans, lentils, tofu, and paneer.
Prep your flavor bases: onion-tomato masala, ginger-garlic paste, and dry spice mixes in labeled jars.
Store separately: Keep curries and grains in separate containers to avoid sogginess.
Freeze half: For freshness and variety, freeze some portions and defrost mid-week.
Sunday Prep-Day Workflow (High-Protein Indian Veg Meal Prep): Use this 90-minute checklist to prep the building blocks once—legumes/tofu, onion-tomato masala, grains, and roasted veg—so weekday meals become quick “mix-and-match” bowls. Follow the time blocks top-to-bottom, then portion and label with grains stored separately (better texture), plus a simple mid-week freezer reset to keep the week tasting fresh.
Storage & Food Safety Tips
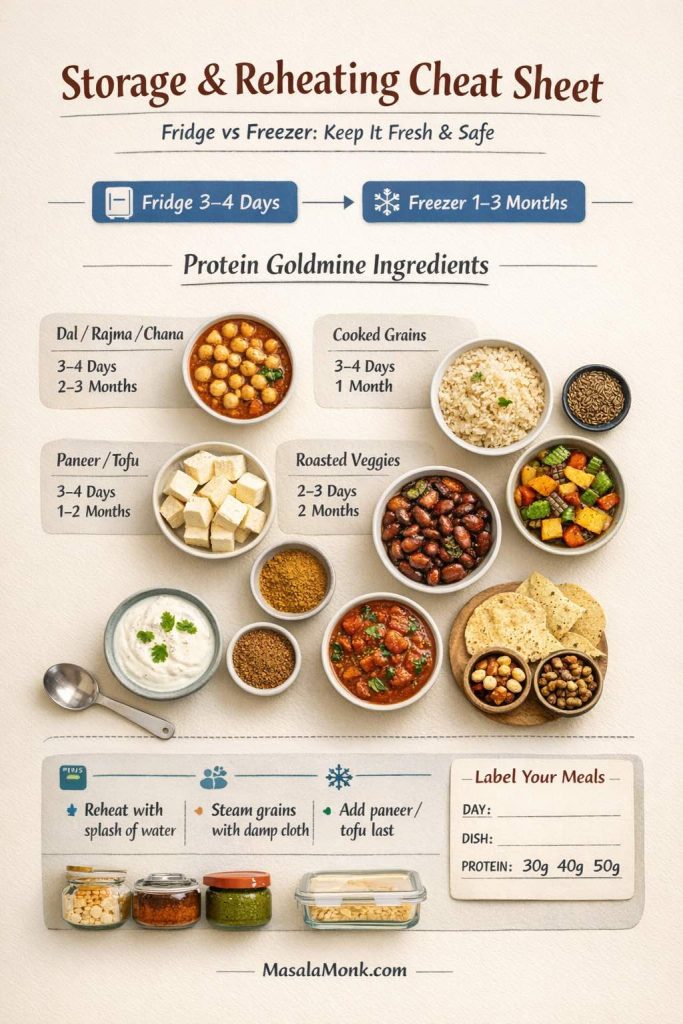
Curries: Last 3–4 days in the fridge; freeze for up to 3–4 months.
Rice/quinoa: Cool quickly, refrigerate within 2 hours, and finish within 3–4 days.
Paneer/tofu: Store in airtight boxes; refresh paneer by dunking in warm water before reheating.
Reheating: Always heat until steaming hot to kill any bacteria.
Storage & Reheating Cheat Sheet (Fridge vs Freezer): Save this for meal prep weeks. It shows how long dal/rajma/chana, cooked grains, paneer/tofu, and roasted veggies stay fresh, plus quick fixes that keep food tasting “just cooked” (steam grains, loosen curries with water, add paneer/tofu at the end). Use the label box to track the day + protein target (30g/40g/50g) so lunches don’t get mixed up.
Gluten-Free High-Protein Indian Meal Prep (Easy Swaps)
If you’re going gluten-free, you don’t need different recipes — you need different bases.
Skip wheat roti and use rice, quinoa, or millets (jowar, bajra, foxtail, barnyard).
Best naturally gluten-free picks from this list: Moong Dal Chilla, Quinoa Vegetable Biryani, Dal Tadka with rice/millet, Tofu–Rajma Power Bowl, Chana Masala with quinoa.
If you’re very sensitive, double-check store-bought spice blends, sauces, and hing labels.
How to Structure Your Week
Prep Day (Sunday)
Cook legumes, tofu, paneer.
Make onion-tomato masala.
Chop and store veggies.
Cook grains in bulk.
Midweek Refresh (Wednesday)
Defrost frozen portions.
Make a quick fresh salad or chutney to revive meals.
Portion Guide: Weight Loss vs Muscle Gain (Same Meals, Different Plates)
You can use the exact same dishes for different goals — the difference is portioning.
For weight loss: 1–2 ladles curry + 2 cups vegetables + ½–1 cup cooked grains + lighter oil/ghee.
For maintenance: 1–2 ladles curry + 1 cup grains + vegetables + yogurt/raita (or soy yogurt).
For bulking: add an extra protein (tofu/paneer/soya), plus nuts/seeds, and increase the grain portion.
Same recipes—different results. Use this portion guide to adjust your Indian vegetarian or vegan meal prep for weight loss, maintenance, or muscle gain without changing what you cook. Follow the simple plate logic—protein + booster + base + veg—and match your serving sizes to the goal so your lunches stay filling, high-protein, and easy to repeat all week.
Sample 7-Day High-Protein Vegetarian Indian Menu
Day
Lunch
Dinner
Mon
Chana Masala + quinoa
Palak Paneer + roti
Tue
Rajma Masala + brown rice
Tofu Tikka Masala + salad
Wed
Moong Dal Chilla + chutney
Paneer Tikka Salad
Thu
Soya Keema + millet
Dal Tadka + rice
Fri
Quinoa Biryani
Tofu–Rajma Bowl
Sat
Chana Masala wrap
Palak Paneer
Sun
Paneer Tikka Salad
Rajma Masala
High Protein Meal Plan for a Week – Veg & Vegan Options
7-Day High-Protein Indian Vegetarian Meal Prep Plan (with vegan swaps). Use this weekly lunch + dinner map to hit 30g–50g protein per meal without overthinking it—each day pairs a hearty Indian main with a smart base (quinoa, brown rice, millet, or roti) and includes easy vegan switches like paneer → tofu and yogurt/raita → soy yogurt. Scroll below for the exact dish breakdowns, storage tips, and the shopping list so you can prep once and eat well all week.
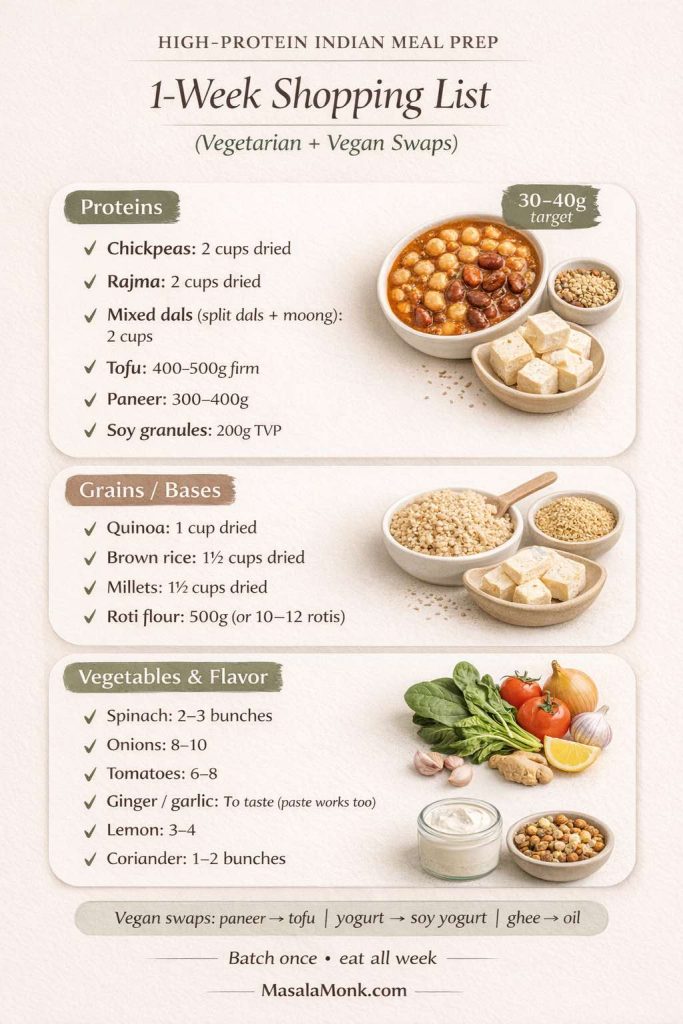
Shopping List for 1 Week of High-Protein Vegetarian Indian Meals
Shopping becomes effortless when you buy in “building blocks,” not random ingredients. Use this 1-week high-protein Indian meal prep shopping list to stock the core vegetarian + vegan staples for bowls, curries, chillas, and salads—so you can hit 30–40g protein per meal with simple mix-and-match combos. Keep the list saved for repeat weeks, then swap paneer → tofu and yogurt → soy yogurt when you want a fully vegan run.
If You’re Buying Prepared Vegetarian/Vegan Meals, Use This Protein Checklist
If you’re short on time and considering tiffin or prepared meals, use this checklist so you still hit your protein goals:
Ask for protein per serving (aim roughly 25–40g for a main meal if possible).
Choose bean/soy-based mains more often than potato/cream-heavy dishes.
If weight loss is your goal, watch the oil level and keep grains measured.
Freezer-friendly curries (rajma, chana, dal) usually give the best value and hold up well.
1. What are the best vegetarian protein sources in Indian cuisine? Some of the top vegetarian protein sources include lentils (dal), chickpeas, kidney beans (rajma), paneer, tofu, soya chunks, quinoa, amaranth, and nuts & seeds. Combining these with whole grains like brown rice or millet ensures a complete amino acid profile.
2. How much protein should I aim for in each meal? For most adults, a balanced high-protein vegetarian meal should have 15–30g of protein depending on your goals, activity level, and total daily needs. Athletes or those looking to build muscle may need more — around 1.6–2.2g protein per kg of body weight daily.
3. Can vegetarian meals provide complete proteins? Yes! You can create complete proteins by combining legumes with grains (e.g., rajma with brown rice, dal with roti, quinoa with vegetables). Foods like quinoa, soy, amaranth, and buckwheat are complete proteins on their own.
4. How can I make vegetarian meal prep last longer?
Store cooked meals in airtight containers.
Refrigerate for up to 4 days or freeze for 1–2 months.
Keep components (gravy, rice, roti) separate until serving to maintain freshness and texture.
5. Are these high-protein Indian dishes suitable for weight loss? Absolutely — high-protein meals help increase satiety, control appetite, and maintain muscle mass during weight loss. Choose dishes with lean protein sources, plenty of vegetables, and moderate healthy fats.
6. Can I replace paneer with tofu in these recipes? Yes! Tofu is a great vegan substitute for paneer, offering similar protein content but with less saturated fat. Marinating tofu before cooking enhances flavor and texture.
7. What are some gluten-free high-protein Indian options?
Quinoa Vegetable Biryani
Moong Dal Chilla
Soya Keema (with millet or rice)
Tofu–Rajma Power Bowl
Dal Tadka with brown rice or barnyard millet
8. How can I increase protein in traditional Indian dishes?
Add lentils or legumes to curries.
Top salads with paneer, tofu, or chickpeas.
Use soy granules or tempeh in place of vegetables or meat.
Replace refined grains with quinoa, millet, or amaranth.
9. Are these recipes kid-friendly? Yes — most can be adjusted for kids by reducing spice levels and cutting protein sources into bite-sized pieces. You can also blend vegetables into gravies for picky eaters.
10. How can I prep these meals quickly during a busy week?
Cook lentils, beans, and grains in bulk over the weekend.
Pre-chop vegetables and store them in airtight containers.
Make spice mixes in advance for quick seasoning.
Freeze marinated tofu or paneer for easy weekday cooking.
11. How do I make a 50g protein vegetarian meal prep? Use a “two-protein plate”: pair dal or rajma with tofu/paneer/soya, then add quinoa or millet. Example: Dal Tadka + Tofu Tikka Masala + quinoa is an easy high-protein setup that reheats well.
12. What’s the easiest vegan meal prep plan for beginners? Prep two mains (rajma/chana + tofu tikka masala), one grain (quinoa/rice), and fresh crunch (cucumber/onion/lemon). Mix and match through the week so it doesn’t feel repetitive.
13. How do I pack vegan meal prep for work without sogginess? Keep sauces separate, store grains apart from curries, and pack crunchy add-ons (onions, roasted chana, papad) separately. Combine only when you’re ready to eat.
Here’s what those often-confusing terms really mean:
Label
What It Actually Means
What It Doesn’t Guarantee
Cage-Free
Hens live indoors but aren’t in cages; more space to move
Outdoor access, better nutrition
Free-Range
Hens have some outdoor access
Amount/quality of outdoor time
Pasture-Raised
Hens spend significant time outdoors on pasture
Organic feed
Organic
Hens eat organic feed; no pesticides, antibiotics
Outdoor access (unless also free-range/pasture)
Omega-3 Enriched
Feed supplemented with flaxseed, algae, etc.
Free-range or organic conditions
✅ Pro tip: Ignore the happy-hen photos. Look for specific labels backed by certifications — “Certified Humane,” “USDA Organic,” or “American Pastured Poultry Producers Association.”
3. Nutrition: Do Expensive Eggs Really Have More?
Let’s cut through the marketing fluff.
Base nutrition (protein, fat, vitamins, minerals) is similar across all eggs. A regular supermarket egg still gives you:
~6–7 g of high-quality protein
~5 g of healthy fats
Choline (brain health)
Vitamin B12, D, A, and selenium
Where expensive eggs can differ:
Omega-3s – Pasture-raised or omega-3–enriched eggs may contain double the omega-3 fatty acids of regular eggs.
Vitamins – Some studies show higher vitamin E and A in pasture-raised eggs due to varied diets.
Lower Cholesterol – Limited evidence suggests pasture-raised eggs may have slightly less cholesterol.
But here’s the truth: differences aren’t always huge. It depends on the hens’ actual feed and living conditions — and those can vary even within the same label.
Pasture-raised systems use more land and resources.
Organic feed has a lower pesticide footprint but higher cost.
Conventional eggs are more “efficient” in output but less ethical.
5. Food Safety & Freshness
Here’s a surprise:
Free-range hens have more exposure to the outdoors — which sometimes means more exposure to bacteria.
In contrast, indoor systems can control contamination more tightly.
Freshness? Local farm eggs can reach your kitchen within a day of being laid. Store-bought eggs may be weeks old (still safe, but not as fresh-tasting).
6. Taste: Is There a Difference?
Ask 10 people, you’ll get 10 answers.
Some say:
Pasture-raised eggs have richer flavor and deeper yolk color.
Fresh eggs whip better and make fluffier omelets.
Others say:
“They taste the same. I can’t tell the difference.”
Taste is subjective — and influenced by freshness, not just farming method.
7. Price vs. Value: The Real Calculation
If you eat a dozen eggs a week:
$2/dozen (conventional) = $104/year
$6/dozen (premium) = $312/year
That’s a $208 yearly difference — about $4/week. For some, that’s worth it for welfare and marginal nutrition gains. For others, it’s a luxury.
8. Practical Buying Tips
Decide Your Priorities – Nutrition? Welfare? Budget? All three?
Mix & Match – Use cheaper eggs for baking, premium eggs for dishes where they’re the star.
Buy Local – Farmers’ markets often sell fresher, premium-quality eggs at lower-than-supermarket prices.
Store Right – Keep eggs in their carton, in the fridge, to preserve freshness longer.
1. Are expensive eggs healthier than cheap eggs? Not always. While pasture-raised or omega-3–enriched eggs may have more omega-3s and certain vitamins, the differences aren’t huge for everyone. Base nutrition (protein, fat, minerals) is similar across all eggs.
2. What’s the main reason some eggs cost more? Higher prices usually come from better hen welfare (pasture-raised, cage-free), organic feed, omega-3 enrichment, certifications, and smaller-scale or local farming.
3. Does the color of the eggshell matter? No. Shell color (white or brown) simply reflects the breed of the hen, not nutrition or quality.
4. How can I tell if an egg is truly pasture-raised? Look for third-party certifications like Certified Humane or American Pastured Poultry Producers Association. Marketing terms without certification can be misleading.
5. Are free-range eggs safer to eat than conventional eggs? Not necessarily. Free-range hens may be more exposed to environmental bacteria, while indoor systems can control contamination more tightly. Proper storage and cooking are key for safety.
6. Is there a taste difference between expensive and cheap eggs? Some people notice richer flavor and deeper yolk color in pasture-raised eggs, especially when fresh. Others find no difference — taste is subjective.
7. Do expensive eggs have less cholesterol? Some studies suggest pasture-raised eggs may have slightly less cholesterol, but it’s not guaranteed. The hen’s diet plays a bigger role than the price tag.
8. How long do eggs stay fresh? Refrigerated eggs can last 3–5 weeks beyond the pack date. Fresher eggs often come from local farms and may taste better.
9. Are organic eggs worth the price? If avoiding pesticides and supporting organic farming matters to you, yes. Nutritionally, the differences may be small unless the feed quality is significantly higher.
10. What’s the most budget-friendly way to eat better eggs? Mix and match — use regular eggs for baking and premium eggs for dishes where flavor and freshness matter, like poached eggs or omelets.