Posted on Leave a comment

Best Homemade Fresh Strawberry Popsicle Recipe

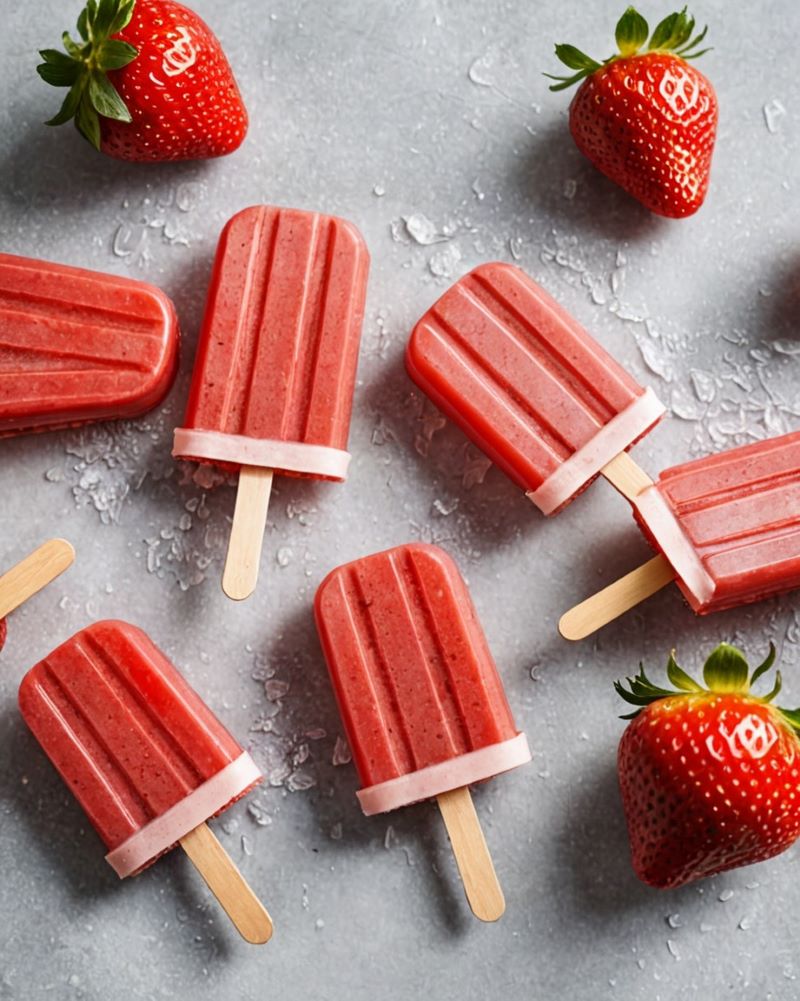
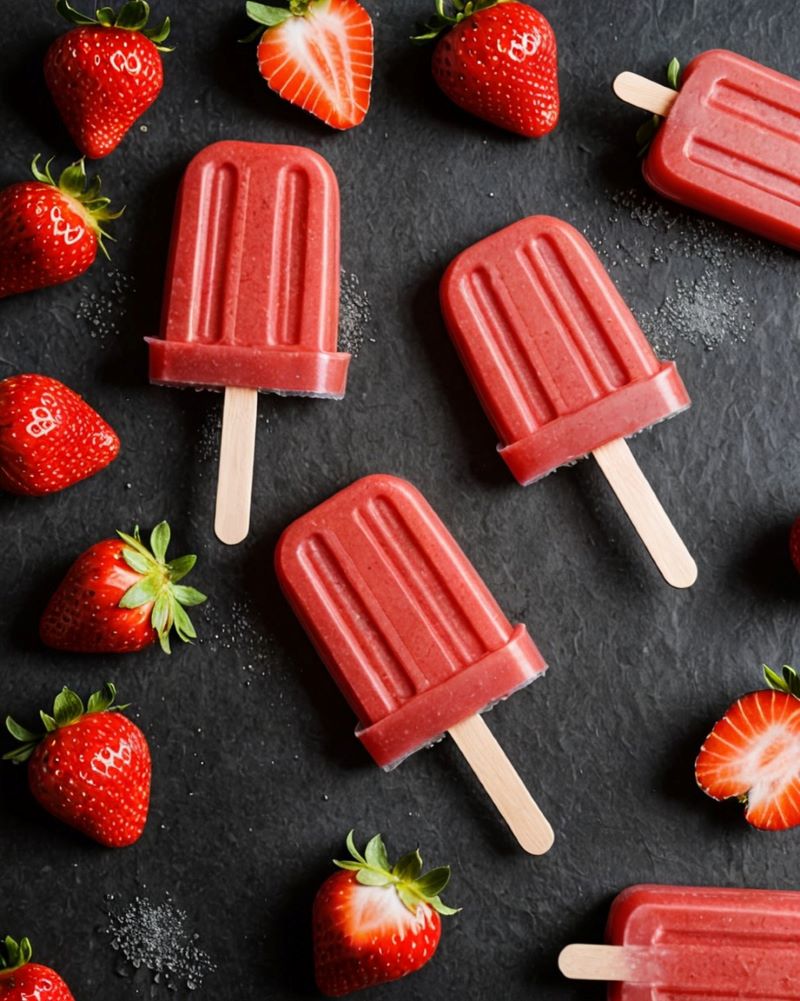
Temperatures are literally skyrocketing this year in India. In this unbearable heat, you just can’t ignore the craving for something cold and refreshing. What better way to kick that summer heat off than with Homemade Popsicle made with fresh fruits. They can be your perfect go-to-treat all summer long!

There is nothing better than lounging on a hot summer day with a popsicle in hand. Even though I love all those fancy pants popsicles but sometimes you just want to make something classic and fuss free. These strawberry popsicles are exactly that! They are pretty simple and straight forward: fresh strawberries, lemon juice, salt and sweetener of your choice.

It’s a perfect healthy treat for adults and kids. They are dairy free, gluten free and eggless. They are literally on repeat every summer at my house. 

Let’s dig in!

Recipe: makes 8 popsicles

Ingredients

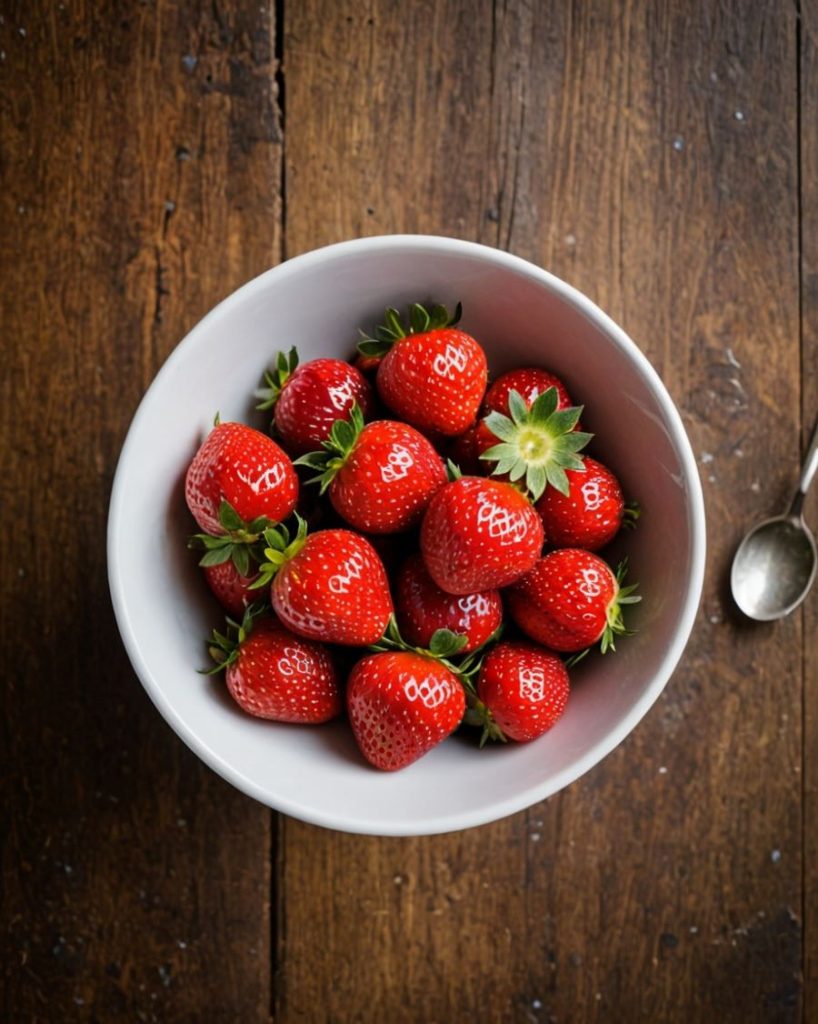
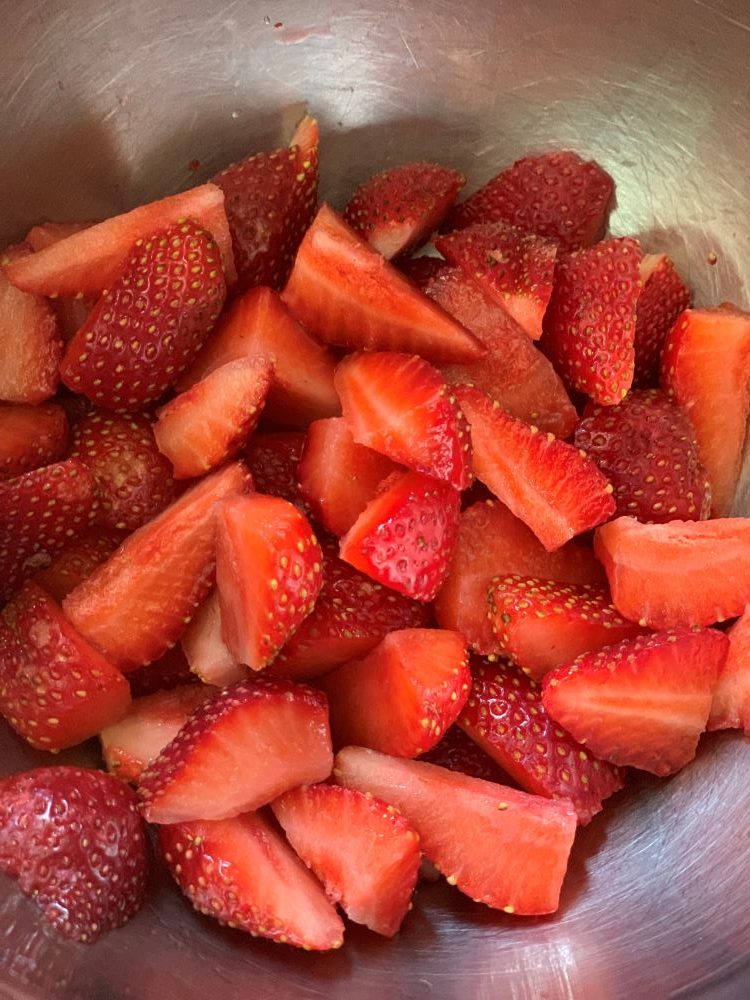
  • Strawberries: 500 grams
  • Unprocessed Cane Sugar: 4 tbsps
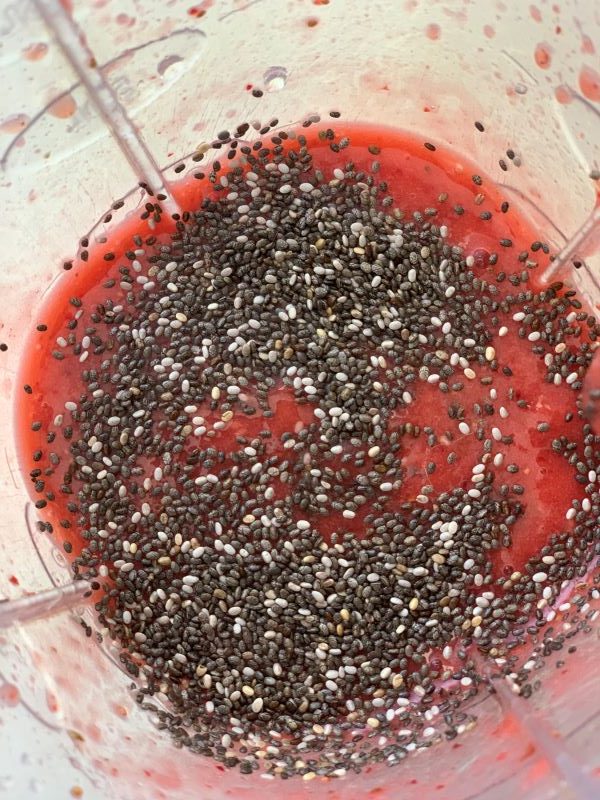
  • Chia seeds: 2 tbsps (optional)
  • Salt: a pinch
  • Lemon juice: 1 tbsp
  • Strawberry Jam: 2 tbsps (optional, but highly recommended)

Instructions

  • Wash and quarter the strawberries.
  • In a large bowl, add all the ingredients mentioned above except chia seeds.
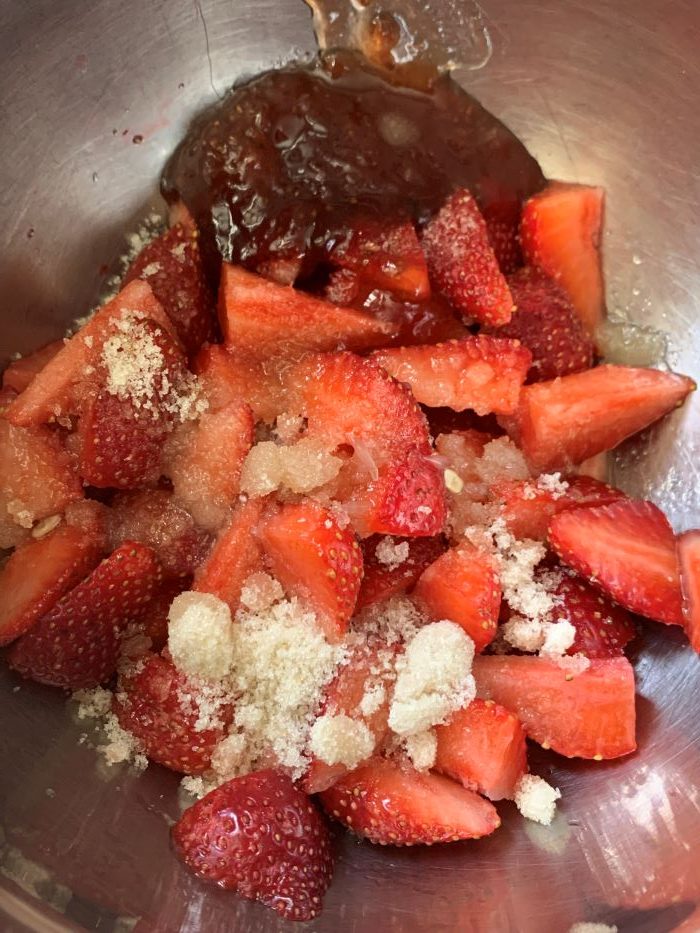
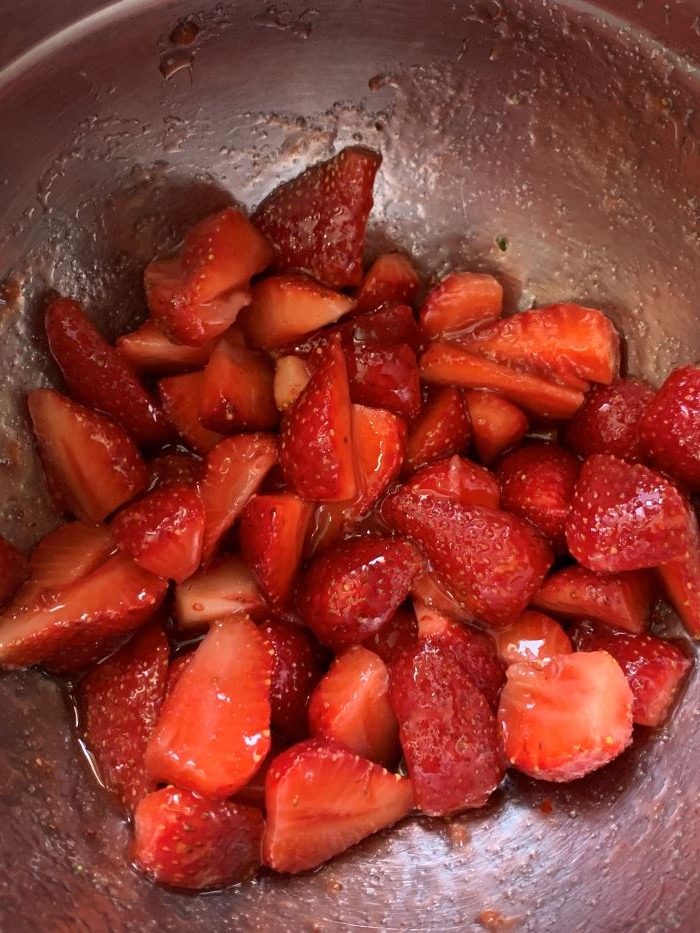
  • Mix well and let it sit for 10-15 minutes. When sugar comes in contact with strawberry, lemon juice and salt, it will melt and release its natural juice making strawberries juicer, sweeter and more intense.
  • Now add everything in the bowl to a blender and  blend everything to a smooth purée. 
  • After blending, add chia seeds and mix well. 
  • Pour in popsicle molds and freeze overnight or for 6-8 hours. Leave a little space on top of the popsicle molds because when freezing they will expand slightly. 
  • For unmolding, run tap water over the popsicle mold for few seconds. Unmold carefully.

Variation

If you’re not in the mood for strawberries but still want a sweet summertime treat, this recipe also works great with other fruits as well. You can go for summer fruits like watermelon, mango, pineapple, peaches or most other fruits make for a great popsicle filling.

Sweetener

If you don’t want to add sugar or unprocessed sugar, you can use other sweeteners like, maple syrup, honey, jaggery powder or syrup. I have tried this recipe with maple syrup and it was a huge hit too.
If you are not adding strawberry jam then you might have to increase the amount of sugar. However, you can try this easy to make Strawberry Apple Preserve if you don’t want to add any store bought jam.

Happy Summers! 🙂

Posted on 1 Comment

Homemade Traditional Coconut Ladoos- Make the juiciest ladoos with this recipe

In Indian tradition, Coconut ladoos or Nariyal ladoos are offered to God or deities during Hindu festivals. Eating homemade sweets that are traditionally prepared, especially during festivals, is a way to bring families together. Sweets prepared at home in the traditional way are wholesome and nourishing that are not going to affect your health or weight.

Unlike commercial sweets, homemade sweets give you a complete control over what you are going to add. Celebrity nutritionist Rujuta Diwekar is of the belief that, if you go completely off sugar, then it can increase cravings and make you switch to artificial sweeteners-which come with their share of side effects and health risks.

Thus you can have homemade sweets prepared with natural and quality ingredients, used in right quantity. Portion control and moderation is the key to everything.

Coconut ladoos are traditional sweet balls made primarily with coconut and a sweetener like sugar and jaggery. They are flavoured with cardamom. Some prefer adding nuts like cashews and almonds to it as well. These are traditionally made with milk, ghee and fresh coconut. However, there are other variations that use condensed milk or milk powder to reduce the cooking time and fresh coconut is replaced with store-bought desiccated coconut.  

In this recipe, we will be making traditional coconut ladoos with fresh coconut, unprocessed sugar, milk and ghee.

They come out absolutely delicious, juicy and soft and they are so easy to make. These ladoos taste best with freshly prepared desiccated coconut at home instead of store-bought desiccated coconut. Preparing desiccated coconut at home is super easy and will hardly take you 10 minutes to prepare it.

Recipe

Prep time: 15 minutes Cook time: 30 minutes 
Serving: 10 ladoos

Ingredients: cup measurements 250 ml

  1. Homemade Desiccated Coconut: 2 cups + 2 tbsps (refer below)
  2. Full cream milk: 1 1/4th cup
  3. Sugar: 1/2 cup
  4. Cardamom powder: 1/4th tsp
  5. Nuts (optional, I didn’t add any)
  6. Kesar strands for garnishing
  7. Ghee: 2 tbsps

Method

  • Heat a heavy bottom wok. Put ghee and coconut in it and roast for a minute. Keep stirring continuously on lowest flame. 
  • Now add milk and sugar. Mix well. The mixture at this point will be watery. Keep stirring and cook on lowest flame till milk completely evaporates. It’ll take roughly 25 minutes. 
  • Once the mixture thickens and gets a crumbly texture, add cardamom powder and chopped nuts if using. Mix well. 
  • Allow it to cool for couple of minutes. Now shape them into small balls. 
  • Put remaining desiccated coconut on a plate. Roll the laddoo over it till it coats well. 
  • Garnish it with kesar strands. 
  • Refrigerate it for atleast an hour or overnight to set.

How to make desiccated coconut at home with fresh coconut

  1. Peel the brown husk from the coconut. Either grate or finely chop it and shred it in a blender. Heat a heavy bottom wok. Put the grated/shredded coconut in it and roast on lowest flame, stirring continuously till moisture from coconut evaporates. It’ll take you anywhere between 7 to 10 minutes. 
  2. It’s done when you will feel that it has really gone light while stirring and separates easily from each other.

Notes:

  1. Sweetener: You can use a sweetener of your choice. If you can’t find raw unprocessed sugar, you can make this with jaggery as well.
  2. Flavour: Traditionally cardamom powder is used to flavour coconut ladoos. However, if you don’t want to add it, you can skip it as well. In winter, you can flavour it be adding dry ginger powder or nutmeg.
  3. Choosing Coconut: Though this recipe tastes best with fresh desiccated coconut but if you can’t find fresh coconut, you can use store-bought desiccated coconut. Make sure the desiccated coconut is raw and not steamed or frozen.
  4. Vegan Version: For vegan version skip, ghee and milk and instead add coconut oil and coconut milk to this recipe.
Posted on 15 Comments

How to make Almond Milk at Home

While I love the convenience of store-bought almond milk but once you get the taste of your homemade version, it’s hard to go back to store-bought milk. It’s creamier and nuttier than commercial almond milk and of course without thickeners, artificial flavors, stabilizers and no shelf life extending additives.

Almond milk is a nutritious, nut-based dairy alternative and has become popular over the years. It’s dairy and lactose free. Hence, making it a good option for those avoiding dairy or are lactose intolerant.

Including almond milk in an overall healthy and balanced diet certainly has its upsides. Almond is a fabulous source of vitamin E, a nutrient that has antioxidants properties. Since it is low in calories, it can also support your weight management goals. 1 cup of almond milk has only around 40 calories. It also contains heart-healthy poly- and monounsaturated fats and is also free from saturated fat, trans fats and dietary cholesterol.

While homemade almond milk is a great source of nutrients, it is not a good source of protein and calcium but don’t let it stop you. There are plenty of other plant base sources of calcium and protein which you can include in your diet.

Homemade almond milk allows you to control the amount of sweetness and infuse flavors as well as play around with the thickness. It’s amazingly simple- just soak, blend and strain and it is super versatile. You can use this milk for making coffee, add it to your cereals, blend it to smoothies, use it in your favorite baked goods. Once you have it in hands, there are million ways to use it.

How to make Almond Milk

Ingredients: makes 800 ml thick Almond milk

  • 1 cup raw Almond
  • 3 sticky Dates
  • 1/2 tsp Vanilla extract
  • 3 cups of filtered Water

Instructions

  • Soak almonds overnight or for at least 7-8 hours. Now most recipes call for soaking almonds in hot water for an hour or 2. But soaking it for long increases bioavailability of the nutrients and makes milk easy to digest. Also, it makes almond easier to blend resulting in creamier milk.
  • Drain the water. The almonds should be nice and plump. Add soaked almonds in a blender. (Do not peel the skin. Skin contains several antioxidants and prebiotics)
  • Also add de-seeded sticky dates and vanilla extract.
  • Add filtered water and then blend till it is smooth & creamy. Do it for 1 or 2 minutes. The timing will depend on how powerful your blender is.
  • Take a clean muslin cloth and set it over a large bowl. Add almond milk. Use your hands to squeeze and press as much liquid out as possible. This is thick creamy milk.
  • If you want it thin, which I like, put the almond residue back in blender. Add 1.5 cups of water and strain again. This will be thin and less creamy.

Variations:

  1. You can choose sweetener of your choice as well. If you don’t want to use sticky dates, you can either go for maple syrup or honey to sweeten it.
  2. You can also simply go for unsweetened version of almond milk as well.
  3. Flavoring your almond milk is totally your choice. Either you can add vanilla extract like mentioned above or flavor it with cinnamon or raw cacao powder if you like chocolaty milk.
  4. You also try blending it with strawberries or blueberries if berry milk is your thing.

Notes:

  • You can use almond milk right away or refrigerate it in a clean airtight glass bottle for upto a week.
  • Do not throw away the almond residue. This can be added to cakes, cookies, smoothies, energy bites. You can also spread the almond residue on a baking tray and bake it in an oven at 180 C till moisture evaporates. Once cooled, grind it to a fine powder and you have your homemade almond meal ready.


Posted on Leave a comment

Protein Packed Millet Cutlets- Easy Vegetarian Recipe

Cutlets originally was derived from the French favourite cotelette, which evolved into ‘cutlet’ in English. It referred to a thin slice of meat, typically taken from the leg or rib section of the animal. This meat was often breaded and fried, creating a crispy and a flavorful dish. 

Cutlets have had quite a history. It came to English shores around 1700s. During those times, dishes with potatoes were considered a novelty. It was introduced in India by the Britishers around 1800s. Thanks to their love for French cooks. When the British came to Bengal, Lord William Amherst started cultivation of potatoes in India. Around those times, the colonial cooks mashed up boiled potatoes and mixed up minced meat to make the neat cutlet.

For the initial years, cutlet remained the privy of the British occupied spaces. Gradually, it made its way to commercial places which even included railway towns and mining colonies. It became so common that even leftover sabjis found its way into becoming a cutlet. 

Among several cutlet recipes, this is the one I enjoy the most because, first of all, it is a fuss free recipe, its healthy, gluten free, a flavor bomb and most importantly they are not deep fried. This can be served as an evening snack or in breakfast. Since it is not deep fried and are gluten free, they are also light on you stomach. These are especially great for all the picky little eaters. My little one gobbled them in no time. 🙂

These can also be stuffed inside toasted bread slices. Use your favourite dressing, top it with lettuce, tomato and onions and enjoy a wholesome meal.

Recipe: makes 6 cutlets

Ingredients 

  • 2, boiled Potatoes
  • 1/2 cup Indian Cottage Cheese or Paneer
  • 2 tbsps, finely chopped Onion
  • Handful of Mint Leaves and Coriander Leaves
  • 1 tbsp grated, Ginger
  • 3 tbsps, Millet flour (I used Finger Millet/Ragi Flour)
  • 1 tsp, Dhania or Coriander powder 
  • A pinch, Garam Masala
  • 1/4th tsp Red Chilli powder (optional)
  • 1/2 tsp, Jeera or Roasted Cumin powder
  • 1/2 tsp Amchoor or Raw Mango powder
  • Salt to taste
  • Oil/Ghee to cook

Instructions

  • Mash boiled potatoes in a bowl. To it add grated paneer/cottage cheese, onions, mint and coriander leaves and ginger. These herbs give an amazing flavor.
  • Now, add all the spices- coriander powder, cumin powder, red chilli powder, raw mango powder, garam masala and salt.
  • In a pan, add millet flour and roast on low flame till it is fragrant. It should take you roughly 2-3 minutes. Keep stirring continuously. Once the flour has roasted well, add it to the potato mixture.
  • Mix everything very well and form a soft dough. If it feels sticky, you can add more flour. Check for seasoning. Once ok, give it a desired shape. Keep aside
  • Heat a griddle or tawa on a medium heat. Add a tbsp of oil/ghee. When the oil is hot, gently place the cutlets on the griddle or tawa.
  • Fry them for 2-3 minutes each side till it gets golden brown on both sides. Do that on a low flame, so that it cooks well from inside.
  • Serve it with green chutney or ketchup.

Enjoy!!

Protein Content:

  • Paneer: 10 grams
  • Potatoes (Large): 5 grams
  • Millet (Ragi flour): 5 grams

Total Protein: 20 grams

Notes:

  • You can also use poha/flattened rice flour in place of millets. Just grind raw and dry poha to a powder and use it in place of ragi. Just make sure the poha powder is fine, otherwise the mixture will turn crumbly.
  • Quantity of flour may change depending on the kind of potatoes or the moisture level in your cooked potatoes.
  • You can also add vegetables of your choice here, like, shredded carrots, cabbage, boiled peas, spinach.
Posted on 3 Comments

Air Fried Chilli Garlic Potato Bites- Guilt Free Snacking

Summer holidays have begun. Kids are at home. As much as it is exciting with all the play dates, pool parties but sometimes let’s admit it, it gets exhausting too, thinking about snacking options for everyone.

Potato-based snacks are very common and are prepared for various purposes. The market is flooded with fusion snacks made from potatoes. We all love those bite sized frozen snacks because they are quick to prepare and are absolutely delicious. But I have major concerns when it comes to frozen foods.

  • First of all is the high sodium content. Sodium is widely used as a preservative. I literally get enfolded with guilt if I serve my child packaged food with high sodium. Too much sodium in a child’s diet increases the likelihood of osteoporosis. It can cause calcium to be lost from bones resulting in weak bones.
  • The ingredients that are used in packaged frozen food are not the same as those in freshly cooked meals. It contains hydrogenated palm oil that has harmful trans-fat.
  • Preservatives like starch, corn syrup which is made up of glucose are added to these foods to add taste and texture. This increases the risk of diabetes and are noted as carcinogenic substances.
  • The high fat and sodium content can also increase the risk of heart diseases, BP and high cholesterol levels.

There is no one who doesn’t enjoy convenience. Tossing a packaged frozen food once in while in your shopping cart is not a problem. However, when this convenience becomes a habit, it comes with a huge risk of health problems.

So, lets make fresh and delicious chilli garlic potato bites which I am sure you and your family will enjoy. They are air-fried, so there goes the guilt of deep frying too.

Recipe

Prep time: 10 minutes Cook time: 20 minutes 
Serving: 20 bites

Ingredients

  • 4 large Potatoes, boiled and mashed
  • 2 tbsps Rice flour
  • 3 slices of Bread (I used whole wheat)
  • 1 tbsp minced garlic
  • 1 tsp Red Chilli Flakes
  • 1/2 Mozzarella Cheese (optional but recommended)
  • Salt and Pepper to taste

Instructions

  • Take boiled and mashed potatoes in a large bowl or a plate. Break the bread slices into tiny pieces and add to potatoes. Add all the ingredients mentioned above.
  • Squeeze and mix everything well to form a soft dough. If the dough feels sticky, add more rice flour or bread slice. It will help to absorb the moisture. Check for seasoning.
  • Now, shape it the way you like it. I shaped some in cylindrical shape but eventually got tired. The easiest is a round shape. So, if you plan to make a lot of these, I recommend a round shape.
  • Preheat the air fryer for 5 minutes at 360 F or 180 C. Brush the basket with little oil and gently add the potato balls. Do not crowd the basket. Do few batches of a single layer. Brush a little oil over the top of each ball. Cook for 4 minutes, shake the basket. Spray or brush it again with some oil. Cook for 2-3 minutes more until golden brown.
  • Serve with ketchup, chutney or ranch dipping sauce.

Variations

  1. A great variation to this is adding ranch seasoning packet to the potatoes because ranch seasoned potatoes are to die for.
  2. You can make them cheesy by adding a block of mozzarella or cheddar cheese in the center.
  3. To make it more crispy, you can dip these balls in corn flour slurry and then coat them with more bread crumbs.
  4. You can make this recipe gluten free by using gluten free bread slices.

Enjoy! Happy Holidays! 🙂